Tutorial # 2 - Fate Has Been Changed (Asuma and Hidan)
This tutorial was requested by
sahara_storm! I hope this helps you. :)
Program: Adobe Photoshop
We'll be going from this to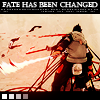
in 7 simple steps.
1. Take this picture of Asuma and Hidan and crop it at 100x100 px. Duplicate the base (CTRL A>>CTRL C>>CTRL V). Now, sharpen the image (FILTER>>SHARPEN>>SHARPEN) and then fade sharpen (SHIFT>>CTRL>>F) it to 20.
What you should probably be seeing: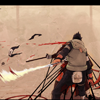
2. Moved the sharpened image upwards slightly, until it covers the top bar. Now, add a new bar in #000000 at the bottom, using the rectangle tool. Merge the layers together (LAYER>>MERGE VISIBLE).
What you should probably be seeing: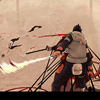
3. Duplicate the base and set it to screen 22%.
What you should probably be seeing: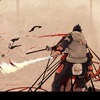
4. Duplicate the base (CTRL A>>CTRL C>>CTRL V) once more and drag it to the top. Set the layer to softlight 100%.
What you should probably be seeing: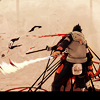
5. Take this glowy dot made by me, and set it to screen 100%. Move the dot close to the two characters, but not directly on them.
What you should probably be seeing: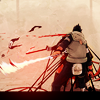
6. Add a bar at the top of the icon in #000000, using the rectangle tool.
What you should probably be seeing: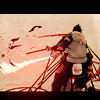
7. Type "Fate Has Been Changed" in castellar and set it to 6.7 pt . Place this tiny text (If you made this, please tell me!) underneath the words. To add tiny text to your brush panel, or any other brush, open the file, go to EDIT>>DEFINE BRUSH, and press "OK". Go to your brush panel and scroll down. Select the brush and stamp it onto your icon, under the words. If you want, you can add this brush by
yumei_k in the bottom left hand corner.
Finished product:
This is how your layer bar should look like:
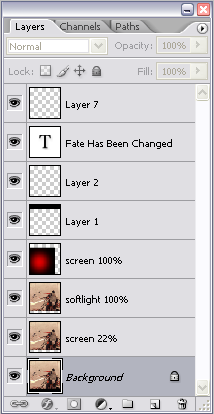
Well, that's it! Feel free to friend this journal for possible updates, although your f-list will be spammed with my random rants, since this is also where I write personal life entries. :) Anyways, if you have any questions, please don't hesitate to ask. If you have comments, feel free to share!
sahara_storm! I hope this helps you. :)
Program: Adobe Photoshop
We'll be going from this to

in 7 simple steps.
1. Take this picture of Asuma and Hidan and crop it at 100x100 px. Duplicate the base (CTRL A>>CTRL C>>CTRL V). Now, sharpen the image (FILTER>>SHARPEN>>SHARPEN) and then fade sharpen (SHIFT>>CTRL>>F) it to 20.
What you should probably be seeing:

2. Moved the sharpened image upwards slightly, until it covers the top bar. Now, add a new bar in #000000 at the bottom, using the rectangle tool. Merge the layers together (LAYER>>MERGE VISIBLE).
What you should probably be seeing:

3. Duplicate the base and set it to screen 22%.
What you should probably be seeing:

4. Duplicate the base (CTRL A>>CTRL C>>CTRL V) once more and drag it to the top. Set the layer to softlight 100%.
What you should probably be seeing:

5. Take this glowy dot made by me, and set it to screen 100%. Move the dot close to the two characters, but not directly on them.
What you should probably be seeing:

6. Add a bar at the top of the icon in #000000, using the rectangle tool.
What you should probably be seeing:

7. Type "Fate Has Been Changed" in castellar and set it to 6.7 pt . Place this tiny text (If you made this, please tell me!) underneath the words. To add tiny text to your brush panel, or any other brush, open the file, go to EDIT>>DEFINE BRUSH, and press "OK". Go to your brush panel and scroll down. Select the brush and stamp it onto your icon, under the words. If you want, you can add this brush by
yumei_k in the bottom left hand corner.
Finished product:

This is how your layer bar should look like:

Well, that's it! Feel free to friend this journal for possible updates, although your f-list will be spammed with my random rants, since this is also where I write personal life entries. :) Anyways, if you have any questions, please don't hesitate to ask. If you have comments, feel free to share!