tutorial: soft b&w icons // PHOTOSHOP CS!

to

in very simple steps.
You know the drill. Open, crop. I would not suggest sharpening the base, but if that's what you want.. go ahead.
So after some rotating and resizing, this is my base:

Duplicate the base layer (Ctrl + J) and set it to screen. Sharpen once. Duplicate the base layer again and leave it under the screen layer. Your layer palette should be in this order now (from top to bottom):
Layer 1 (screen)
Background copy (normal)
Background (normal)
Set "background copy" or.. the 2nd (normal) layer to screen. Merge visible / flatten image.

Duplicate this new base now and go to Filer >> Blur >> Guassian Blur. Set it to 0.8 and click OK. Set this blurred layer to Multiply. Don't merge yet.

(optional I do this, but you don't have to. It just makes the icon bolder. Duplicate the bright (new), but unblurred base (under the guassian blur layer) and set that to multiply. Go to Filter >> Blur >> Guassian Blur. Set it to 0.3 and click OK.
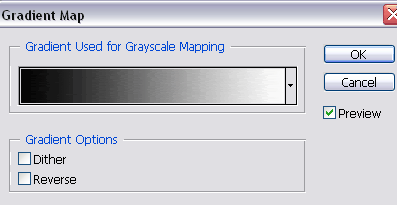
Create a new layer. Layer >> New Adjustment Layer >> Gradient Map. Select a simple black to white gradient as below.

Merge. :]

By the way, without the extra multiply layer.. It comes out like this. Not much different.

don't forget to check out cchallenge ;]