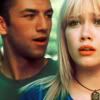
Cinderella Story // PhotoshopCS
I like to play and experiment in photoshop, and I was testing out new kinds of colouring on these Cinderella Story caps. Involves some curves, selective colour layers. You need Photoshop. So here we go.

Background
Open up your picture full size. Since this was a cap, and those usually aren't great quality, I didn't sharpen it. I cropped it down to 100x100.

Background Copy
Duplicate your base and set it to screen at 64%. This is the part where you really need to think about your cap/image. Since this cap was fairly light, I didn't need to do much work to brighten it. However, if your cap is darker, you may need to incorporate a few more screen layers.

Background Copy 2
Duplicate the base once again. Bring it to the top, and set it to soft light with an opacity of 64%. Again, this honestly depends on your icon. Go to Filter >> Blur >> Gaussian Blur >> 5.0... Just to make it a little bit softer.

Selective Color 1
Make a new adjustment layer. I just wanted to make it more red and yellow. Layer >> New Adjustment Layer >> Selective Colour.
===================
On RED Setting:
--cyan: -58
--magenta: 0
--yellow: +100
--black: 0
On YELLOW Setting:
--cyan: -100
--magenta: 0
--yellow: -91
--black: 0
On NEUTRALS Setting:
--cyan: +59
--magenta: 0
--yellow: +30
--black: 0
===================

Curves 1
To tone down some of the yellows, and bring back some of the greens/blues, I used a curves adjustment layer. Go to Layer >> New Adjustment Layer >> Curves.
===================
On RED Setting:
-- 1st point - I: 208, O: 187
-- 2nd point - I: 97, O: 108
===================
Set this layer to 57%.

Curves 2
Now another new curves layer. Again, to restore the blues in her face. Go to Layer >> New Adjustment Layer >> Curves.
===================
On BLUE Setting:
-- 1st point - I: 188, O: 214
===================

Selective Color 2
Another selective colour layer. I can't really explain what I was trying to do in this step, I was just messing around. Go to Layer >> New Adjustment Layer >> Selective Colour.
===================
On RED Setting:
--cyan: +100
--magenta: 0
--yellow: +88
--black: 0
On NEUTRALS Setting:
--cyan: +100
--magenta: -61
--yellow: -100
--black: +100
===================
This probably looks really funny right now. But set this layer to soft light at 33%.

Curves 2
Last layer. Just to darken the image a little.
===================
On RGB Setting:
-- 1st Point - I: 153, O: 137
===================
And there you go! Now you can do whatever you want with the rest of the icon. I added some red to her lips, played with some other things... and then submitted it to an icontest (hill_ichallenge). :)
Examples of this colouring:


» »
If you need any additional help, just ask.

Background
Open up your picture full size. Since this was a cap, and those usually aren't great quality, I didn't sharpen it. I cropped it down to 100x100.

Background Copy
Duplicate your base and set it to screen at 64%. This is the part where you really need to think about your cap/image. Since this cap was fairly light, I didn't need to do much work to brighten it. However, if your cap is darker, you may need to incorporate a few more screen layers.

Background Copy 2
Duplicate the base once again. Bring it to the top, and set it to soft light with an opacity of 64%. Again, this honestly depends on your icon. Go to Filter >> Blur >> Gaussian Blur >> 5.0... Just to make it a little bit softer.

Selective Color 1
Make a new adjustment layer. I just wanted to make it more red and yellow. Layer >> New Adjustment Layer >> Selective Colour.
===================
On RED Setting:
--cyan: -58
--magenta: 0
--yellow: +100
--black: 0
On YELLOW Setting:
--cyan: -100
--magenta: 0
--yellow: -91
--black: 0
On NEUTRALS Setting:
--cyan: +59
--magenta: 0
--yellow: +30
--black: 0
===================

Curves 1
To tone down some of the yellows, and bring back some of the greens/blues, I used a curves adjustment layer. Go to Layer >> New Adjustment Layer >> Curves.
===================
On RED Setting:
-- 1st point - I: 208, O: 187
-- 2nd point - I: 97, O: 108
===================
Set this layer to 57%.

Curves 2
Now another new curves layer. Again, to restore the blues in her face. Go to Layer >> New Adjustment Layer >> Curves.
===================
On BLUE Setting:
-- 1st point - I: 188, O: 214
===================

Selective Color 2
Another selective colour layer. I can't really explain what I was trying to do in this step, I was just messing around. Go to Layer >> New Adjustment Layer >> Selective Colour.
===================
On RED Setting:
--cyan: +100
--magenta: 0
--yellow: +88
--black: 0
On NEUTRALS Setting:
--cyan: +100
--magenta: -61
--yellow: -100
--black: +100
===================
This probably looks really funny right now. But set this layer to soft light at 33%.

Curves 2
Last layer. Just to darken the image a little.
===================
On RGB Setting:
-- 1st Point - I: 153, O: 137
===================
And there you go! Now you can do whatever you want with the rest of the icon. I added some red to her lips, played with some other things... and then submitted it to an icontest (hill_ichallenge). :)
Examples of this colouring:


» »

If you need any additional help, just ask.