Tutorial Number 3 [Image Heavy]
Going from 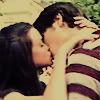
to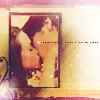
Using Photoshop CS for this!
For this icon, I followed *some* of the steps from this tutorial, just to get the colouring for the little picture.
Basically, my base (which was already very bright) came out like this

You don't want your base/picture too dark, or it won't look that great in this.
Your background layer should be your photo/base, but it honestly doesn't matter.
Make a new layer and fill it with white. On a new layer, I used this brush by 77words in black.
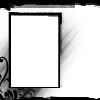
Now, with the RMT (Rectangular Marquee Tool), select an area equal to the size of the small box in the brush. Go back to your base and choose a part of the picture that you want to be visible. Copy it, and paste it onto a layer above the black brush. Now position it to that it fits just inside black box.
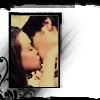
Don't worry, it will get better.
Paste this texture by gender UNDER the black brush layer.


#DDC79E on a new layer above the texture we just pasted. Set it to multiply.

now, paste this texture by gender on a new layer ABOVE the little picture layer and set it to soft light.
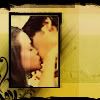

put this texture by gender on a new layer, above everything, and set it to screen. It covered their faces too much, so I went ahead and erased where it covered the black box.

I took this texture by any_otherday and blurred the light greatly. I pasted it on a new layer, above everything, and set it to screen. I then went to Edit » Transform » Flip Vertical. I moved it down so that the brightest light was at the bottom left corner of the icon. I also erased most of the texture, just leaving that one little bright spot.
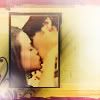
I then typed some random tiny text near the box. 2pt, Calisto MT, black.

To me, the icon didn't really.. pop! If you know what I mean? It just looked a little faded.
So I made a new layer and pressed Ctrl + Alt + Shift + E . Like I've said in previous tutorials, I hate flattening icons, so I just Stamp Visible.
I then went to Image >> Adjustments >> Selective Color.
Select Neutrals from the drop down menu and make your settings like the following:
Cyan : +45%
Magenta : +55%
Yellow : +42%
Black : +3%

(This might not look the same as the finished icon because I accidentally forgot to write down the Selective Color settings, so I had to recreate them.)

Finally, add this texture. I don't know who it's by, sorry. Set it to screen, merge your layers, and ta-da! :)

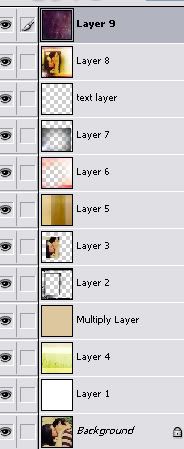
By the way, incase you were confused on the layers, this is how my layer palette looks.


to

Using Photoshop CS for this!
For this icon, I followed *some* of the steps from this tutorial, just to get the colouring for the little picture.
Basically, my base (which was already very bright) came out like this

You don't want your base/picture too dark, or it won't look that great in this.
Your background layer should be your photo/base, but it honestly doesn't matter.
Make a new layer and fill it with white. On a new layer, I used this brush by 77words in black.

Now, with the RMT (Rectangular Marquee Tool), select an area equal to the size of the small box in the brush. Go back to your base and choose a part of the picture that you want to be visible. Copy it, and paste it onto a layer above the black brush. Now position it to that it fits just inside black box.

Don't worry, it will get better.

Paste this texture by gender UNDER the black brush layer.


#DDC79E on a new layer above the texture we just pasted. Set it to multiply.


now, paste this texture by gender on a new layer ABOVE the little picture layer and set it to soft light.


put this texture by gender on a new layer, above everything, and set it to screen. It covered their faces too much, so I went ahead and erased where it covered the black box.


I took this texture by any_otherday and blurred the light greatly. I pasted it on a new layer, above everything, and set it to screen. I then went to Edit » Transform » Flip Vertical. I moved it down so that the brightest light was at the bottom left corner of the icon. I also erased most of the texture, just leaving that one little bright spot.

I then typed some random tiny text near the box. 2pt, Calisto MT, black.

To me, the icon didn't really.. pop! If you know what I mean? It just looked a little faded.
So I made a new layer and pressed Ctrl + Alt + Shift + E . Like I've said in previous tutorials, I hate flattening icons, so I just Stamp Visible.
I then went to Image >> Adjustments >> Selective Color.
Select Neutrals from the drop down menu and make your settings like the following:
Cyan : +45%
Magenta : +55%
Yellow : +42%
Black : +3%

(This might not look the same as the finished icon because I accidentally forgot to write down the Selective Color settings, so I had to recreate them.)

Finally, add this texture. I don't know who it's by, sorry. Set it to screen, merge your layers, and ta-da! :)

By the way, incase you were confused on the layers, this is how my layer palette looks.
