(no subject)
Hey all. A new tutorial!
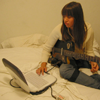
Using Selective Colouring. Works best on yellowish pictures, made in PSCS2.

to
1 First of all, you duplicate the base and set the duplicated layer to screen 100%.
2 Then you make a Colour Balance layer with the following settings (Midtones):
-63/ -5/ +65
You should have this now:

3 Make a new Selective Colour layer, with the following settings.
REDS: -100 / 0 / 100 / 0
YELLOWS: 100/ 0 / -100/ 0
NEUTRALS: 100/ 14/ -29/ 11
This is what you should have:

4 Merge all your layers
5 I selected Charlyn's face - but you can also select some other part of the image - with the Elliptical Marquee Tool.
6 Copy it
7 Paste it somewhere on the icon
8 Use the Drop Shadow tool with the following settings;

9 Use the stroke tool

And your image now should look like this:

OPTIONAL
I moved the little circle and it looked like this:

If you want the image in the little circle to be black & white, go to Image > Adjustments > Desaturate. It'll look like this.

You can also add some text;

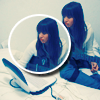
And Tah-Dah! There's your final result.
Comments would be nice, and do show me your results!
Using Selective Colouring. Works best on yellowish pictures, made in PSCS2.

to

1 First of all, you duplicate the base and set the duplicated layer to screen 100%.
2 Then you make a Colour Balance layer with the following settings (Midtones):
-63/ -5/ +65
You should have this now:

3 Make a new Selective Colour layer, with the following settings.
REDS: -100 / 0 / 100 / 0
YELLOWS: 100/ 0 / -100/ 0
NEUTRALS: 100/ 14/ -29/ 11
This is what you should have:

4 Merge all your layers
5 I selected Charlyn's face - but you can also select some other part of the image - with the Elliptical Marquee Tool.
6 Copy it
7 Paste it somewhere on the icon
8 Use the Drop Shadow tool with the following settings;

9 Use the stroke tool

And your image now should look like this:

OPTIONAL
I moved the little circle and it looked like this:

If you want the image in the little circle to be black & white, go to Image > Adjustments > Desaturate. It'll look like this.

You can also add some text;

And Tah-Dah! There's your final result.
Comments would be nice, and do show me your results!