TUTORIAL NUMBER I ; ~
TODAY WE GO FROM

TO
IN MY FIRST TUTORIAL EVER. :]
PSP/GIMP TRANSLATABLE.
NO SELECTIVE COLORING.
NO CURVES.
BEGINNER LEVEL.
VERY EASY TO UNDERSTAND.
.PSD FILE INCLUDED FOR PHOTOSHOP USERS, SO LAYERS CAN BE DRAGGED TO YOUR IMAGE.
Link to the .PSD file for those who have Adobe Photoshop 7.0+ and are lazy.
INSTRUCTIONS:
- Open .PSD file in Photoshop.
- Press CTRL and hold it down while selecting the color layers.
- Drag all of the selected layers to your icon.
- Click on the background copies of my image and see what blend mode it is on.
- Create duplicates of your background image, and place them in the same location as my own background copies and set them to the same blend mode. You can refer to my layers palette below as a reference (under the cut).
- Voila. You're done!
Before I begin, I would like to tell you all that this is my very first tutorial, and that I WORKED MY HARDEST to get this tutorial to be as comprehensible as possible, and as easy to complete as possible.For your iconing ease and pleasure, I have painstakingly uploaded images of the layers so that you all wouldn't have to go and type in the number in the palette before filling the layer, and you can instead copy and paste the image of the color layers and get it easily finished. Enjoy it. :]
And, most importantly, I would like to give credit where credit is due. crackchemistry created the first half of this tutorial, and I added a twist of my own to get my selected coloring after their following their half of the tutorial. The link is here. It is a fantastic tutorial, so go check it out. You won't be disappointed!
Without further ado, the tutorial.
oo1.
Duplicate your background image, and set it to Screen at 100% opacity. Sharpen if desired. This will make your image lighter, so play with the opacity so that it won't be overpoweringly bright.

oo2.
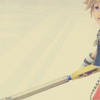
Create a new layer, and fill it with #0F1A43 at 100% opacity and set it to Exclusion.

→
oo3.
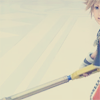
Create a new layer and fill it with #7186A8 at 100% opacity and set it to Softlight.

→
oo4.
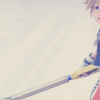
Create a new layer and fill it with #8B7DBB at 100% opacity and set it to Softlight.

→
oo5.
Duplicate the #8B7DBB layer and set it to 50% opacity (Optional-- try deleting the layer at the end to see if it helps in achieving a more blue color. I did this).

→
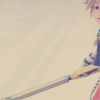
oo6.
Create a new layer and fill it with #E9D3B7 and set it to Multiply at 50% opacity.
→
oo7.
Duplicate your base and bring it to the top and set it to Overlay (or another blend mode to fit your icon) at 100% opacity (Again, play with the opacity so that it suits your needs).

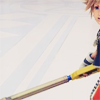
oo8.
Create a new layer and fill it with #415493 and set it to Difference at 40% opacity (Play with the opacity a little so that the layer isn't overpowering).

→
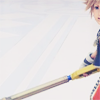
oo9.
Create a new layer and fill it with #b6c5db and set it to Softlight at 100% opacity.

→
o10.
Duplicate your background image once again and drag it to the top and set it to Color Burn at 100% opacity.

My layers palette for reference:
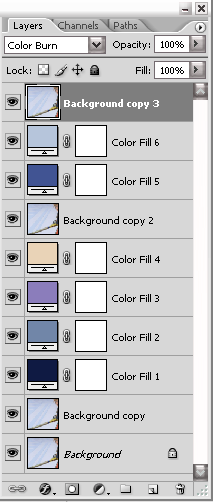
I'd love to see what you get! :]
CLEAR. ~

TO

IN MY FIRST TUTORIAL EVER. :]
PSP/GIMP TRANSLATABLE.
NO SELECTIVE COLORING.
NO CURVES.
BEGINNER LEVEL.
VERY EASY TO UNDERSTAND.
.PSD FILE INCLUDED FOR PHOTOSHOP USERS, SO LAYERS CAN BE DRAGGED TO YOUR IMAGE.
Link to the .PSD file for those who have Adobe Photoshop 7.0+ and are lazy.
INSTRUCTIONS:
- Open .PSD file in Photoshop.
- Press CTRL and hold it down while selecting the color layers.
- Drag all of the selected layers to your icon.
- Click on the background copies of my image and see what blend mode it is on.
- Create duplicates of your background image, and place them in the same location as my own background copies and set them to the same blend mode. You can refer to my layers palette below as a reference (under the cut).
- Voila. You're done!
Before I begin, I would like to tell you all that this is my very first tutorial, and that I WORKED MY HARDEST to get this tutorial to be as comprehensible as possible, and as easy to complete as possible.For your iconing ease and pleasure, I have painstakingly uploaded images of the layers so that you all wouldn't have to go and type in the number in the palette before filling the layer, and you can instead copy and paste the image of the color layers and get it easily finished. Enjoy it. :]
And, most importantly, I would like to give credit where credit is due. crackchemistry created the first half of this tutorial, and I added a twist of my own to get my selected coloring after their following their half of the tutorial. The link is here. It is a fantastic tutorial, so go check it out. You won't be disappointed!
Without further ado, the tutorial.
oo1.
Duplicate your background image, and set it to Screen at 100% opacity. Sharpen if desired. This will make your image lighter, so play with the opacity so that it won't be overpoweringly bright.

oo2.
Create a new layer, and fill it with #0F1A43 at 100% opacity and set it to Exclusion.

→

oo3.
Create a new layer and fill it with #7186A8 at 100% opacity and set it to Softlight.

→

oo4.
Create a new layer and fill it with #8B7DBB at 100% opacity and set it to Softlight.

→

oo5.
Duplicate the #8B7DBB layer and set it to 50% opacity (Optional-- try deleting the layer at the end to see if it helps in achieving a more blue color. I did this).

→

oo6.
Create a new layer and fill it with #E9D3B7 and set it to Multiply at 50% opacity.

→

oo7.
Duplicate your base and bring it to the top and set it to Overlay (or another blend mode to fit your icon) at 100% opacity (Again, play with the opacity so that it suits your needs).

oo8.
Create a new layer and fill it with #415493 and set it to Difference at 40% opacity (Play with the opacity a little so that the layer isn't overpowering).

→

oo9.
Create a new layer and fill it with #b6c5db and set it to Softlight at 100% opacity.

→

o10.
Duplicate your background image once again and drag it to the top and set it to Color Burn at 100% opacity.

My layers palette for reference:

I'd love to see what you get! :]
CLEAR. ~