tutorial: sandy & the girls
to
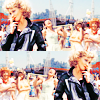
Made in PSCS2, involves selective coloring
Tutorial #2, requested by pinkishgirly
Step One
Take your cap and lighten it. Duplicate it once, set to SCREEN. That should be enough, but if it's not, go Image - Adjustments - Variations and click LIGHTEN once or twice. Your cap should be light enough now.
Step Two
Resize the cap to a smaller size. I resized the above cap to 400 (Image - Image Size; it should automatically populate). Copy and Merge everything (Edit - Copy Merged - Edit - Paste)
Step Three
Make yourself a 100x100 blank box and pull the cap into it. Resize it again so the whole cap fits into the box and cut out the black border.

Step Four
Duplicate it again and flip it horizontally. Edit - Transform - Flip Horizontal.
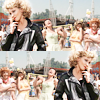
Step Five
Add in a Hue/Saturation Layer. Go to Layer - New Adjustment Layer - Hue/Saturation. Up the Saturation to 23 and hit okay.
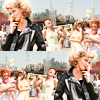
Step Six
Next we have a selective coloring layer. If you have PSP, I don't think selective coloring is enabled, but I don't really know about that.
Go to Layer - New Adjustment Layer - Selective Coloring. You're going to be using all Colors except Magenta, White & Black.
Reds:
Cyan -100
Yellow +100
Yellows:
Cyan +52
Yellow -55
Greens:
Cyan +44
Yellow -71
Cyans:
Cyan +71
Magenta -67
Yellow -74
Blues:
Cyan +52
Magenta +27
Yellow +52
Neutrals:
Cyan -29
Magenta -26
Yellow -59
Black +33
Step Seven
Copy & Merge the image again. Go to Edit - Copy Merged, Edit - Paste.
Step Eight
We want to change the color of this layer. To do this go to Image - Adjustments - Variations. Add some green and yellow into it. This is about the color you should end up with:

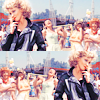
Set the layer to SOFT LIGHT and you should end up with this, your result:

Other examples using this tutorial: