My First Tutorial...iknowyoualljustcantwaityeah.
Ish on Dommeh as Charleh. ;D
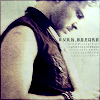
Please note that 1) this tutorial is meant to inspire, NOT to be copied step by step when making your own icons to share; and 2) this particular icon is NOT up for grabs yet. If I see it somewhere, the person who put it at that somewhere dies. :)
Also know that I use Paint Shop Pro 7, and that if you have a paint program other than this, there will be slight variations to these steps that you will have to take. Oh, and I'm going step by step on this thing almost as if someone has just bought PSP and never used the tools other than opening a file. ;)
First off, the cap:
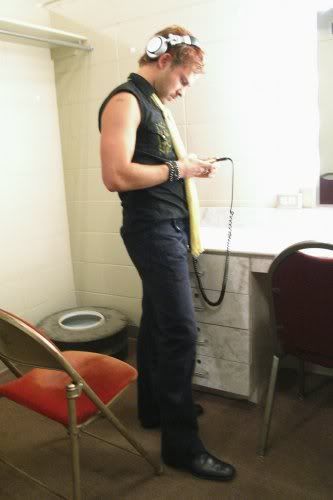
(Source: http://dominic-monaghan.us)
I used the Crop feature on the tool palette, and went to Image > Resize > Pixel Size: 100x100. Which gave me this:

Next, go to Layers > Duplicate, then Layers > Properties, Blend Mode to Screen; at 90% Opacity. Go to Effects > Sharpen > Sharpen, then do it again. (This step is from booster_rocket, and I've used it on almost every icon I've made) This lightens up the photo. Then I usually make a 1 px border with the Shape tool set to a square, and the color Black. Finally, hit Layers > Merge > Merge All (Flatten), so you can work with the whole pic again:

No worries; it'll get prettier. ;) Click Colors > Adjust > Hue/Saturation/Lightness, then put the Hue @ -5; Sat @ -27; Lightness @ -20. Go to Adjust > Brightness > Contrast, with Brightness @ -8; Contrast @ 21. Here it is now:

Then you go to Effects > Artistic Effects > Aged Newspaper, and set the Amount to Age to 10:
Go to Layers > New Raster Layer, Blend Mode to Color @ 100% Opacity. Use the Flood Fill tool and head to the Color Palette, see Styles, set color to #F8BE7A. KEEP Flood Fill @ Normal, 25% Opacity from now on! Click and hold the color to get the Gradient tool, click on that and then the little arrow, hit #2 Fading Foreground and Angle 45. Click OK. Here's the gradient:

Here's the icon so far:
Now in this case, I used a brush from teh_indy:
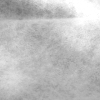
I opened that up and selected it in the Color Palatte Styles > Patterns. Then go to Layers > New Raster Layer and make Blend Mode be Multiply @ 100% Opacity. Click on Flood Fill, and then click on the icon. You get this:
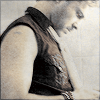
Merge the layers. Click Colors > Adjust > Color Balance.
Shadows: -12 -45 -18
Midtones: -26 -36 -30
Highlights: -11 -5 -38

Then I hit the Retouch tool to Darken certain areas, and used the Text tool, Verdana Size 3 (Antialias and Floating Checked), and then a text brush of my own stamped below it and edited the way I saw fit:

And there's teh pretty Charlie! XP
Please note that 1) this tutorial is meant to inspire, NOT to be copied step by step when making your own icons to share; and 2) this particular icon is NOT up for grabs yet. If I see it somewhere, the person who put it at that somewhere dies. :)
Also know that I use Paint Shop Pro 7, and that if you have a paint program other than this, there will be slight variations to these steps that you will have to take. Oh, and I'm going step by step on this thing almost as if someone has just bought PSP and never used the tools other than opening a file. ;)
First off, the cap:
(Source: http://dominic-monaghan.us)
I used the Crop feature on the tool palette, and went to Image > Resize > Pixel Size: 100x100. Which gave me this:
Next, go to Layers > Duplicate, then Layers > Properties, Blend Mode to Screen; at 90% Opacity. Go to Effects > Sharpen > Sharpen, then do it again. (This step is from booster_rocket, and I've used it on almost every icon I've made) This lightens up the photo. Then I usually make a 1 px border with the Shape tool set to a square, and the color Black. Finally, hit Layers > Merge > Merge All (Flatten), so you can work with the whole pic again:
No worries; it'll get prettier. ;) Click Colors > Adjust > Hue/Saturation/Lightness, then put the Hue @ -5; Sat @ -27; Lightness @ -20. Go to Adjust > Brightness > Contrast, with Brightness @ -8; Contrast @ 21. Here it is now:
Then you go to Effects > Artistic Effects > Aged Newspaper, and set the Amount to Age to 10:
Go to Layers > New Raster Layer, Blend Mode to Color @ 100% Opacity. Use the Flood Fill tool and head to the Color Palette, see Styles, set color to #F8BE7A. KEEP Flood Fill @ Normal, 25% Opacity from now on! Click and hold the color to get the Gradient tool, click on that and then the little arrow, hit #2 Fading Foreground and Angle 45. Click OK. Here's the gradient:
Here's the icon so far:
Now in this case, I used a brush from teh_indy:
I opened that up and selected it in the Color Palatte Styles > Patterns. Then go to Layers > New Raster Layer and make Blend Mode be Multiply @ 100% Opacity. Click on Flood Fill, and then click on the icon. You get this:
Merge the layers. Click Colors > Adjust > Color Balance.
Shadows: -12 -45 -18
Midtones: -26 -36 -30
Highlights: -11 -5 -38
Then I hit the Retouch tool to Darken certain areas, and used the Text tool, Verdana Size 3 (Antialias and Floating Checked), and then a text brush of my own stamped below it and edited the way I saw fit:
And there's teh pretty Charlie! XP