CC30 Single Pattern Project: the shibori dyed obi age
Spent the weekend working on a piece of mom's kimono outfit for the Single Pattern contest at CC30, a shibori dyed obi age.
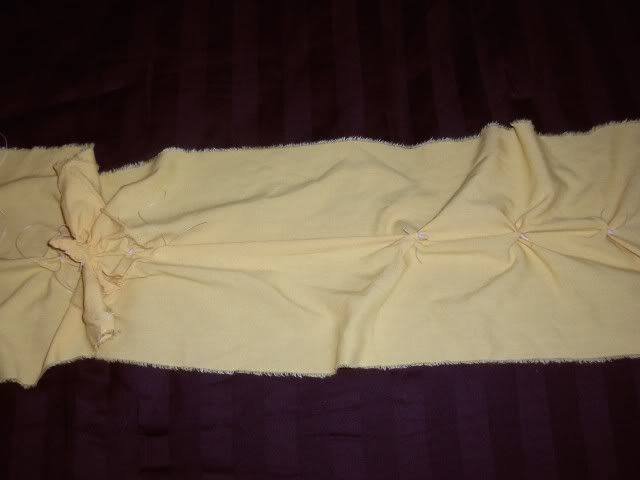
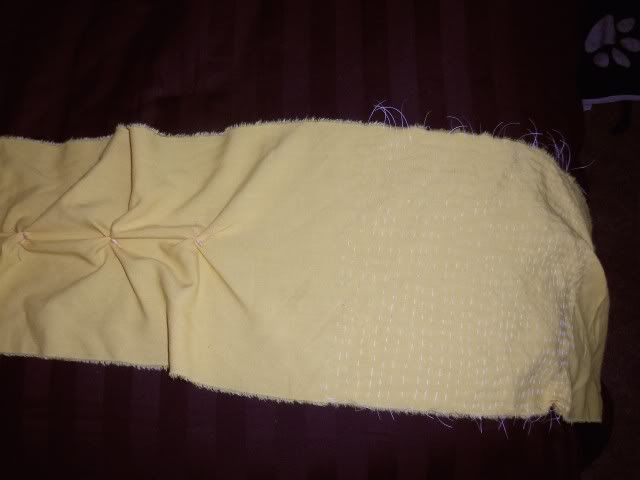
This was my first attempt at shibori so I treated this as a sampler project and tried to do a little of many different techniques. I took a 10" x 84" strip of a light weight bright yellow rayon (same stuff as mijan's Star Trek Kimono) and put in stitches using nylon upholstery thread as standard sewing thread wouldn't hold up to how tight I was going to have to yank on them to bunch up the fabric. I started by folding the fabric in half length-wise and stitching a series of concentric half circles on the fold in a technique called Karamatu. From there I enclosed the circle in a diamond shape made with stitches called Ori Nui which gives the effect of two dashed lines running parallel to one another. A series of centered dots were made by folding the fabric around a narrow wooden stick and wrapping the threads tightly around the tip. I have no idea what the technique would be called but it was the one that reminded me most of the tie dyeing adventures of summer camp. I finished off the ends with wide patches of a simple stitching called Mokume which results in a narrow wood grain effect running perpendicular to the threads. The whole process took me about five hours over the course of a couple of evenings, but as I had to re-do a couple rows as I learned what I was doing I'd say it'd probably take me less than three to do the same pattern all over again.
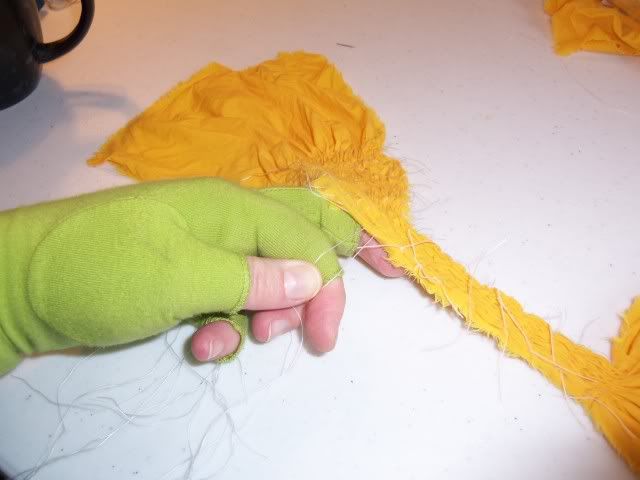
After spending the last week reading up on dyeing techniques on the Dharma Trading Company website I was convinced to take the dye process a bit more seriously. I didn't really want to wait for the fabric to soak in water over night so instead I soaked it before tightening the stitches. Let me just say now that pulling on wet nylon upholstery thread by hand was one of the poorer ideas I've had yet. Tore the shit out of my index finger before deciding that this was perhaps the perfect time to be wearing the fingerless gloves. That helped immemseley.
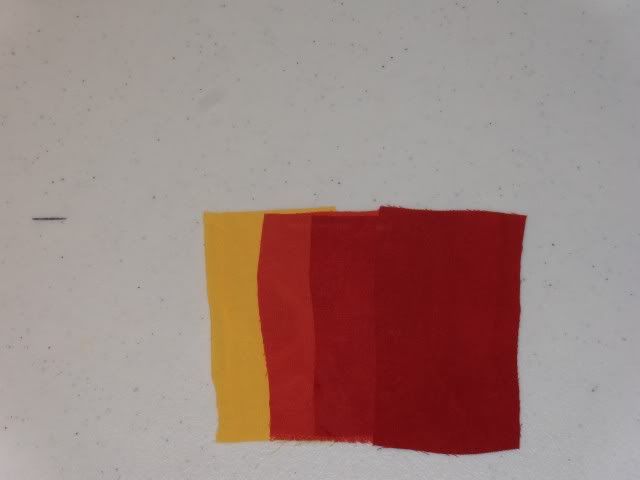
Still used the red liquid Rit dye that I keep on hand but did it in a pot on the stove one medium heat and made use of the swatch-dyeing idea that auroraceleste suggested in the dyeing panel at Arisia which was to safety pin a few swatches of your fabric together and then suspend them in the dye bath by a string. That way you could test the color as you go without removing the garment from the dye bath. BEST IDEA EVER! It took about 20 minutes to achieve what I thought was the perfect shade of hibiscus red. Swatches shown are the initial fabric and at 10, 15 and 20 minutes in the dye bath.
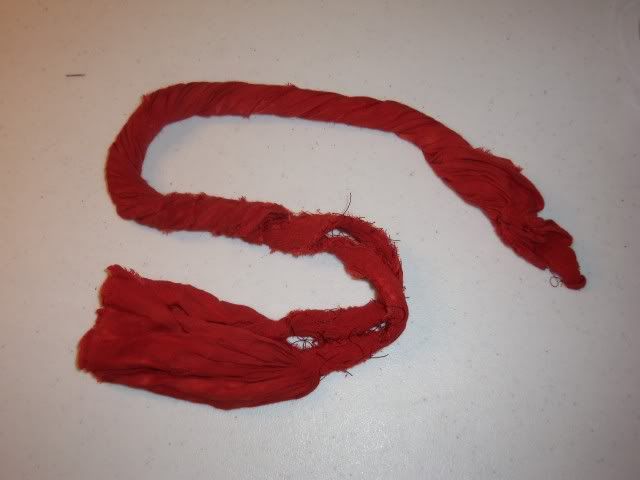
I then spent the rest of my natural life trying to rinse out as much of the red dye as possible. Not an easy thing to do with the fabric was bunched up that tight. Me being an impatient bugger I ran the rinsed fabric through a series of one minute bursts through the microwave to speed up the drying process. Once it cooled the next step was to remove all the stitching. Not as simple as it sounds. I found that using a seam ripper to get under the stitches was good but I made a couple knicks in the fabric while I was getting the technique right. Using an awl to work my way under the stitches and separate the folds helped immensely.
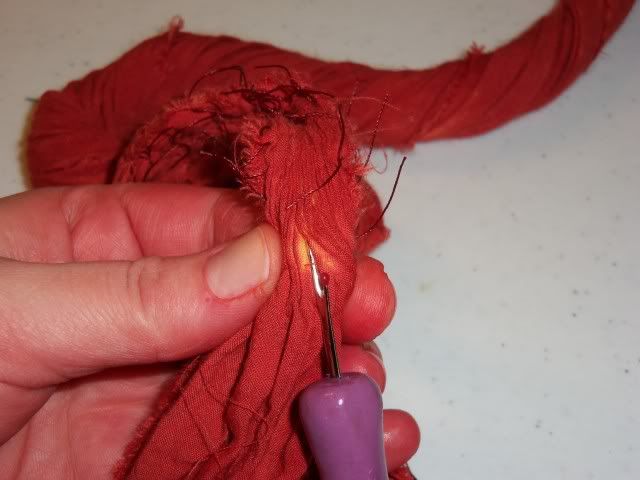
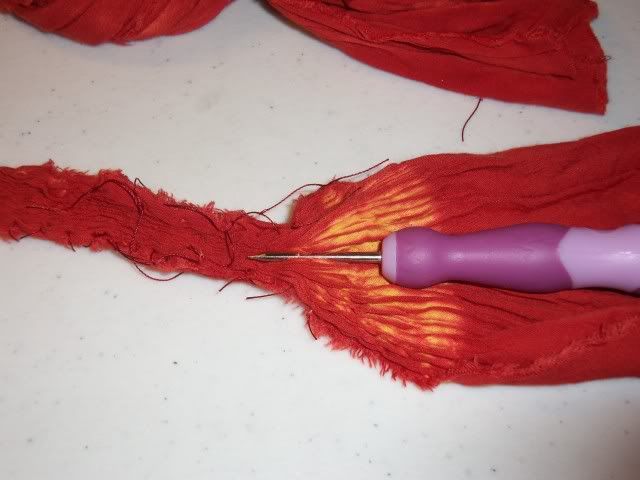
I absolutel LOVE how it turned out. I was afraid that dyeing the yellow fabric wouldn't work out too well but the dye took beautifully and the orangey parts where yellow faded to red weren't as weird as I expectedc them to be. Nothing like the rubber banded tie dye of my youth, the stitching made the folds so incredibly tight that absolutely no dye was able to work it's way in.

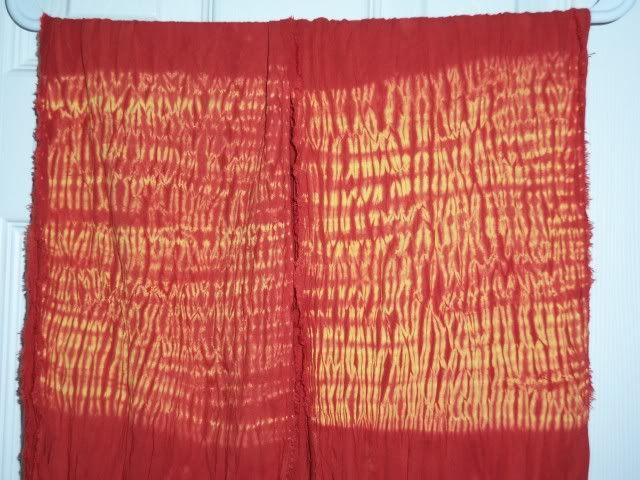

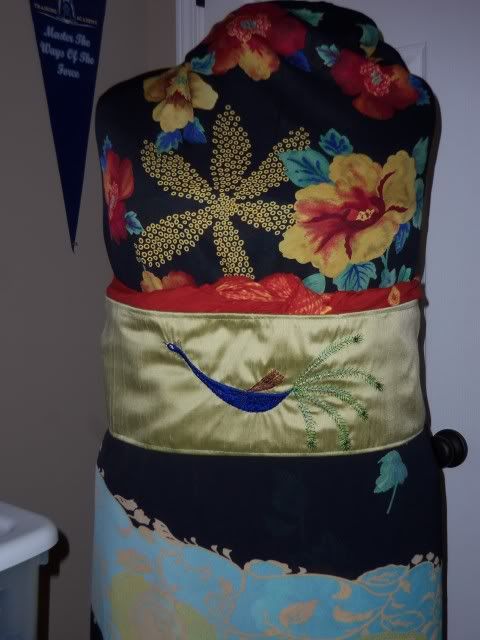
And here it is in place against the fabric for mom's kimono and the mostly done obi.
Technique reference: http://www.burdastyle.com/techniques/dyeing-fabric-shibori-techniques/
This was my first attempt at shibori so I treated this as a sampler project and tried to do a little of many different techniques. I took a 10" x 84" strip of a light weight bright yellow rayon (same stuff as mijan's Star Trek Kimono) and put in stitches using nylon upholstery thread as standard sewing thread wouldn't hold up to how tight I was going to have to yank on them to bunch up the fabric. I started by folding the fabric in half length-wise and stitching a series of concentric half circles on the fold in a technique called Karamatu. From there I enclosed the circle in a diamond shape made with stitches called Ori Nui which gives the effect of two dashed lines running parallel to one another. A series of centered dots were made by folding the fabric around a narrow wooden stick and wrapping the threads tightly around the tip. I have no idea what the technique would be called but it was the one that reminded me most of the tie dyeing adventures of summer camp. I finished off the ends with wide patches of a simple stitching called Mokume which results in a narrow wood grain effect running perpendicular to the threads. The whole process took me about five hours over the course of a couple of evenings, but as I had to re-do a couple rows as I learned what I was doing I'd say it'd probably take me less than three to do the same pattern all over again.


After spending the last week reading up on dyeing techniques on the Dharma Trading Company website I was convinced to take the dye process a bit more seriously. I didn't really want to wait for the fabric to soak in water over night so instead I soaked it before tightening the stitches. Let me just say now that pulling on wet nylon upholstery thread by hand was one of the poorer ideas I've had yet. Tore the shit out of my index finger before deciding that this was perhaps the perfect time to be wearing the fingerless gloves. That helped immemseley.

Still used the red liquid Rit dye that I keep on hand but did it in a pot on the stove one medium heat and made use of the swatch-dyeing idea that auroraceleste suggested in the dyeing panel at Arisia which was to safety pin a few swatches of your fabric together and then suspend them in the dye bath by a string. That way you could test the color as you go without removing the garment from the dye bath. BEST IDEA EVER! It took about 20 minutes to achieve what I thought was the perfect shade of hibiscus red. Swatches shown are the initial fabric and at 10, 15 and 20 minutes in the dye bath.


I then spent the rest of my natural life trying to rinse out as much of the red dye as possible. Not an easy thing to do with the fabric was bunched up that tight. Me being an impatient bugger I ran the rinsed fabric through a series of one minute bursts through the microwave to speed up the drying process. Once it cooled the next step was to remove all the stitching. Not as simple as it sounds. I found that using a seam ripper to get under the stitches was good but I made a couple knicks in the fabric while I was getting the technique right. Using an awl to work my way under the stitches and separate the folds helped immensely.


I absolutel LOVE how it turned out. I was afraid that dyeing the yellow fabric wouldn't work out too well but the dye took beautifully and the orangey parts where yellow faded to red weren't as weird as I expectedc them to be. Nothing like the rubber banded tie dye of my youth, the stitching made the folds so incredibly tight that absolutely no dye was able to work it's way in.


And here it is in place against the fabric for mom's kimono and the mostly done obi.

Technique reference: http://www.burdastyle.com/techniques/dyeing-fabric-shibori-techniques/