8 Tutorials
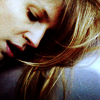
this >>

1. Crop, resize, etc.
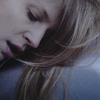
2. Hit Shift+Ctrl+L for Auto Levels
You made need to duplicate your base and set to screen between 25-50%
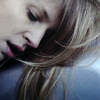
3. Selective Color
Reds:
C: -100
M: +8
Y: +87
B: +35
Neutrals:
C: -9
M: -2
Y: +2
B: +3
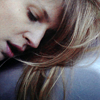
4. Curves
RGB:
IP: 107
OP: 157
Red:
IP: 131
OP: 128
Green:
IP: 126
OP: 129
Blue:
IP: 74
OP: 58
IP: 135
OP: 113
IP: 204
OP: 206
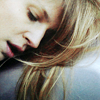
5. Color Balance
Shadows: 10, -5, 13
Midtones: 8, -4, -17
Highlights: -4, 9, 18
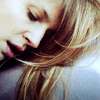
6. Fill Layer
#1c0600, soft light
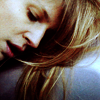
7. Photo Filter
Color: #ec8a00 (default color), set to softlight at 50%

.psd
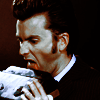
this >>

1. Crop, resize, etc.

2. Selective Color
Reds:
C: -100
M: +14
Y: +27
B: 0
Yellows:
C: -100
M: 0
Y: 0
B: +26
Neutrals:
C: +24
M: +1
Y: +4
B: +3

3. Selective Color
Reds:
C: -100
M: 0
Y: +42
B: 0
Yellows:
C: -100
M: +14
Y: +46
B: 0
Neutrals:
C: +28
M: 0
Y: -6
B: 0

4. Fill Layer
#00162a, set to color dodge

5. Duplicate fill layer

6. Fill Layer
#68370b, set to color dodge at 30%

7. Brightness/Contrast
Contrast: +10

8. Photo Filter
Cooling Filter (82), set to soft light

.psd
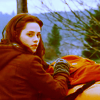
this >>

1. Crop, resize, etc.

2. Duplicate base, set to screen at 10%

3. Selective Color
Yellows:
C: 0
M: 0
Y: +21
B: 0
Neutrals:
C: +5
M: -5
Y: +4
B: +8
Blacks:
C: +9
M: +4
Y: +10
B: -3

4. Photo Filter:
Cooling Filter (82)

5. Selective Color:
Reds:
C: -100
M: -5
Y: +51
B: 0
Yellows:
C: -43
M: -13
Y: -29
B: +12
Neutrals:
Cy: -8
M: -8
Y: -1
B: +47
Blacks
C: -20
M: -9
Y: +58
B: +40

6. Curves:
RGB:
IP: 98
OP: 124
Red:
IP: 50
OP: 57
IP: 124
OP: 128
IP: 175
OP: 172
Green:
IP: 64
OP: 53
IP: 129
OP: 132
IP: 184
OP: 174
Blue:
IP: 43
OP: 42
IP: 191
OP: 181

7. Color Balance:
Shadows: -2, +4, +16
Midtones: +9, +1, -4
Highlights: -15, -6, -2

8. Fill Layer
#170a00, set to exclusion

This is the correct psd. Sorry for the inconvenience.
.psd
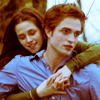
this >>

1. Crop, resize, etc.

2. Fill Layer
#120000, set to exclusion

3. Photo Filter
Cooling Filter (82), set to soft light

4. Curves
RGB:
IP: 120
OP: 145
Red:
IP: 123
OP: 116
Green:
IP: 119
OP: 127
Blue:
IP: 126
OP: 122

5. Selective Color
Reds:
C: -100
M: -42
Y: -39
B: +32
Neutrals:
C: +8
M: +7
Y: +1
B: +15

6. Color Balance
Shadows: +10, +2, +1
Midtones: -22, -16, -21
Highlights: +6, +7, +4

.psd
this >>

1. Crop, resize, etc.
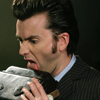
2. Duplicate Base, set to screen at 30%
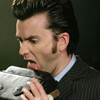
3. Fill Layer
#290000, set to exclusion
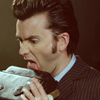
4. Selective Color, set to screen
Reds:
C: +51
M: +20
Y: +15
B: +46
Yellows:
C: +22
M: +30
Y: +88
B: -31
Cyans:
C: +88
M: -36
Y: 0
B: -21
Blues:
C: +100
M: +26
Y: +1
B: -26
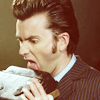
5. Duplicate Selective Color, set to multiply
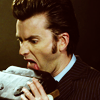
6. Photo Filter
Cooling Filter (82)
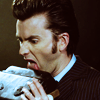
7. Color Balance
Shadows: +19, -1, -8
Midtones: +14, 0, 0
Highlights: -11, -6, -1
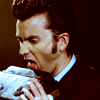
8. Selective Color
Whites:
C: +100
M: -7
Y: +3
B: 0
Neutrals:
C: +6
M: -1
Y: -7
B: +8
Blacks:
C: +7
M: +13
Y: +9
B: +17
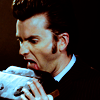
9. Channel Mixer, set to softlight at 25%
Red:
R: +105
G: -29
B: 0
Green:
R: -9
G: +104
B: +19
Blue:
R: -26
G: +54
B: 100
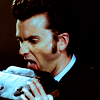
10. Gradient Map
Black to white, set to lighten
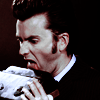
11. Selective Color
Reds:
C: -100
M: -63
Yellow: +46
Black: +88
Yellows:
C: -30
M: -13
Y: +100
B: +100
Neutrals:
C: +26
M: +13
Y: +19
B: +10

.psd
this >>

1. Crop, resize, etc.
2. Duplicate base, set to screen

3. Selective Color
Reds:
c: -100
M: +8
Y: +22
B: +100
Yellows:
c: -100
M: 0
Y: 0
B: 0
Cyans:
c: -100
M: -8
Y: -9
B: +58
Blues:
C: +38
M: +23
Y: -19
B: 0
Neutrals:
C: +8
M: -7
Y: +5
B: +10

4. Selective Color
Reds:
c: -52
M: -27
Y: +29
B: +69
Blues:
C: +100
M: 0
Y: +100
B: +100
Neutrals:
C: -6
M: +2
Y: +2
B: +9

5. Fill Layer
#482700, set to soft light
6. Curves
RGB:
IP: 51
OP: 74
IP: 113
OP: 144
IP: 174
OP: 189
Red:
IP: 76
OP: 57
IP: 131
OP: 129
IP: 207
OP: 209
Green:
IP: 59
OP: 48
IP: 127
OP: 121
IP: 211
OP: 224
Blue:
IP: 40
OP: 34
IP: 125
OP: 129
IP: 223
OP: 213

7. Curves
RGB:
IP: 38
OP: 40
IP: 62
OP: 57
IP: 130
OP: 130
IP: 195
OP: 195
Red:
IP: 123
OP: 126
Green:
IP: 131
OP: 130
IP: 189
OP: 188
Blue:
IP: 59
OP: 52
IP: 131
OP: 130
IP: 194
OP: 214

8. Duplicate base, drag to top, set to soft light

9. Fill Layer
#160c00, set to exclusion

.psd
this >>

1. Crop, resize, etc.
2. Channel Mixer
Red:
R: +118
G: +5
B: -5
3. Selective Color
Reds:
C: -100
M: -17
Y: +32
B: +27
Cyans:
C: -27
M: -30
Y: +52
B: +37
Neutrals:
C: -8
M: +4
Y: +27
B: +1
4. Curves
RGB:
IP: 100
OP: 121
IP: 133
OP: 157
Red:
IP:127
OP:128
Green:
IP: 125
OP: 125
Blue:
IP: 134
OP: 130
5. Curves
RGB:
IP: 90
OP: 82
IP: 129
OP: 129
IP: 170
OP: 165
6. Photo Filter
Cooling Filter (82)
7. Selective Color
Reds:
C: -100
M: -17
Y: +32
B: +27
Cyans:
C: -100
M: -30
Y: -41
B: +37
Neutrals:
C: +30
M: +11
Y: +5
B: -1
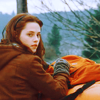
8. Color Balance
Shadows: -19, -44, -100
Midtones: -61, -72, -59
Highlights: 0, 0, +38
9. Fill Layer
#1b0202, set to exclusion

.psd
this >>

1. Crop, resize, etc.

2. Curves
Blue:
IP: 35
OP: 35
IP: 214
OP: 228
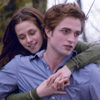
3. Curves
RGB:
IP: 125
OP: 140
Red:
IP: 97
OP: 93
IP: 133
OP: 117
Green:
IP: 131
OP: 125
Blue:
IP: 137
OP: 114
4. Fill Layer
#230d04, set to exculsion
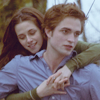
5. Fill layer
#181402, set fill to 55%

6. Color Balance
Shadows: +15, 0, 0
Midtones: 0, 0, -20
Highlights: 0, 0, +10

7. Selective Color (Optional)
Black:
C: 0
M: 0
Y: 0
B: +15

8. Color Balance:
Shadows: +17, 0, 0
Midtones: 0, 0, -29
Highlights: 0, 0, +10
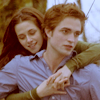
9. Hue/Saturation
Saturation: +11
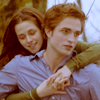
10. Photo Filter
Cooling Filter (82), set to overlay
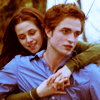
11. Duplicate second curves layer and drag to top

.psd
For those of you working in PS7, I redid the tuts with a photo filter layer since y'all don't have that.
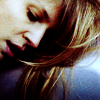


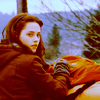
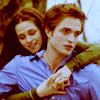
I may have went over board on the tutorials, but I was in the mood.
I wasn't very detailed. Ok, I wasn't detailed at all, so if you have any questions just let me know. PSDS are included. More examples found here.
