(no subject)
my ninth tutorial -- how to make this icon in 27 steps:
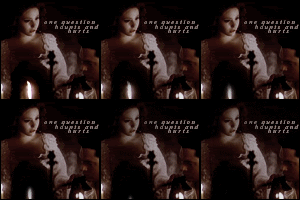
i got quite a few questions and comments regarding the icons i have made where the flame flickers, so i thought i would create a tutorial on how i did it. for this tutorial i used: photoshop 7.0 and animation shop 3.0.
step 01:
for the first step, we need to choose the subject of our icon. because one of my favorite movies is phantom of the opera, and that movie has tons of candles in it, i chose this cap: here. now, i suggest that, when choosing an image, pick one where the area around the flame is one color. i find it a lot easier to pick a dark picture (or, at least, a picture that can be made dark) -- you'll see why as the tutorial progresses.
step 02:
now we have to make the icon itself. resize the image and crop it to 100x100.
step 03:
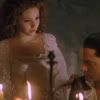
duplicate the image 5 times. set the first two copies to screen, the third to soft light, the fourth to multiply and the fifth to screen (opacity 50%). also, the copy you set to multiply, make sure you desaturate it.
step 04:
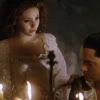
on the copy that is soft light, go to filter >> sharpen, and sharpen that layer twice -- merge layers (layer >> merger layers). then, using the blur tool (size - 5px, strength - 30), smooth out the faces and other pixelated areas. make sure you don't blur out any defining features otherwise it will look weird. we want it smooth not messy.
step 05
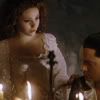
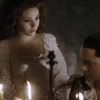
now next, go to layer >> new adjustment layer >> hue/saturation; set saturation to -35.
step 06:
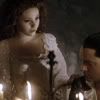
then, go to layer >> new adjustment layer >> brightness/contrast; set brightness to +6 & contrast to +7.
step 07:
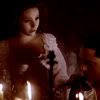
create a new layer; using the flood fill tool, fill the layer with a pinkish color -- i used #ECD2D4.

step 08:
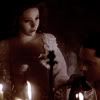
set the lighting mode on the pink layer to color burn.
step 09:
now, i think that pink doesn't look right -- i want it clear, crisp and dark, not red; go to layer >> new adjustment layer >> hue/saturation; set saturation to -35, again.
step 10:
we want a little light shining on the event in the icon; create another and fill it was a mid-grey color. i used #989898.

step 11:
set that layer to overlay.
step 12:
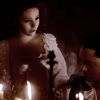
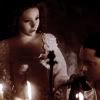
go to select >> select all; then, go to edit >> copy merged. after you make sure that your next layer is on top, paste the copy. desaturate it and set the copy to screen, 30%.
step 13:
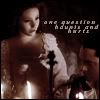
add a 1px black stroke and some text; i took a quote from "no good deed" (wicked): "one question haunts and hurts".
step 14:
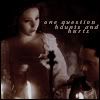
merge layers again. duplicate the icon and, between the two copies, create a layer and fill it with black. leave both images set at normal, but lower the opacity on the top one to 80%.
step 15:
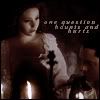
now we are going to start priming the animation. taking a soft brush, 30 pixel or so, lightly color the area around the candle with black. hopefully your icon came out dark enough so that, when we color around the flame, it blends well and doesn't look odd. if you happen to color on the flame, use a small eraser and erase the black.
step 16:
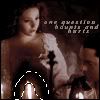
now we are going to reduce the flame. use the lasso tool and select an even portion of the flame -- but not too much. something like this:
step 17:
feather that selection (5 pixels is probably ideal for the first fill) and, on a new layer, fill it in with black.
step 18:
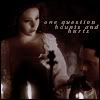
repeat step 17, making the flame go smaller and smaller -- make sure that you are only feathering the selections between 2-3 pixels however now. keep going until there is only the tiniest hint of the flame left. also, make sure you save each image as you make a new layer.

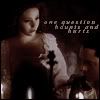
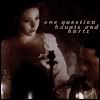
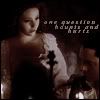
i now have 6 images that i saved (i saved mine 1.jpg, 2.jpg, 3.jpg, 4.jpg, 5.jpg & 6.jpg).
step 19:
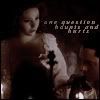
however, when a candle flickers out, a room grows dark -- we want to achieve that affect here. on the fifth image, create a new layer. using a larger brush (maybe 65 pixels), lightly color in christine's face with black. set that layer to multiply, opacity 25% -- save that one as 6.jpg, replacing the first 6.jpg, we won't be needing that one anymore.
new 6.jpg:
step 20:
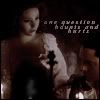
now it's time for the smoke. create a new layer on top of 6.jpg and, using a soft brush, 13 pixels, make a slight squiggle in grey.
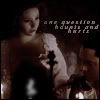
set the squiggle to linear dodge, opacity 30%.
step 21:
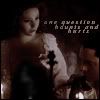
duplicate the squiggle and move it up and to the left a little. keep that puff of smoke on linear dodge, 30% opacity, but lower the layer below it to 10% opacity.
step 21:
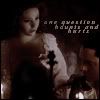
lower the top layer of smoke to 10% opacity and lower the layer below it to 0% opacity.
step 23:
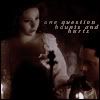
and, lastly, we want the smoke to fade and no hint of the candle to remain. on a new layer, cover the piece of flame and the smoke with black.
that's the end of photoshop -- now we move onto animation shop.
step 24:
create a new animation, size 100x100. go to animation >> insert frames >> from file. by choosing add file, select the 10 images we have saved. make sure that they are in number order (1-10.jpg; usually the last one is on top -- just press move up and it goes to the bottom). press ok.
step 25:
there will be an empty frame at the end (frame 11). make sure it alone is selected (it will be boxed in blue), and delete it.
step 26:
take a moment to view your animation (view >> animation). if the flame looks weird, you might want to go back to ps and fix the sizes. if it flows naturally, continue -- just press view >> animation to go back to your frames.
mine looks like this:
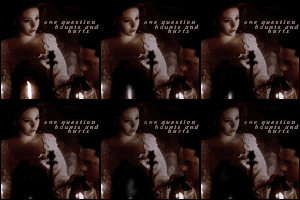
step 27:
now we want to fix the timing and make the animation look better. what i did was go up and down the animation and add other copies of certain frames so that the flame flickers before it dies. i added 6 frames (no i'm up to 16 frames).
frame 1: 1.jpg
frame 2: 2.jpg
frame 3: 3.jpg
frame 4: 2.jpg
frame 5: 3.jpg
frame 6: 4.jpg
frame 7: 3.jpg
frame 8: 4.jpg
frame 9: 5.jpg
frame 10: 4.jpg
frame 11: 5.jpg
frame 12: 6.jpg
frame 13: 7.jpg
frame 14: 8.jpg
frame 15: 9.jpg
frame 16: 10.jpg
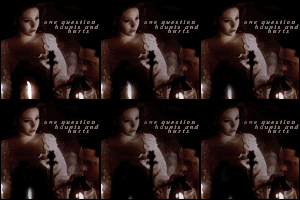
step 27:
now the flame flickers and the timing is right on that (i like 10/100 for flickers) -- now i want to fix the timing on the smoke. i set frame #14 & #15 to 15/100 and #16 to 50/100. now the smoke will waft and there will be a brief pause before the animation loops.

and, that's it! can you believe it? all you have to do is save your icon and make sure that it's less than 40 kb -- mine came out to 21 kb.
+ comments are appreciated; i'd love to see what you created.

i got quite a few questions and comments regarding the icons i have made where the flame flickers, so i thought i would create a tutorial on how i did it. for this tutorial i used: photoshop 7.0 and animation shop 3.0.
step 01:
for the first step, we need to choose the subject of our icon. because one of my favorite movies is phantom of the opera, and that movie has tons of candles in it, i chose this cap: here. now, i suggest that, when choosing an image, pick one where the area around the flame is one color. i find it a lot easier to pick a dark picture (or, at least, a picture that can be made dark) -- you'll see why as the tutorial progresses.
step 02:
now we have to make the icon itself. resize the image and crop it to 100x100.

step 03:
duplicate the image 5 times. set the first two copies to screen, the third to soft light, the fourth to multiply and the fifth to screen (opacity 50%). also, the copy you set to multiply, make sure you desaturate it.

step 04:
on the copy that is soft light, go to filter >> sharpen, and sharpen that layer twice -- merge layers (layer >> merger layers). then, using the blur tool (size - 5px, strength - 30), smooth out the faces and other pixelated areas. make sure you don't blur out any defining features otherwise it will look weird. we want it smooth not messy.

step 05
now next, go to layer >> new adjustment layer >> hue/saturation; set saturation to -35.

step 06:
then, go to layer >> new adjustment layer >> brightness/contrast; set brightness to +6 & contrast to +7.

step 07:
create a new layer; using the flood fill tool, fill the layer with a pinkish color -- i used #ECD2D4.

step 08:
set the lighting mode on the pink layer to color burn.

step 09:
now, i think that pink doesn't look right -- i want it clear, crisp and dark, not red; go to layer >> new adjustment layer >> hue/saturation; set saturation to -35, again.

step 10:
we want a little light shining on the event in the icon; create another and fill it was a mid-grey color. i used #989898.

step 11:
set that layer to overlay.

step 12:
go to select >> select all; then, go to edit >> copy merged. after you make sure that your next layer is on top, paste the copy. desaturate it and set the copy to screen, 30%.

step 13:
add a 1px black stroke and some text; i took a quote from "no good deed" (wicked): "one question haunts and hurts".

step 14:
merge layers again. duplicate the icon and, between the two copies, create a layer and fill it with black. leave both images set at normal, but lower the opacity on the top one to 80%.

step 15:
now we are going to start priming the animation. taking a soft brush, 30 pixel or so, lightly color the area around the candle with black. hopefully your icon came out dark enough so that, when we color around the flame, it blends well and doesn't look odd. if you happen to color on the flame, use a small eraser and erase the black.

step 16:
now we are going to reduce the flame. use the lasso tool and select an even portion of the flame -- but not too much. something like this:

step 17:
feather that selection (5 pixels is probably ideal for the first fill) and, on a new layer, fill it in with black.

step 18:
repeat step 17, making the flame go smaller and smaller -- make sure that you are only feathering the selections between 2-3 pixels however now. keep going until there is only the tiniest hint of the flame left. also, make sure you save each image as you make a new layer.


i now have 6 images that i saved (i saved mine 1.jpg, 2.jpg, 3.jpg, 4.jpg, 5.jpg & 6.jpg).
step 19:
however, when a candle flickers out, a room grows dark -- we want to achieve that affect here. on the fifth image, create a new layer. using a larger brush (maybe 65 pixels), lightly color in christine's face with black. set that layer to multiply, opacity 25% -- save that one as 6.jpg, replacing the first 6.jpg, we won't be needing that one anymore.
new 6.jpg:

step 20:
now it's time for the smoke. create a new layer on top of 6.jpg and, using a soft brush, 13 pixels, make a slight squiggle in grey.

set the squiggle to linear dodge, opacity 30%.

step 21:
duplicate the squiggle and move it up and to the left a little. keep that puff of smoke on linear dodge, 30% opacity, but lower the layer below it to 10% opacity.

step 21:
lower the top layer of smoke to 10% opacity and lower the layer below it to 0% opacity.

step 23:
and, lastly, we want the smoke to fade and no hint of the candle to remain. on a new layer, cover the piece of flame and the smoke with black.

that's the end of photoshop -- now we move onto animation shop.
step 24:
create a new animation, size 100x100. go to animation >> insert frames >> from file. by choosing add file, select the 10 images we have saved. make sure that they are in number order (1-10.jpg; usually the last one is on top -- just press move up and it goes to the bottom). press ok.
step 25:
there will be an empty frame at the end (frame 11). make sure it alone is selected (it will be boxed in blue), and delete it.
step 26:
take a moment to view your animation (view >> animation). if the flame looks weird, you might want to go back to ps and fix the sizes. if it flows naturally, continue -- just press view >> animation to go back to your frames.
mine looks like this:

step 27:
now we want to fix the timing and make the animation look better. what i did was go up and down the animation and add other copies of certain frames so that the flame flickers before it dies. i added 6 frames (no i'm up to 16 frames).
frame 1: 1.jpg
frame 2: 2.jpg
frame 3: 3.jpg
frame 4: 2.jpg
frame 5: 3.jpg
frame 6: 4.jpg
frame 7: 3.jpg
frame 8: 4.jpg
frame 9: 5.jpg
frame 10: 4.jpg
frame 11: 5.jpg
frame 12: 6.jpg
frame 13: 7.jpg
frame 14: 8.jpg
frame 15: 9.jpg
frame 16: 10.jpg

step 27:
now the flame flickers and the timing is right on that (i like 10/100 for flickers) -- now i want to fix the timing on the smoke. i set frame #14 & #15 to 15/100 and #16 to 50/100. now the smoke will waft and there will be a brief pause before the animation loops.

and, that's it! can you believe it? all you have to do is save your icon and make sure that it's less than 40 kb -- mine came out to 21 kb.
+ comments are appreciated; i'd love to see what you created.