LEGO USB Drive
So after seeing things like this, this, this, and this, I decided to kill a few hours and try it for myself.
So I grabbed my cheap (cheap in quality, I actually got it for free) 32MB USB Flash Drive, some lego bricks (I figured out that it would have to be 3x6), and scrounged up the necessary tools for the job. To cut away the sides of the various pieces I used a small saw in combination with an exacto knife that I heated up over a gas burner (a regular butane lighter just wouldn't get hot enough). I'd then use the knife and sandpaper to get rid of any excess plastic.
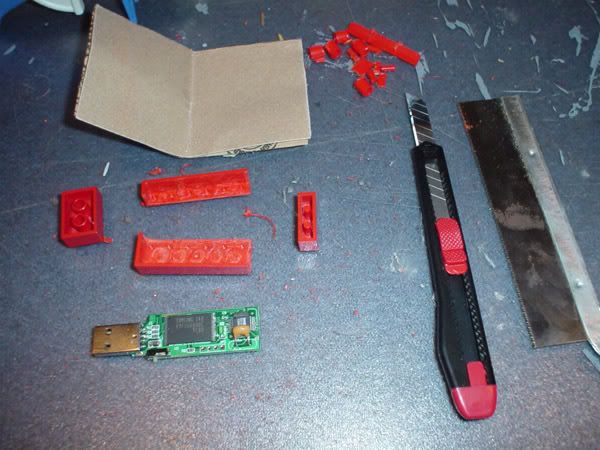
Above: Some of the tools I used plus a couple hollowed out LEGO pieces.
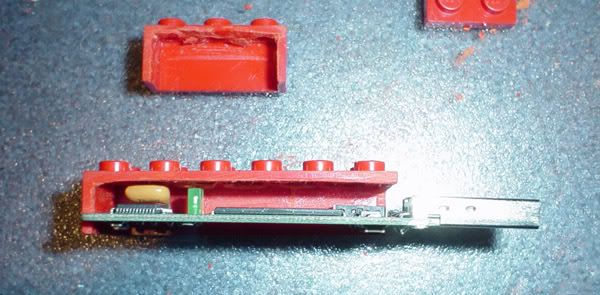
Above: Trying to fit the drive into one of the hollowed out pieces. Extra sanding and cutting was needed to make enough room for the capacitor (yellow thing on the far left of the board).
After hollowing out all the top pieces, I began working on the bottom pieces. I used flat lego pieces for this and at first just tried to cut the "dots" off with the hot exacto knife. This did not work as it produced holes in the pieces (see picture below). So I tried again, this time sanding the "dots" down as much as I could.
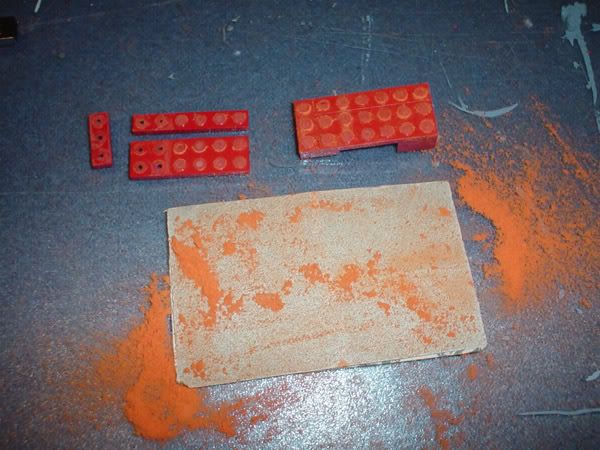
Above: Sanding the bottom pieces. The pieces to the left are my first (failed) attempt at slimming the bottom.
I then glued all the bottom pieces together and glued two of the top pieces together. I decided to save the third piece for later because it would have to be cut out for the USB plug to protrude. I used superglue (cyanoacrylate) to glue these together and managed to only fuse my fingers together once or twice. After the top was glued together I drilled a hole through one of the "dots" on top to let the LED show through. I used a hot glue gun to inject some hot glue into the hole and back into the interior of the hollowed out top which will diffuse the light from the LED. I then capped the hole with a clear round LEGO piece to complete the look.
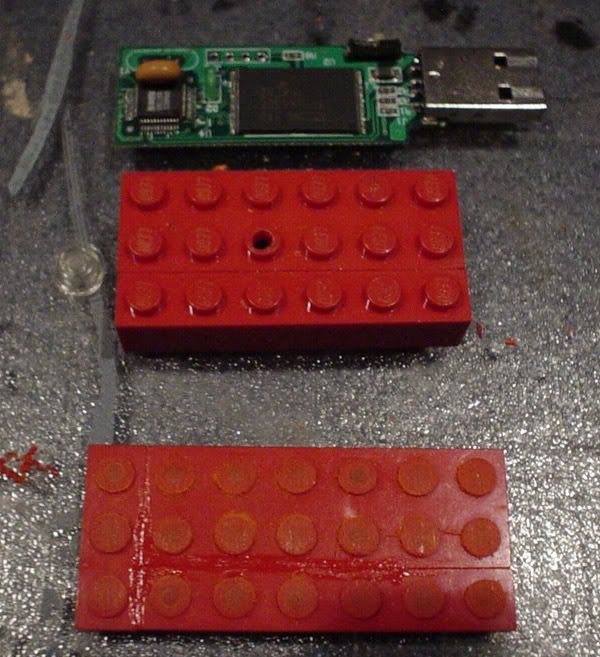
Above: The completed bottom and partially completed top with LED hole.
The board was then fitted into the top and glued into place with hot glue. The drive has a physical write lock on it, which is just a switch that I had to sand down in order to get it to fit. I left it in the unlocked position and didn't bother with trying to figure out how to keep that capability. It was just easier not to. After that I was able to cut out a portion of the remaining top piece for the USB plug and then I glued that piece onto the top to finally complete the top. Once that was done it was simply a matter of gluing on the bottom and I was done. Hooray!
Well... not quite yet. As I was placing the top and bottom together, they snapped into place and consequently a little bit of superglue shot in my eye. So I spent the next 15 minutes rinsing my eye out and the next few hours blinking like a madman and putting in eye drops. Don't worry, I'm ok now, but damn do I wish I had put on safety glasses. Anyhoo, it's finished and it works--success!
Also, I was going to make a cap, but the whole superglue-in-the-eye thing combined with the fact that I had already spent a few hours on the drive itself made me fell less than motivated to do so.
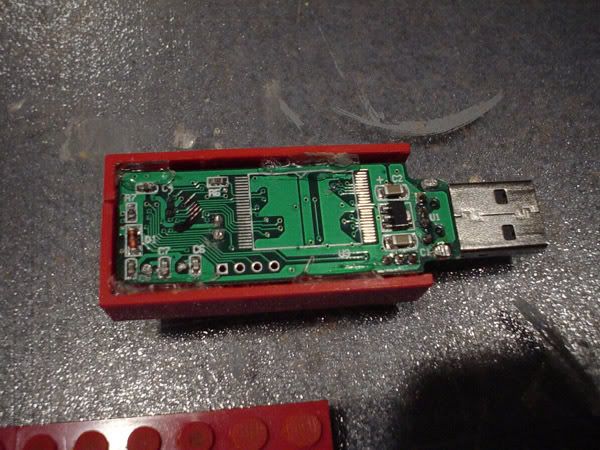
Above: The board fitted into the top and held in place with hot glue.

Above: The finished product.

Above: It's not much bigger than its previous shell.
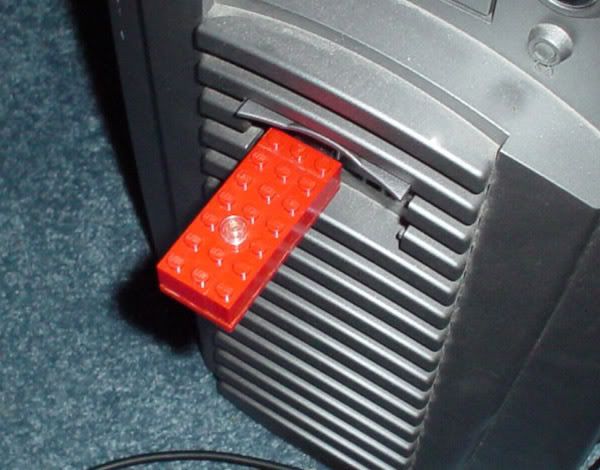
Above: It fits and it works!
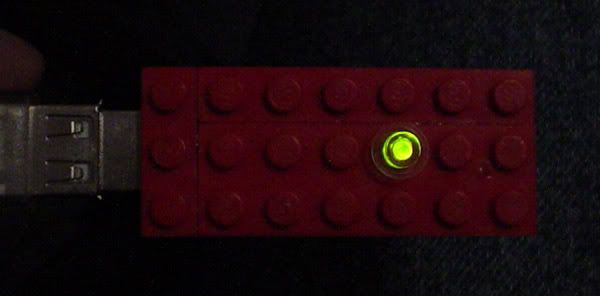
Above: The active light couldn't have turned out any better.
So I grabbed my cheap (cheap in quality, I actually got it for free) 32MB USB Flash Drive, some lego bricks (I figured out that it would have to be 3x6), and scrounged up the necessary tools for the job. To cut away the sides of the various pieces I used a small saw in combination with an exacto knife that I heated up over a gas burner (a regular butane lighter just wouldn't get hot enough). I'd then use the knife and sandpaper to get rid of any excess plastic.

Above: Some of the tools I used plus a couple hollowed out LEGO pieces.

Above: Trying to fit the drive into one of the hollowed out pieces. Extra sanding and cutting was needed to make enough room for the capacitor (yellow thing on the far left of the board).
After hollowing out all the top pieces, I began working on the bottom pieces. I used flat lego pieces for this and at first just tried to cut the "dots" off with the hot exacto knife. This did not work as it produced holes in the pieces (see picture below). So I tried again, this time sanding the "dots" down as much as I could.

Above: Sanding the bottom pieces. The pieces to the left are my first (failed) attempt at slimming the bottom.
I then glued all the bottom pieces together and glued two of the top pieces together. I decided to save the third piece for later because it would have to be cut out for the USB plug to protrude. I used superglue (cyanoacrylate) to glue these together and managed to only fuse my fingers together once or twice. After the top was glued together I drilled a hole through one of the "dots" on top to let the LED show through. I used a hot glue gun to inject some hot glue into the hole and back into the interior of the hollowed out top which will diffuse the light from the LED. I then capped the hole with a clear round LEGO piece to complete the look.

Above: The completed bottom and partially completed top with LED hole.
The board was then fitted into the top and glued into place with hot glue. The drive has a physical write lock on it, which is just a switch that I had to sand down in order to get it to fit. I left it in the unlocked position and didn't bother with trying to figure out how to keep that capability. It was just easier not to. After that I was able to cut out a portion of the remaining top piece for the USB plug and then I glued that piece onto the top to finally complete the top. Once that was done it was simply a matter of gluing on the bottom and I was done. Hooray!
Well... not quite yet. As I was placing the top and bottom together, they snapped into place and consequently a little bit of superglue shot in my eye. So I spent the next 15 minutes rinsing my eye out and the next few hours blinking like a madman and putting in eye drops. Don't worry, I'm ok now, but damn do I wish I had put on safety glasses. Anyhoo, it's finished and it works--success!
Also, I was going to make a cap, but the whole superglue-in-the-eye thing combined with the fact that I had already spent a few hours on the drive itself made me fell less than motivated to do so.

Above: The board fitted into the top and held in place with hot glue.

Above: The finished product.

Above: It's not much bigger than its previous shell.

Above: It fits and it works!

Above: The active light couldn't have turned out any better.