Starburst Tutorial In Gimp
Good Morning!!
I don't know about anyone else but i personally love learning new things. i myself use 4 different photo editing programs currently. PSP 8, PSP X, PS 7, And The Gimp. I write alot of tutorials for Gimp due to the fact it's free and alot of people use it. So this is a tutorial made for Gimp but is translateable.
I learned this is Adobe Photoshop 7 I translated to Gimp for you all hope it's easy to understand if not let me know...
Cross Posted Various Places
Here is what we are going to make:

Open Gimp, Create a new image, Make sure that you have a transparent background. When you select FILE>NEW a box pops up. This is where you set your dimensions. For this larger to start works better so i use 420x300px then click the ADVANCED OPTIONS TABS In there it says FILL WITH BACKGROUND COLOR Click on that and select TRANSPARENCY
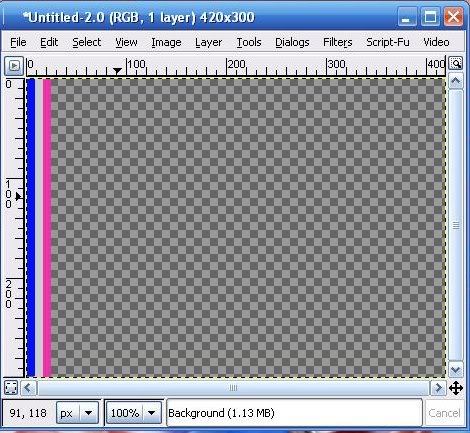
This gives you the checker board looking box.
Now click on your RECTANGULAR SELECTION TOOL The box first one on the tools palette. On your transparent background make a selection in a narrow width. Fill it with a color of your choice. do this 2 or 3 times filling with different colors like so.

Now i am not sure but i personally couldn't figure out how to export a selected region to a pattern in Gimp so if you know please let me know...
What i did was copied the background and moved the stripes across the screen till the entire background was filled. Then i Merged All visible layers and cropped out a square region. Approximately 250x250 px. So we aren't resizing to an icon just yet.
Now go to FILTERS>DISTORTS>POLAR CORDS When the box pops up put in these settings:
Circle depth in percent=0.00
Offset Angle=75.00
Check ONLY = TO POLAR
Click OK
This will give you the burst.
Now crop the image to your liking and resize to 100x100 px....There you go....Custom starburst background.
Example of use:

Feel free to ask questions.
I don't know about anyone else but i personally love learning new things. i myself use 4 different photo editing programs currently. PSP 8, PSP X, PS 7, And The Gimp. I write alot of tutorials for Gimp due to the fact it's free and alot of people use it. So this is a tutorial made for Gimp but is translateable.
I learned this is Adobe Photoshop 7 I translated to Gimp for you all hope it's easy to understand if not let me know...
Cross Posted Various Places
Here is what we are going to make:

Open Gimp, Create a new image, Make sure that you have a transparent background. When you select FILE>NEW a box pops up. This is where you set your dimensions. For this larger to start works better so i use 420x300px then click the ADVANCED OPTIONS TABS In there it says FILL WITH BACKGROUND COLOR Click on that and select TRANSPARENCY
This gives you the checker board looking box.
Now click on your RECTANGULAR SELECTION TOOL The box first one on the tools palette. On your transparent background make a selection in a narrow width. Fill it with a color of your choice. do this 2 or 3 times filling with different colors like so.

Now i am not sure but i personally couldn't figure out how to export a selected region to a pattern in Gimp so if you know please let me know...
What i did was copied the background and moved the stripes across the screen till the entire background was filled. Then i Merged All visible layers and cropped out a square region. Approximately 250x250 px. So we aren't resizing to an icon just yet.
Now go to FILTERS>DISTORTS>POLAR CORDS When the box pops up put in these settings:
Circle depth in percent=0.00
Offset Angle=75.00
Check ONLY = TO POLAR
Click OK
This will give you the burst.
Now crop the image to your liking and resize to 100x100 px....There you go....Custom starburst background.
Example of use:
Feel free to ask questions.