The One Tutorial Worth Saving
I love these textures made by xonlyashesx. I put them to good use and I love the results!
We were be going from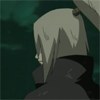
to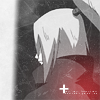
First a started out with a screencap of Deidara *drool* from Ninpouchou. After cropping I came up with this.
It was far too dark, so I lightened it up by copying my base and setting it to Screen 100%.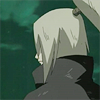
Now it looks washed out, so I decided to add some contrast to make the image a little richer. I did this by adding a softlight layer of the base at 50%.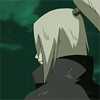
I put in your garden variety exlusion layer in dark navy
and set it at 57%.
I then took a sandy colored layer
and set it on Multiply 12%.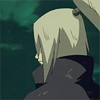
Next, I added a gradient map to turn my image black and white. You can either do this by going to Image>Adjustments>Desaturate (Shft+Ctrl+U), adding a Hue/Saturation layer and setting the master Saturation at -100, or adding a black or white raster layer and setting it to Color. Which ever you prefer to do.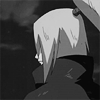
I thought it was a bit too dark for my taste, so I added a Brightness/Contrast layer. I can't remember my exact settings. I think I set the brightness to around +15 and the contrast to around +6. But this really depends on your image and your taste anyway.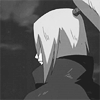
Now the fun part! I took this texture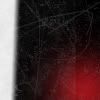
from xonlyashesx and set it to Screen 100%.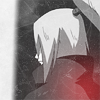
Add whatever text or brushes you prefer, and you're done!
Play around with the tutorial and see what you come up with! I'd love it if you'd post the results so I could see what you came up with! As always, if you have any questions just ask!
We were be going from

to

First a started out with a screencap of Deidara *drool* from Ninpouchou. After cropping I came up with this.

It was far too dark, so I lightened it up by copying my base and setting it to Screen 100%.

Now it looks washed out, so I decided to add some contrast to make the image a little richer. I did this by adding a softlight layer of the base at 50%.

I put in your garden variety exlusion layer in dark navy

and set it at 57%.

I then took a sandy colored layer

and set it on Multiply 12%.

Next, I added a gradient map to turn my image black and white. You can either do this by going to Image>Adjustments>Desaturate (Shft+Ctrl+U), adding a Hue/Saturation layer and setting the master Saturation at -100, or adding a black or white raster layer and setting it to Color. Which ever you prefer to do.

I thought it was a bit too dark for my taste, so I added a Brightness/Contrast layer. I can't remember my exact settings. I think I set the brightness to around +15 and the contrast to around +6. But this really depends on your image and your taste anyway.

Now the fun part! I took this texture

from xonlyashesx and set it to Screen 100%.

Add whatever text or brushes you prefer, and you're done!

Play around with the tutorial and see what you come up with! I'd love it if you'd post the results so I could see what you came up with! As always, if you have any questions just ask!