(no subject)
Program(s)+version: Photoshop CS2
Involves: Curves, Levels, Selective Color
Translatable: yes
Steps: 7
Difficulty: easy
How to:
- brighten and enhance dull caps, using Curves and Levels
- repair cut off images
- create negative space
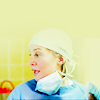
Made in Photoshop CS2. Translatable, there's one Selective Color layer, but the result can be recreated.
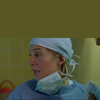
-->
1. Crop your base. The original cap cuts off her head, so we'll have to fix that later. To make it easier, select a color near the edge with the Eyedropper Tool, it'll help to create a smooth background. Make sure you have that color set as your background color when you crop.
Duplicate your base twice and set both layers to Screen 100%.

-->
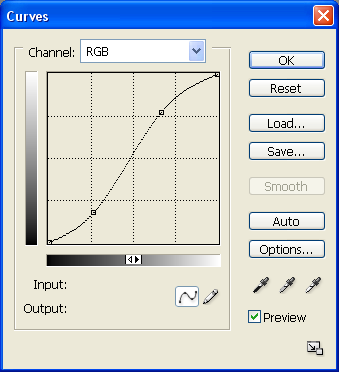
2. Add a Curves layer. We'll only work on the RGB tab, since the image only needs brightening and more contrast. The colors are nice enough that this will make them pop.
Make one point in the upper half (affects light shades) and draw it upwards until it's a lot brighter, then make one in the bottom half (affects dark shades) and draw it downwards until you get the contrast you're looking for.
This so-called s-curve is one of the easist tools to improve contrast.
RGB:
First point: I: 170 O: 197
Second point: I: 67 O: 46

-->
3. Copy/paste everything as a new layer (Ctrl+Alt+Shift+e). I prefer this to merging down, because I can go back and change things if there's need to.
Select the Smudge Tool, choose a hard round brush, around 3 or 5 px. Smooth out the dark part on the right, then carefully re-build her cap. Start smudging from the bright parts in the middle until you have roughly the shape you need, from there carefully smudge the outline.

-->
4. To further increase contrast, add a Levels layer. Drag the grey slider to the left, this will affect the midtones and make the image lighter. Drag the black slider to the right, this will affect the dark shades and make them darker.
RGB Input: 44 1,79 245

-->
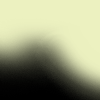
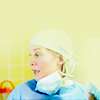
5. To create the space above her head, pick a light green next to her head with the Eyedropper Tool. This will make sure it blends well with the background we have so far. Select a big soft round brush, around 65px, and paint around her. Make sure the fuzzy edge only partially covers her head.
Lower the opcity until you can see the cap shine through (here I lowered it to 87%)

+
-->
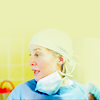
6. If you use Photoshop, add a Selective Color layer and increase the Reds: lower Cyan to make Red warmer, increase Black to make it darker.
This step will affect her skin and the red bit in the background.
Reds:
Cyan: -76
Black: +26
If you want to achieve a similar effect in a another program, pick a darker shade of red from the red bit in the background.
Add a new layer and paint over this red bit and her cheeks with a soft round brush, blur it. Set it to Overlay on a low opacity.

-->
7. As a last step, add a bit more contrast. Copy/paste everthing as a new layer, desaturate it. Slightly increase the contrast and lower the brightness directly on that layer (Image/Adjust/Brightness and Contrast).
Set it to Color Burn and lower the opacity until you like the result (I chose 37%).

-->
My layers.
Feel free to ask any questions.
comment / re-distribute / hotlink / watch
Involves: Curves, Levels, Selective Color
Translatable: yes
Steps: 7
Difficulty: easy
How to:
- brighten and enhance dull caps, using Curves and Levels
- repair cut off images
- create negative space
Made in Photoshop CS2. Translatable, there's one Selective Color layer, but the result can be recreated.

-->

1. Crop your base. The original cap cuts off her head, so we'll have to fix that later. To make it easier, select a color near the edge with the Eyedropper Tool, it'll help to create a smooth background. Make sure you have that color set as your background color when you crop.
Duplicate your base twice and set both layers to Screen 100%.

-->

2. Add a Curves layer. We'll only work on the RGB tab, since the image only needs brightening and more contrast. The colors are nice enough that this will make them pop.
Make one point in the upper half (affects light shades) and draw it upwards until it's a lot brighter, then make one in the bottom half (affects dark shades) and draw it downwards until you get the contrast you're looking for.
This so-called s-curve is one of the easist tools to improve contrast.
RGB:
First point: I: 170 O: 197
Second point: I: 67 O: 46


-->

3. Copy/paste everything as a new layer (Ctrl+Alt+Shift+e). I prefer this to merging down, because I can go back and change things if there's need to.
Select the Smudge Tool, choose a hard round brush, around 3 or 5 px. Smooth out the dark part on the right, then carefully re-build her cap. Start smudging from the bright parts in the middle until you have roughly the shape you need, from there carefully smudge the outline.

-->

4. To further increase contrast, add a Levels layer. Drag the grey slider to the left, this will affect the midtones and make the image lighter. Drag the black slider to the right, this will affect the dark shades and make them darker.
RGB Input: 44 1,79 245

-->

5. To create the space above her head, pick a light green next to her head with the Eyedropper Tool. This will make sure it blends well with the background we have so far. Select a big soft round brush, around 65px, and paint around her. Make sure the fuzzy edge only partially covers her head.
Lower the opcity until you can see the cap shine through (here I lowered it to 87%)

+

-->

6. If you use Photoshop, add a Selective Color layer and increase the Reds: lower Cyan to make Red warmer, increase Black to make it darker.
This step will affect her skin and the red bit in the background.
Reds:
Cyan: -76
Black: +26
If you want to achieve a similar effect in a another program, pick a darker shade of red from the red bit in the background.
Add a new layer and paint over this red bit and her cheeks with a soft round brush, blur it. Set it to Overlay on a low opacity.

-->

7. As a last step, add a bit more contrast. Copy/paste everthing as a new layer, desaturate it. Slightly increase the contrast and lower the brightness directly on that layer (Image/Adjust/Brightness and Contrast).
Set it to Color Burn and lower the opacity until you like the result (I chose 37%).

-->

My layers.
Feel free to ask any questions.
comment / re-distribute / hotlink / watch