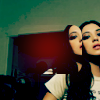
Michelle Branch Tutorial
Tutorial #2.
Go from
to
With using PSP X
DO NOT COPY EXACTLY! I post these for a reason and if you snag and use them ( *looks at a couple* ) I will never post another tutorial again. I'm talking mostly about coloring!
01. Start of with base.
02. Duplicate base and set it to screen. Adjust to liking.
03. Add new layer
and set to softlight. I put mine in the lower 20's for right now.
03. Add new layer
and set to burn. 100%.
04. Add new layout
and set to soft light. 100%.
05. This is usually when I adjust the screen and the first softlight layer to my liking. :) Depends on what base you use.
06. Then I selected the selection tool and clicked on 'rounded rectangle' and selected a portion of my icon;
. Copied it (ctrl+c)
07. Ctrl+l the copied selection into the icon and postioned where I liked it.
08. Add
and set to screen. Now, I thought the red was too bright so I changed the opacity lower.
This is what it looks like;
Add text and bam! Finished icon!:
Other style/colors, that are similar, you can use with this;


Go from

to

With using PSP X
DO NOT COPY EXACTLY! I post these for a reason and if you snag and use them ( *looks at a couple* ) I will never post another tutorial again. I'm talking mostly about coloring!
01. Start of with base.

02. Duplicate base and set it to screen. Adjust to liking.
03. Add new layer

and set to softlight. I put mine in the lower 20's for right now.
03. Add new layer

and set to burn. 100%.
04. Add new layout

and set to soft light. 100%.
05. This is usually when I adjust the screen and the first softlight layer to my liking. :) Depends on what base you use.
06. Then I selected the selection tool and clicked on 'rounded rectangle' and selected a portion of my icon;

. Copied it (ctrl+c)
07. Ctrl+l the copied selection into the icon and postioned where I liked it.
08. Add

and set to screen. Now, I thought the red was too bright so I changed the opacity lower.
This is what it looks like;

Add text and bam! Finished icon!:

Other style/colors, that are similar, you can use with this;


