(no subject)
2 1/2 tutorials for you today requests from both gabriela_gosden and dragonsquee. Since gabriela_gosden asked first and I pretty much did the same for #2 of Dogs and the Ling/Ran Fan icons so I'll just tack on how to do the pop out affect at the end of the first DOGS tutorial :P
Credit for textures used located here
#1:
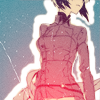
and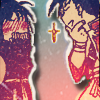
Step One. Color it :D!
Here is my base.
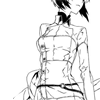
Skin Color:#F3DFD5
Coat Color:#2B192E
Scarf Color:#A2A7BF
All set to multiply, Opacity for all: 65%
You could put them all on one layer, but I like having a layer for each color so if I have to move/adjust one color I won't have too much trouble.
Now I have this
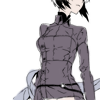
Step Two the border
Make a new layer and fill it with #0D276D. Set it to exclusion.
You should get something similar to this
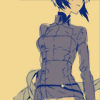
Set the Opacity to 77%. Now either using a layer mask or the erase tool, trace AROUND the girl's figure. Do NOT erase any of the fill layer that is on the girl. Make the border thicker/thinner randomly to give the icon more of a imperfect feel.
The layer itself should look something like this:

Since the layer is on exlusion however, the icon should look like this:
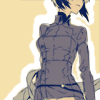
Now duplicate the fill layer and go to Image>Adjustments>Hue/Saturation
Hue:150
Saturation:100
Lightness:64
Set the Opacity of this new, salmon colored layer to 94% and make sure the mode is still exclusion.
Now it looks like this:
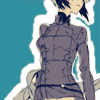
Step Three Fancying it up :D
Take this texture:
Set it to screen. Now you have this.
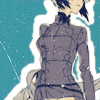
Now take this light texture (Which I made by messing around with
Filter>Render>Lighting Effects and Edit>Free Transform):
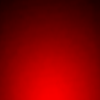
And Set it to Screen
Tada!

For the Ling/Ranfan icon the blue exclusion layer opacity was 72% and the salmon color was 61% and cleaning up the base was a total bitch DX
The textures were slightly different also.
and
c
Lastly to make the shadow effect copy and select all of your layers (except the red light texture I made) and then go to Layers>Merge Layers. Select the background of the new layer (anything that isn't the white border/ling/ranfan)
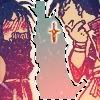
and then click delete. Nothing should look different about your icon right now. Now select the newest layer and go to Layer>Layer Styles>Drop Shadow
Blend Mode: Multiply
Opacity:70%
Angle:123 degrees
Distance:9
Spread:0
Size:8
There you go :D

Sorry if this confusing. This icon took me awhile to figure out perfectly myself so it's kind of hard to explain how I got it XD.
#2:
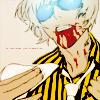
Step One. Color
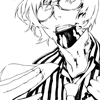
Each color should probably be in it's own layer. Make sure the blood layer is UNDER the skin layer. Screen does not usually work well OVER a multiplied layer.
Hair
color:#E5E5E5
Mode:Multiply
Opacity:100%
Blood
color:#D40000
Mode:Screen
Opacity:75%
Skin
color:#EBDAD1
Mode:Multiply
Opacity:100%
Striped Shirt
color:#FFE100
Mode:Multiply
Opacity:100%
Glasses
lens color:#1D42FF
Cloud reflection:#99AAFF
Mode:Multiply
Opacity:64%
Here we are:
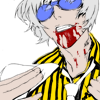
Step Two. Fancying it up.
Fill a new layer with #405878
Mode:Difference
Opacity:40%
Now delete the bits covering his jacket.
It should look like this:
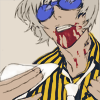
Now copy all the layers you've created so far and merge the copied files together to form a new layer. Put this layer on top of all the others and set the mode to softlight.
You get this:
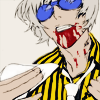
New layer
fill with:#EED8AA
Mode: Color Burn
Opacity:100%

New Text Layer
Font: Arial black
size: 2
letter spacing:300
special:small caps
Anti-aliasing method:Smooth
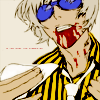
New Layer
fill with:#F8E8E0
Mode:Linear Burn
Opacity: 17%

Put this gradient as a new layer
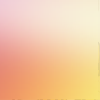
Mode: Soft light
Opacity:59%
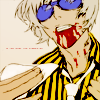
Experimented with Filter>Render>Lighting Effects made two 'omni' light texture layers (one over each lens of Giovanni's gafas de sol) and merged them to get this:

Put as new layer and set to screen

Done!
So...that was only two hours of my life XD Hope you like!
Edit: NO CLUE what happened to my layout -_-; Why did I trust imageshack? WHY?! The only thing I hosted at photobucket was my header XD thank goodness! I'll probably just make a new layout for myself *_* yay!
Credit for textures used located here
#1:

and

Step One. Color it :D!
Here is my base.

Skin Color:#F3DFD5
Coat Color:#2B192E
Scarf Color:#A2A7BF
All set to multiply, Opacity for all: 65%
You could put them all on one layer, but I like having a layer for each color so if I have to move/adjust one color I won't have too much trouble.
Now I have this

Step Two the border
Make a new layer and fill it with #0D276D. Set it to exclusion.
You should get something similar to this

Set the Opacity to 77%. Now either using a layer mask or the erase tool, trace AROUND the girl's figure. Do NOT erase any of the fill layer that is on the girl. Make the border thicker/thinner randomly to give the icon more of a imperfect feel.
The layer itself should look something like this:

Since the layer is on exlusion however, the icon should look like this:

Now duplicate the fill layer and go to Image>Adjustments>Hue/Saturation
Hue:150
Saturation:100
Lightness:64
Set the Opacity of this new, salmon colored layer to 94% and make sure the mode is still exclusion.
Now it looks like this:

Step Three Fancying it up :D
Take this texture:

Set it to screen. Now you have this.

Now take this light texture (Which I made by messing around with
Filter>Render>Lighting Effects and Edit>Free Transform):

And Set it to Screen
Tada!

For the Ling/Ranfan icon the blue exclusion layer opacity was 72% and the salmon color was 61% and cleaning up the base was a total bitch DX
The textures were slightly different also.

and

c
Lastly to make the shadow effect copy and select all of your layers (except the red light texture I made) and then go to Layers>Merge Layers. Select the background of the new layer (anything that isn't the white border/ling/ranfan)

and then click delete. Nothing should look different about your icon right now. Now select the newest layer and go to Layer>Layer Styles>Drop Shadow
Blend Mode: Multiply
Opacity:70%
Angle:123 degrees
Distance:9
Spread:0
Size:8
There you go :D

Sorry if this confusing. This icon took me awhile to figure out perfectly myself so it's kind of hard to explain how I got it XD.
#2:

Step One. Color

Each color should probably be in it's own layer. Make sure the blood layer is UNDER the skin layer. Screen does not usually work well OVER a multiplied layer.
Hair
color:#E5E5E5
Mode:Multiply
Opacity:100%
Blood
color:#D40000
Mode:Screen
Opacity:75%
Skin
color:#EBDAD1
Mode:Multiply
Opacity:100%
Striped Shirt
color:#FFE100
Mode:Multiply
Opacity:100%
Glasses
lens color:#1D42FF
Cloud reflection:#99AAFF
Mode:Multiply
Opacity:64%
Here we are:

Step Two. Fancying it up.
Fill a new layer with #405878
Mode:Difference
Opacity:40%
Now delete the bits covering his jacket.
It should look like this:

Now copy all the layers you've created so far and merge the copied files together to form a new layer. Put this layer on top of all the others and set the mode to softlight.
You get this:

New layer
fill with:#EED8AA
Mode: Color Burn
Opacity:100%

New Text Layer
Font: Arial black
size: 2
letter spacing:300
special:small caps
Anti-aliasing method:Smooth

New Layer
fill with:#F8E8E0
Mode:Linear Burn
Opacity: 17%

Put this gradient as a new layer

Mode: Soft light
Opacity:59%

Experimented with Filter>Render>Lighting Effects made two 'omni' light texture layers (one over each lens of Giovanni's gafas de sol) and merged them to get this:

Put as new layer and set to screen

Done!
So...that was only two hours of my life XD Hope you like!
Edit: NO CLUE what happened to my layout -_-; Why did I trust imageshack? WHY?! The only thing I hosted at photobucket was my header XD thank goodness! I'll probably just make a new layout for myself *_* yay!