My first tut
Okay, as I promised, here it is the tutorial that I made. This is my first tut ever, so please be kind :D
We are going to this
from this
Tut for Paint Shop Pro. It requires knowledge of the graphic program. Level: Medium (I think)
First of all, I have to remind you that English is not my mother tongue, I really made an effort in order to make myself as clear as possible, so I hope you all can understand the tut. And, this tut only shows how I made the icon, it doesn't show any tecnique further than that.
This was my image.

Step 1. Cropp it and sharpen it once (over-sharpening is a huge no). Now I'm going to call the result of this The Base.
Step 2. Duplicate your base and set it to screen. Low the oppacity to 26.
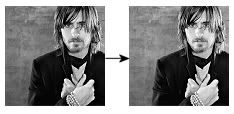
Step 3. Duplicate your base again put it above everything and set it to soft light. Low the oppacity to 46.
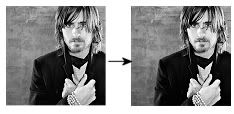
Step 4. Create a new raster layer fill it with this color and set it to Burn. Low the oppacity to 42.
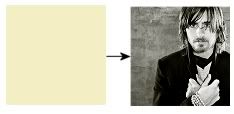
Step 5. Take this color gradient put it above all the layers and set it to soft light. Low the oppacity to 75.
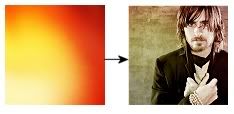
Step 6. Take this gradient put it above all the layers and set it to Hard Light. Oppacity %100. Erase a bit the part that covers Jared's face, not the hair, only the face. I used my erase tool with Oppacity 70 and Hardness 75.
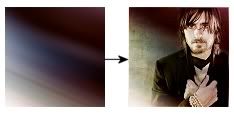
Step 7. Take this gradient put it above all the layers and set it to Dodge. Low the oppacity to 82. And again erase the part that covers Jared's face. Erase tool with the same numbers.
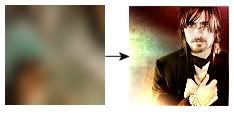
Step 8. Duplicate your base again, put it above all the layers and then set it to Soft Light. Oppacity %100.
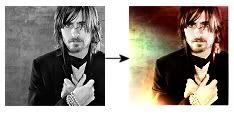
Now the coloring is done. The brush part begins, and the most tricky.
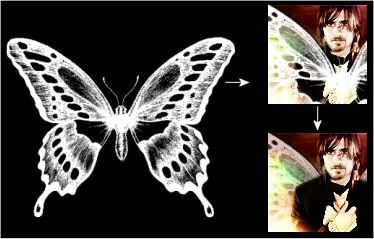
Step 9. Take this brush filled with black, carefully put it above Jared, the butterfly's body has to mach with Jared's body. After that carefully erase the butterfly body, only leave the wings. After that set it to Overlay. Low the oppacity to 48.
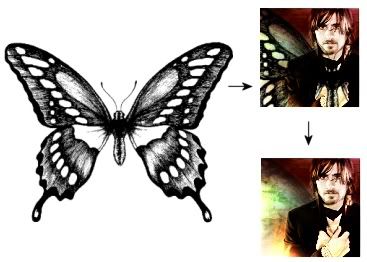
Step 10. Take again the butterfly brush, but this time fill it with white. Put it above Jared but this time put it a bit lower than the black wings. What I wanted was to give the white wings some black shadow. Again carefully erase the butterfly body (be carefull with the edges, we don't want to leave white marks on Jared) And then set the layer to Luminance. Low the oppacity to 76.
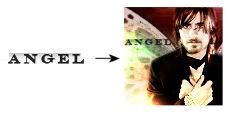
Step 11. Take this text and put it on the wing.
Merge layers and we're done. Do not merge layers before you're completely done, if you do it you cannot correct or change anything. If you have to leave your graphic half-done, save it without merging and finish it later.
The final product is-->
Any comments? Questions? Doubts?
I hope this was helpful. If you try it I'd love to see what you get.
BTW, the credits of the resoruces I used are in my personal user info.
Lis XD
We are going to this
from this

Tut for Paint Shop Pro. It requires knowledge of the graphic program. Level: Medium (I think)
First of all, I have to remind you that English is not my mother tongue, I really made an effort in order to make myself as clear as possible, so I hope you all can understand the tut. And, this tut only shows how I made the icon, it doesn't show any tecnique further than that.
This was my image.

Step 1. Cropp it and sharpen it once (over-sharpening is a huge no). Now I'm going to call the result of this The Base.
Step 2. Duplicate your base and set it to screen. Low the oppacity to 26.

Step 3. Duplicate your base again put it above everything and set it to soft light. Low the oppacity to 46.

Step 4. Create a new raster layer fill it with this color and set it to Burn. Low the oppacity to 42.

Step 5. Take this color gradient put it above all the layers and set it to soft light. Low the oppacity to 75.

Step 6. Take this gradient put it above all the layers and set it to Hard Light. Oppacity %100. Erase a bit the part that covers Jared's face, not the hair, only the face. I used my erase tool with Oppacity 70 and Hardness 75.

Step 7. Take this gradient put it above all the layers and set it to Dodge. Low the oppacity to 82. And again erase the part that covers Jared's face. Erase tool with the same numbers.

Step 8. Duplicate your base again, put it above all the layers and then set it to Soft Light. Oppacity %100.

Now the coloring is done. The brush part begins, and the most tricky.
Step 9. Take this brush filled with black, carefully put it above Jared, the butterfly's body has to mach with Jared's body. After that carefully erase the butterfly body, only leave the wings. After that set it to Overlay. Low the oppacity to 48.

Step 10. Take again the butterfly brush, but this time fill it with white. Put it above Jared but this time put it a bit lower than the black wings. What I wanted was to give the white wings some black shadow. Again carefully erase the butterfly body (be carefull with the edges, we don't want to leave white marks on Jared) And then set the layer to Luminance. Low the oppacity to 76.

Step 11. Take this text and put it on the wing.

Merge layers and we're done. Do not merge layers before you're completely done, if you do it you cannot correct or change anything. If you have to leave your graphic half-done, save it without merging and finish it later.
The final product is-->
Any comments? Questions? Doubts?
I hope this was helpful. If you try it I'd love to see what you get.
BTW, the credits of the resoruces I used are in my personal user info.
Lis XD