Second tutorial
I'm on a roll lately! ^^
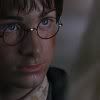
to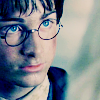
&nd

to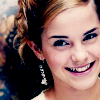
in gimp
SAME METHOD!
So, I'm showing you two examples of this tutorial to show you this tutorial can work out very differently! =)
[1] Crop your base to 100 X 100. Sharpen it.
[2] Screen it. I didn't screen my base with the Emma Watson example, but I did do it with the Harry Potter one.
[3] New layer; fill with #6ba1eb, burn.
[4] New layer; fill with #c3e3f5, soft light.
[5] New layer; fill with #f5ede3, multiply.
[6] Duplicate that layer. Set it again to multiply.
[7] Duplicate your base; drag it on top, soft light.
Play with your opacities! I mostly set them to 100%, but it all depends on your image.
That's all! I would love to see your results!

*HUGS* TOTAL! give halleeluuia more *HUGS*
Get hugs of your own
There's more:
[x] Feel free to friend me!
[x] Comments are really nice
[x] You can see more examples of this method in this post ('Lost' &nd 'HP &nd 'Emma Watson')

to

&nd

to

in gimp
SAME METHOD!
So, I'm showing you two examples of this tutorial to show you this tutorial can work out very differently! =)
[1] Crop your base to 100 X 100. Sharpen it.
[2] Screen it. I didn't screen my base with the Emma Watson example, but I did do it with the Harry Potter one.
[3] New layer; fill with #6ba1eb, burn.
[4] New layer; fill with #c3e3f5, soft light.
[5] New layer; fill with #f5ede3, multiply.
[6] Duplicate that layer. Set it again to multiply.
[7] Duplicate your base; drag it on top, soft light.
Play with your opacities! I mostly set them to 100%, but it all depends on your image.
That's all! I would love to see your results!
*HUGS* TOTAL! give halleeluuia more *HUGS*
Get hugs of your own
There's more:
[x] Feel free to friend me!
[x] Comments are really nice
[x] You can see more examples of this method in this post ('Lost' &nd 'HP &nd 'Emma Watson')