#24 - Nana Tutorial
Going from:
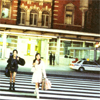
to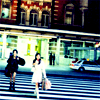
No selective coloring, involves levels.
Begin with your base:

For this particular base, I didn't need to brighten it anymore, but if you need to, then just duplicate your base and set the layer to SCREEN. You may even want to duplicate it again and set that layer to SOFTLIGHT. Just depends on your picture.
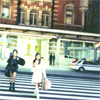
Create a new layer filled with #77abdb and set the layer to SOFTLIGHT 100%:

>
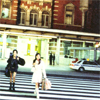
Create a new layer filled with #eebc9b and set the layer to BURN 43%:
>
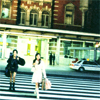
Go to Layers>New Adjustment Layer>COLOR BALANCE, and enter in:
SHADOWS: -18, 15, 12
MIDTONES: -39, -10, -17
NO HIGHLIGHTS
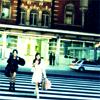
Now, duplicate, yes DUPLICATE, the previous COLOR BALANCE layer, except change:
SHADOWS: -18, -31, 12
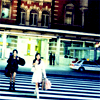
Now, go to Layers>New Adjustment Layer>LEVELS and enter in:
RGB: I: 25, 1.23, 255
GREEN: I: 19, .94, 255
And finally, go to Layers> New Adjustment Layer>HUE/SATURATION/LIGHTNESS and enter in:
Master: S: 17
REDS: S: 21
CYANS: S: -10

And it's done! Yay, how pretty! If it's too red, then you may want to decrease the saturation in the REDS on the last step. Of course, if you didn't notice, it is quite blue, like most of my tutorials, cough. So that's why I desaturated the cyans a bit in the last step.
If you have any questions, feel free to ask. Comments and results are appreciated!! (Oh, and I've never said this before due to embarrassment and trying not to sound vain, but you can friend me if you like my tutorials!)
Other examples:
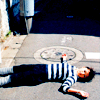


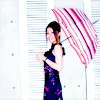

Oh yes. And I would really really just love to thank Nana-nana.net for having all the awesome HQ pictures that I love to steal. If that website didn't exist, then neither would this tutorial (or my header, for that matter)!
-Kelsey

to

No selective coloring, involves levels.
Begin with your base:

For this particular base, I didn't need to brighten it anymore, but if you need to, then just duplicate your base and set the layer to SCREEN. You may even want to duplicate it again and set that layer to SOFTLIGHT. Just depends on your picture.
Create a new layer filled with #77abdb and set the layer to SOFTLIGHT 100%:

>

Create a new layer filled with #eebc9b and set the layer to BURN 43%:

>

Go to Layers>New Adjustment Layer>COLOR BALANCE, and enter in:
SHADOWS: -18, 15, 12
MIDTONES: -39, -10, -17
NO HIGHLIGHTS

Now, duplicate, yes DUPLICATE, the previous COLOR BALANCE layer, except change:
SHADOWS: -18, -31, 12

Now, go to Layers>New Adjustment Layer>LEVELS and enter in:
RGB: I: 25, 1.23, 255
GREEN: I: 19, .94, 255

And finally, go to Layers> New Adjustment Layer>HUE/SATURATION/LIGHTNESS and enter in:
Master: S: 17
REDS: S: 21
CYANS: S: -10

And it's done! Yay, how pretty! If it's too red, then you may want to decrease the saturation in the REDS on the last step. Of course, if you didn't notice, it is quite blue, like most of my tutorials, cough. So that's why I desaturated the cyans a bit in the last step.
If you have any questions, feel free to ask. Comments and results are appreciated!! (Oh, and I've never said this before due to embarrassment and trying not to sound vain, but you can friend me if you like my tutorials!)
Other examples:


Oh yes. And I would really really just love to thank Nana-nana.net for having all the awesome HQ pictures that I love to steal. If that website didn't exist, then neither would this tutorial (or my header, for that matter)!
-Kelsey