#06: 2 tutorials (lozzy)
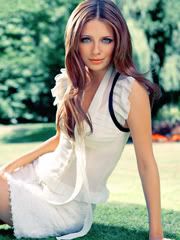
TUTORIAL #2 - MISCHA BARTON - BANNER

to
Photoshop 7 (selective colour, adjustment layers)
Image Heavy (the examples are resized)
Medium
Requested by myst56
01. Duplicate your base once and set it to SCREEN @ 30% opacity & 20% fill.
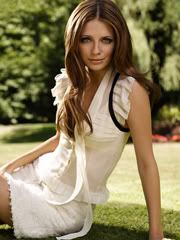
02. Create a new layer and fill it with a light blue colour, I used #C8E3ED. Set the blend mode to SOFT LIGHT @ 100%.
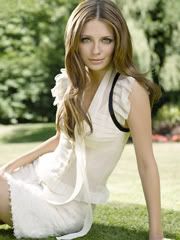
03. Create a hue & saturation new adjustment layer and up the saturation +20

04. Create a selective colour new adjustment layer, with the following settings:
REDS:
C: -100
Y: +100
YELLOWS:
C: +25
Y: -63
NEUTRALS:
C: +10
Y: -16
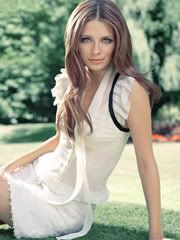
05. Create a hue & saturation new adjustment layer, with the following settings:
MASTER:
S: +15
REDS:
S: +30
YELLOWS:
S: +17
GREENS:
S: +13
CYANS:
S: +16
BLUES:
S: +13
MAGENTAS:
S: +19
Lower the opacity to 80%

06. Create a levels new adjustment layer with the following settings:
RBG:
20, 1.20, 255
RED:
20, 0.89, 255
GREEN:
20, 0.96, 255
BLUE:
20, 1.10, 255
Lower the opacity to 60%.
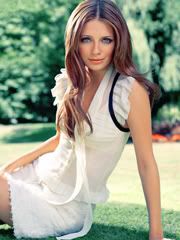
07. Create a curves new adjustment layer, with the following settings:
RBG:
88, 162
{See}
RED:
0, 128
{See}
GREEN:
0, 114
{See}
BLUE:
0, 160
{See}
It should look like THIS.
Lower the opacity & fill to 50% and set the blend mode to COLOUR BURN

08. Create a selective colour new adjustment layer, with the following settings:
REDS:
C: -10
Y: +11
YELLOWS:
C: +14
Y: +12
NEUTRALS:
C: +4
Y: -5
B: -6
09. Create a brightness & contrast new adjustment layer with the following settings:
B: -2
C: +3

10. To create the border I went Select-->All, Edit-->Stroke. When the box pops up I had 10px for the width and the colour white. Click okay. Do the select-->all, edit-->stroke thing again. This time in the box I had 1px for the width and the colour black. And you’re done.
{See}

Click to enlargen.
TUTORIAL #3 - KATE - COLOURING

to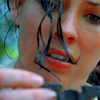
Photoshop 7 (selective colour, adjustment layers)
Image Heavy (the examples are resized)
Medium
Requested by amiricons
01. Duplicate your base once and set to SCREEN @ 100%.

02. Create a selective colour new adjustment layer with the following settings (keep in mind that settings will probably not work for all pics, because of how dark/blue my base is):
REDS:
C: -100
M: +100
Y: +100
B: +100
YELLOWS:
C: -100
M: +100
Y: +100
B: +100
NEUTRALS:
C: -11
M: +3
Y: +19
B: +4
BLACKS:
B: +2

03. Create a hue & saturation new adjustment layer with the following settings:
MASTER:
S: +20
REDS:
S: +11
YELLOWS:
S: +11
MAGENTAS:
S: +9
Lower the opacity to 75%.

04. Create a selective colour new adjustment layer with the following settings:
REDS:
C: -43
Y: +39
YELLOWS:
C: -39
Y: -30
NEUTRALS:
C: +6
Y: -4

05. Create a colour balance new adjustment layer with the following settings:
MIDTONES:
C/Y: +3
M/G: +3
Y/B: -5
SHADOWS:
C/Y: +2
M/G: +3
Y/B: +3
HIGHLIGHTS
C/Y: -5
M/G: -5
Y/B: +3
Lower the opacity to 65%

06. Create a levels new adjustment layer with the following settings:
RBG:
3, 1.07, 215
RED:
10, 1.05, 255
GREEN:
10, 1.05, 255
BLUE:
10, 1.05, 255

Done :)

to

Photoshop 7 (selective colour, adjustment layers)
Image Heavy (the examples are resized)
Medium
Requested by myst56
01. Duplicate your base once and set it to SCREEN @ 30% opacity & 20% fill.

02. Create a new layer and fill it with a light blue colour, I used #C8E3ED. Set the blend mode to SOFT LIGHT @ 100%.

03. Create a hue & saturation new adjustment layer and up the saturation +20

04. Create a selective colour new adjustment layer, with the following settings:
REDS:
C: -100
Y: +100
YELLOWS:
C: +25
Y: -63
NEUTRALS:
C: +10
Y: -16

05. Create a hue & saturation new adjustment layer, with the following settings:
MASTER:
S: +15
REDS:
S: +30
YELLOWS:
S: +17
GREENS:
S: +13
CYANS:
S: +16
BLUES:
S: +13
MAGENTAS:
S: +19
Lower the opacity to 80%

06. Create a levels new adjustment layer with the following settings:
RBG:
20, 1.20, 255
RED:
20, 0.89, 255
GREEN:
20, 0.96, 255
BLUE:
20, 1.10, 255
Lower the opacity to 60%.

07. Create a curves new adjustment layer, with the following settings:
RBG:
88, 162
{See}
RED:
0, 128
{See}
GREEN:
0, 114
{See}
BLUE:
0, 160
{See}
It should look like THIS.
Lower the opacity & fill to 50% and set the blend mode to COLOUR BURN

08. Create a selective colour new adjustment layer, with the following settings:
REDS:
C: -10
Y: +11
YELLOWS:
C: +14
Y: +12
NEUTRALS:
C: +4
Y: -5
B: -6

09. Create a brightness & contrast new adjustment layer with the following settings:
B: -2
C: +3

10. To create the border I went Select-->All, Edit-->Stroke. When the box pops up I had 10px for the width and the colour white. Click okay. Do the select-->all, edit-->stroke thing again. This time in the box I had 1px for the width and the colour black. And you’re done.
{See}

Click to enlargen.
TUTORIAL #3 - KATE - COLOURING

to

Photoshop 7 (selective colour, adjustment layers)
Image Heavy (the examples are resized)
Medium
Requested by amiricons
01. Duplicate your base once and set to SCREEN @ 100%.

02. Create a selective colour new adjustment layer with the following settings (keep in mind that settings will probably not work for all pics, because of how dark/blue my base is):
REDS:
C: -100
M: +100
Y: +100
B: +100
YELLOWS:
C: -100
M: +100
Y: +100
B: +100
NEUTRALS:
C: -11
M: +3
Y: +19
B: +4
BLACKS:
B: +2

03. Create a hue & saturation new adjustment layer with the following settings:
MASTER:
S: +20
REDS:
S: +11
YELLOWS:
S: +11
MAGENTAS:
S: +9
Lower the opacity to 75%.

04. Create a selective colour new adjustment layer with the following settings:
REDS:
C: -43
Y: +39
YELLOWS:
C: -39
Y: -30
NEUTRALS:
C: +6
Y: -4

05. Create a colour balance new adjustment layer with the following settings:
MIDTONES:
C/Y: +3
M/G: +3
Y/B: -5
SHADOWS:
C/Y: +2
M/G: +3
Y/B: +3
HIGHLIGHTS
C/Y: -5
M/G: -5
Y/B: +3
Lower the opacity to 65%

06. Create a levels new adjustment layer with the following settings:
RBG:
3, 1.07, 215
RED:
10, 1.05, 255
GREEN:
10, 1.05, 255
BLUE:
10, 1.05, 255

Done :)