Ritsuka icon tutorial
I like the look of this icon, so I thought i'd make a tutorial for it.
We're going from
to
Made in PS7, but i'm pretty sure it's translatable. ^_^
Oookay.
1.) First, take your base. Resize it and put it on a 100x100 pixel document, yadda yadda.
I have this:
2.) Duplicate your base, and set it to Desaturate. Set to soft light, 100%. Duplicate that layer.
I have this:
3.) Add a border. You don't have to do this step if you don't want one. ^_^
I have:
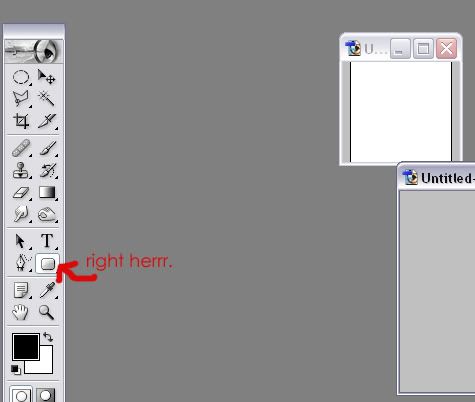
4.) Click your shape tool, and set it to Rounded Rectangle.
(screenshot: http://i124.photobucket.com/albums/p19/Shining_Collection_icons/4.jpg)
Make a text box using the Rounded Rectangle tool. Fill with the same color as the border.
I have this:
5.) Woo, coloring time. Fill a new layer with #D5F6FC. Set to Color Burn, 100%.
6.) Fill a new layer with #F4EAD8. Set to Multiply, 95%.
7.) Take this texture by
77words
Copy it onto your icon and set it to Screen, 100%.
8.) Now add the text. Place it (...obviously.. >_>) in the text box.. and you're done!