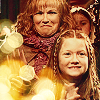
(no subject)
Hello, a somewhat more involved tutorial of brightening of an icon base. Comments are always loved :)
Program:PSP9
Level:Easy
Go from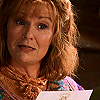
to
1) I screen capped this base personally from COS>cropped and resized to 100x100>sharpened twice

2)Use the soften tool and the smudge tool at a low opacity to carefully smooth out her skin. Be careful around the eyes and lips. I find using a smaller brush size and magnifying the icon to 400-500% helps loads. You can be very pricise which is good.

3)Duplicate the base twice>set both layers to scree

>>
4)Create a new layer>fill it with a dark blue (#12193e)>set to exclusion at 65%


5)Create a new layer>fill it with a very light tan>se to burn at 50%


6)Merge all the layerse
7)Create new layer>fill with the same dark blue>set to exclusion at 50%

8)Creat new layer>fill with a bit darker tan>set to multiply at 50%


9)Duplicate the base picture>drag to the top>desaturate>set to luminance at 50%

>>
10)Go to Enhance photo>automatic contrast enhancement> bias:Darker strength:Normal apperance:Bold

11)Paste on this texture by unknown>set to soft light at 50%

And you are done!!
Other examples


Program:PSP9
Level:Easy
Go from

to

1) I screen capped this base personally from COS>cropped and resized to 100x100>sharpened twice

2)Use the soften tool and the smudge tool at a low opacity to carefully smooth out her skin. Be careful around the eyes and lips. I find using a smaller brush size and magnifying the icon to 400-500% helps loads. You can be very pricise which is good.

3)Duplicate the base twice>set both layers to scree

>>

4)Create a new layer>fill it with a dark blue (#12193e)>set to exclusion at 65%


5)Create a new layer>fill it with a very light tan>se to burn at 50%


6)Merge all the layerse
7)Create new layer>fill with the same dark blue>set to exclusion at 50%

8)Creat new layer>fill with a bit darker tan>set to multiply at 50%


9)Duplicate the base picture>drag to the top>desaturate>set to luminance at 50%

>>

10)Go to Enhance photo>automatic contrast enhancement> bias:Darker strength:Normal apperance:Bold

11)Paste on this texture by unknown>set to soft light at 50%


And you are done!!
Other examples
