Tutorial #2: Hillary Dreamscape
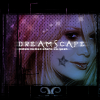
Today we are going from:

-->
This is using Photoshop CS
First, cut and crop your icon down to size:

Hillary looks a little washed out in this, and we need her looking a bit more hard. Duplicate your layer and keep the bottom on unedited in case you mess up. Take the burn tool and start darking the areas around her eyes, lips, and hair. It should end of looking something like this:

Much better. Now for a gradient we set to Multiply, 100%

-->
It's too undefined. So duplicate your burned layer and bring it up top and set it to soft light, 28% opactiy. Duplicate it again. This time go to Filter-Blur-Gaussin Blur. Set it to about 2.8. Put it on soft light at 28% opacity. Duplicate this layer. (so you have a total of three copys over the gradient, the top two blurred, all at 28%..there's a method to it, I promise)

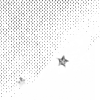
Next, I took some brushes(I'm aweful and can't remember where they're from) and paint them on black. The first is a spotted pixelly brush, the other is a star.
-->
Then in white, I used stars from Imprints. It's in a set called Nightmares and Dreamscape(coincidence! ^-^). Set it to soft light.

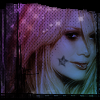
Next, we use border brushes from Hybrid Genesis. The both of these are from set 5.
-->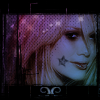
Now for the text. In evenescent I wrote "Dreamscape" in white. Add some small (size 2 does well) text underneath.
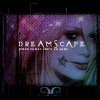
And just to complete the dreamy feel, duplicate both text layers. On the bottom text layers(under the duplicated ones) go to filter-blur-motion blur. Set it to about 28.

and viola! Your done! Enjoy and have fun! (and if you make any icons with this, I'd love to see em)

-->

This is using Photoshop CS
First, cut and crop your icon down to size:

Hillary looks a little washed out in this, and we need her looking a bit more hard. Duplicate your layer and keep the bottom on unedited in case you mess up. Take the burn tool and start darking the areas around her eyes, lips, and hair. It should end of looking something like this:

Much better. Now for a gradient we set to Multiply, 100%

-->

It's too undefined. So duplicate your burned layer and bring it up top and set it to soft light, 28% opactiy. Duplicate it again. This time go to Filter-Blur-Gaussin Blur. Set it to about 2.8. Put it on soft light at 28% opacity. Duplicate this layer. (so you have a total of three copys over the gradient, the top two blurred, all at 28%..there's a method to it, I promise)

Next, I took some brushes(I'm aweful and can't remember where they're from) and paint them on black. The first is a spotted pixelly brush, the other is a star.

-->

Then in white, I used stars from Imprints. It's in a set called Nightmares and Dreamscape(coincidence! ^-^). Set it to soft light.

Next, we use border brushes from Hybrid Genesis. The both of these are from set 5.

-->

Now for the text. In evenescent I wrote "Dreamscape" in white. Add some small (size 2 does well) text underneath.

And just to complete the dreamy feel, duplicate both text layers. On the bottom text layers(under the duplicated ones) go to filter-blur-motion blur. Set it to about 28.

and viola! Your done! Enjoy and have fun! (and if you make any icons with this, I'd love to see em)