My first tutorial- Ryan Ross
I am very excited about this!
This is my first tutorial and the first time i have been asked to make a tutorial for any of my icons!
This tutorial was requested by andnightsgrow.
It's not exactly the same as the original because of the cropping and whatnot but it's pretty damn close!
We're going from
---->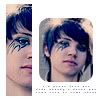
in 14 steps.
Not incredibly image heavy but a basic knowledge of your programme would help.
Made in Photoshop CS2 but I'm sure could be easily translated.
1. I started out with this picture of the yummy Panic! at the disco.
2. I cropped Ryan ( because he is a fittie) out to 100x100 pixels and sharpened him (filter-sharpen-sharpen)
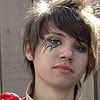
3. Then i duplicated the layer and set it to screen
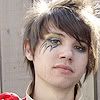
4. You may be thinking "oh my god he's all white arrrrrgh!" but worry not, this icon is going to look quite odd until the end. Make a new layer, and fill it with #114168, a kinda bluey, and set to exclusion, 70% opacity.

----->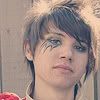
5. Now to make him look even more odd and for you to think I've done something wrong, add another new layer, fill with #8bbee1, and set to softlight (100%)

----->
6. Now for the fun bit.
Select all the whole icon, then copy merged, and paste as a new layer on the same icon.
7. Set this new duplicated layer to colour burn

Now doesn't that look pretty?
If you like, you can stop here, but if you want the cropping of the original icon, follow me...
8. Resize the image ( image size) to 70x70ish pixels.

9. Now use the Rounded Rectangle Shape Tool ( set to "pen tool") and create a rounded rectangle shape over the icon you've made. Then right click and select "make selection", select OK and then copy.
10. Create a new 100x100 white canvas, and paste this rounded icon as a new layer.
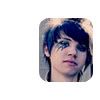
11. Now go back to the original icon, and keep pressing "step backwards" until you get to the point where the icon has gone far enough that it is back to 100x100 pixels in size.
12. Then make a long thin selection of the icon ( i would recommend the face) and copy and paste this as a new layer onto the canvas you made before with the rounded icon on.
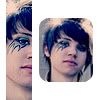
13. You can't see it on here, but delete any areas on your icon that touch the outside of the canvas, by selecting them with the rectangular selection tool and hitting "delete"
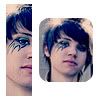
14. Select a colour from the icon ( i chose some of the dark blue in Ryan's hair) and either use a tiny text brush, or add your own tiny text in this colour.

And you're done!
Original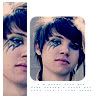
---->
Tutorial
Almost identical?
Please tell me what you thought, please don't copy the tutorial exactly, but i'd love to see what you can come up with :)
If there is anything you're stuck on please please ask me.
Thank you for looking at my tutorial.
Charlotte
xxx
This is my first tutorial and the first time i have been asked to make a tutorial for any of my icons!
This tutorial was requested by andnightsgrow.
It's not exactly the same as the original because of the cropping and whatnot but it's pretty damn close!
We're going from

---->

in 14 steps.
Not incredibly image heavy but a basic knowledge of your programme would help.
Made in Photoshop CS2 but I'm sure could be easily translated.
1. I started out with this picture of the yummy Panic! at the disco.
2. I cropped Ryan ( because he is a fittie) out to 100x100 pixels and sharpened him (filter-sharpen-sharpen)

3. Then i duplicated the layer and set it to screen

4. You may be thinking "oh my god he's all white arrrrrgh!" but worry not, this icon is going to look quite odd until the end. Make a new layer, and fill it with #114168, a kinda bluey, and set to exclusion, 70% opacity.

----->

5. Now to make him look even more odd and for you to think I've done something wrong, add another new layer, fill with #8bbee1, and set to softlight (100%)

----->

6. Now for the fun bit.
Select all the whole icon, then copy merged, and paste as a new layer on the same icon.
7. Set this new duplicated layer to colour burn

Now doesn't that look pretty?
If you like, you can stop here, but if you want the cropping of the original icon, follow me...
8. Resize the image ( image size) to 70x70ish pixels.

9. Now use the Rounded Rectangle Shape Tool ( set to "pen tool") and create a rounded rectangle shape over the icon you've made. Then right click and select "make selection", select OK and then copy.
10. Create a new 100x100 white canvas, and paste this rounded icon as a new layer.

11. Now go back to the original icon, and keep pressing "step backwards" until you get to the point where the icon has gone far enough that it is back to 100x100 pixels in size.
12. Then make a long thin selection of the icon ( i would recommend the face) and copy and paste this as a new layer onto the canvas you made before with the rounded icon on.

13. You can't see it on here, but delete any areas on your icon that touch the outside of the canvas, by selecting them with the rectangular selection tool and hitting "delete"

14. Select a colour from the icon ( i chose some of the dark blue in Ryan's hair) and either use a tiny text brush, or add your own tiny text in this colour.

And you're done!
Original

---->

Tutorial
Almost identical?
Please tell me what you thought, please don't copy the tutorial exactly, but i'd love to see what you can come up with :)
If there is anything you're stuck on please please ask me.
Thank you for looking at my tutorial.
Charlotte
xxx