1st Tutorial, B. Jantet!
This is my first tut. I used PS CS. Not sure if it's translatable. Super image heavy and moderate knowledge of Photoshop is a plus
Go from This to this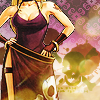
and finally this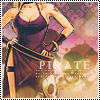
Ok, So first let's start with the base
1) Select new and open up a blank 100 x 100 pixel base.
2) Ok, ow your going to open up this texture by tragic-icons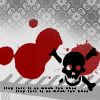
Set this texture at Normal 100%
3) Now your going to open up this
texture and drag it up above the Skull texture and set it to Color Burn at 53% Opacity.
It should look something like this
4) Alright, now open up This pic and resize the picture until you have it at a size you like and move it over to the left a bit so you have space on the right.
Should look like this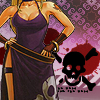
5) B. Janet looks kinda dark, huh. Ok, now duplicate the layer with her picture and set it to Screen.
This is what we should have by now.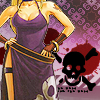
6) Time for the fun part. Now this part is up to you, but if your using this pic, do the following: On the layer window click the little white/black circle and choose Selective Coloring. This should create a new layer above the rest and open up a box with a drop down box and color names. This is the selective coloring box.
On the drop down box go to Red and input the following:
Cyan 35
Magenta 24
On the drop down box go to Magenta and input the following:
Cyan -86
Magenta 25
Yellow 46
Black 15
You Should have this.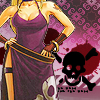
7) Open up this
texture and place it at the top of the layer list. Set it to Screen and Opacity at 87%.
It should look like this.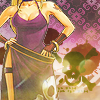
8) Open this
texture and roate the image until the light orbs are on the other side of your image. Set it to Screen and the Opacity to 57%.
This is where we should be.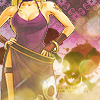
.
9) Duplicate the original picture of B. Janet and drag her up to the top of the layer list. Set it to De-saturate and then Overlay.
This is what we have.
You can stop now, add some text, whatever.
I on the other hand think this looks a little blah, so if you want to spice it up follow on.
10) Open up a new canvas as 100 x 100 pixels. Merge the other icon and drag it over to the new canvas. Resize the picture itself to 96x96 pixels
11) Now use this
dot brush on a new layer above the image.
This is what it should look like.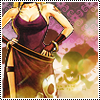
12)Make a new layer at the top of the list and and using the Rectangular Marquee Tool, select the area of the picture and using the paint bucket tool fill the selection with 053859 or this
set it to Exclusion 50%.
You should have this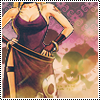
13) now you can add tiny text and normal text. I wrote pirate in Times New Roman at 11py Crisp.
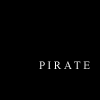
And this is the final product.
Questions? Comments? Wanna see what you can make.
P.S. If you see one of your textures, just tell me and I will credit you. ^___^
Go from This to this

and finally this

Ok, So first let's start with the base
1) Select new and open up a blank 100 x 100 pixel base.
2) Ok, ow your going to open up this texture by tragic-icons

Set this texture at Normal 100%
3) Now your going to open up this

texture and drag it up above the Skull texture and set it to Color Burn at 53% Opacity.
It should look something like this

4) Alright, now open up This pic and resize the picture until you have it at a size you like and move it over to the left a bit so you have space on the right.
Should look like this

5) B. Janet looks kinda dark, huh. Ok, now duplicate the layer with her picture and set it to Screen.
This is what we should have by now.

6) Time for the fun part. Now this part is up to you, but if your using this pic, do the following: On the layer window click the little white/black circle and choose Selective Coloring. This should create a new layer above the rest and open up a box with a drop down box and color names. This is the selective coloring box.
On the drop down box go to Red and input the following:
Cyan 35
Magenta 24
On the drop down box go to Magenta and input the following:
Cyan -86
Magenta 25
Yellow 46
Black 15
You Should have this.

7) Open up this

texture and place it at the top of the layer list. Set it to Screen and Opacity at 87%.
It should look like this.

8) Open this

texture and roate the image until the light orbs are on the other side of your image. Set it to Screen and the Opacity to 57%.
This is where we should be.

.
9) Duplicate the original picture of B. Janet and drag her up to the top of the layer list. Set it to De-saturate and then Overlay.
This is what we have.

You can stop now, add some text, whatever.
I on the other hand think this looks a little blah, so if you want to spice it up follow on.
10) Open up a new canvas as 100 x 100 pixels. Merge the other icon and drag it over to the new canvas. Resize the picture itself to 96x96 pixels
11) Now use this

dot brush on a new layer above the image.
This is what it should look like.

12)Make a new layer at the top of the list and and using the Rectangular Marquee Tool, select the area of the picture and using the paint bucket tool fill the selection with 053859 or this

set it to Exclusion 50%.
You should have this

13) now you can add tiny text and normal text. I wrote pirate in Times New Roman at 11py Crisp.


And this is the final product.

Questions? Comments? Wanna see what you can make.
P.S. If you see one of your textures, just tell me and I will credit you. ^___^