Tutorial 1 -Kirirya-
We're turning this: 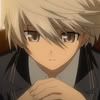
into this: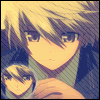
Very Easy, not translatable ^^ [Contains Selective Coloring]
First crop your base to 100x100 or whatever size you need.

Duplicate your base, go to Filter >> Blur >> Gaussian Blur and set that radius to 2.0 then set that layer to Overlay at 100% [you can play around with the opacity].

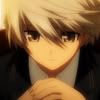
Now make a new layer fill it with black [#000000] and set it to Soft Light, 50% Opacity, 50% Fill. Not very purty is it?

>>
Make another new layer and fill it with #009CFF or any other sky blue and set it to Soft Light 100%. Still not very purty x3333

>>
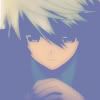
Another layer and fill it this time with #7279AB and set it to Lighten 100%. That is not pretty x3

>>
Note: If you are using an image that is slightly dark then use those blue layers, but if it is slightly bright then instead of using the 2 colors above, use Orange [Soft Light 100%] and a slightly dark red [Lighten]
Make ANOTHER layer [this tutorial is full of color layers x333] and fill it with #C0C08C and set it to Soft Light.

>>
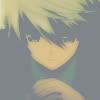
Another layer please! This is the 2nd to the last fill layer I swear! Fill it with #E4E4C8 and set it to Multiply.

>>
We're gonna make make this icon pretty now~ Duplicate the base and put it on top and set it to Overlay 100%~ [You can also Desaturate it then set it to Overlay or Soft Light, but I chose not to]

Okay, now go to Layer >> New Adjustment Layer >> Brightness and Contrast. I put in these settings:
Brightness: +16
Contrast: +2
Adjust the settings to your liking.
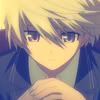
Make another Adjustment Layer, Selective Coloring [w00t!]
Reds
Black: +100%
Yellow
Yellow : -100%
Black: +100%
Blues
Cyan: +100%
Magenta: +100%
Yellow: -100%
Black: +100%

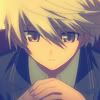
Hes not purty anymore ;__________;
Last fill layer! New layer, fill it with a dark blue [I chose #041068].

>>
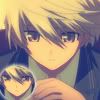
Okay! Make a new layer and press Ctrl+Alt+Shift+E. Then choose the Elliptical Maruqee Tool. Select Kiriya-kun's face. Press Ctrl+C [Edit >>Copy] then Ctrl+V [Paste]. Then delete the layer below the one with the circle. We won't be needing it. Go to Edit >> Free Transform then while pressing Shift, make the circle smaller, then move it to the right. Add an Outer Glow to the circle thingy :3

>>
Now paste these Diagonal Lines [
] onto the image then set it to Soft Light 43%. You can lower the Opacity. I took the Smudge Tool and used it on Kirirya's face.

Last step! [God I'm sleepy XDD] Add this:
brush by me on a new layer and you are done! YAY!!

______________
Try not to do every exactly the same as I did, okay? Make the icon your own :3

into this:

Very Easy, not translatable ^^ [Contains Selective Coloring]
First crop your base to 100x100 or whatever size you need.

Duplicate your base, go to Filter >> Blur >> Gaussian Blur and set that radius to 2.0 then set that layer to Overlay at 100% [you can play around with the opacity].

Now make a new layer fill it with black [#000000] and set it to Soft Light, 50% Opacity, 50% Fill. Not very purty is it?

>>

Make another new layer and fill it with #009CFF or any other sky blue and set it to Soft Light 100%. Still not very purty x3333

>>

Another layer and fill it this time with #7279AB and set it to Lighten 100%. That is not pretty x3

>>

Note: If you are using an image that is slightly dark then use those blue layers, but if it is slightly bright then instead of using the 2 colors above, use Orange [Soft Light 100%] and a slightly dark red [Lighten]
Make ANOTHER layer [this tutorial is full of color layers x333] and fill it with #C0C08C and set it to Soft Light.

>>

Another layer please! This is the 2nd to the last fill layer I swear! Fill it with #E4E4C8 and set it to Multiply.

>>

We're gonna make make this icon pretty now~ Duplicate the base and put it on top and set it to Overlay 100%~ [You can also Desaturate it then set it to Overlay or Soft Light, but I chose not to]

Okay, now go to Layer >> New Adjustment Layer >> Brightness and Contrast. I put in these settings:
Brightness: +16
Contrast: +2
Adjust the settings to your liking.

Make another Adjustment Layer, Selective Coloring [w00t!]
Reds
Black: +100%
Yellow
Yellow : -100%
Black: +100%
Blues
Cyan: +100%
Magenta: +100%
Yellow: -100%
Black: +100%

Hes not purty anymore ;__________;
Last fill layer! New layer, fill it with a dark blue [I chose #041068].

>>

Okay! Make a new layer and press Ctrl+Alt+Shift+E. Then choose the Elliptical Maruqee Tool. Select Kiriya-kun's face. Press Ctrl+C [Edit >>Copy] then Ctrl+V [Paste]. Then delete the layer below the one with the circle. We won't be needing it. Go to Edit >> Free Transform then while pressing Shift, make the circle smaller, then move it to the right. Add an Outer Glow to the circle thingy :3

>>

Now paste these Diagonal Lines [

] onto the image then set it to Soft Light 43%. You can lower the Opacity. I took the Smudge Tool and used it on Kirirya's face.

Last step! [God I'm sleepy XDD] Add this:

brush by me on a new layer and you are done! YAY!!

______________
Try not to do every exactly the same as I did, okay? Make the icon your own :3