Text Background Tutorial
Hey, my first attempt at a tutorial. It's a technique I use often when making sigtags for RPGs, and the like. Most people tend to ask how they put a border around their text, but I do something slightly different. It's pretty simple, once you get the hand of it, but it's quite a neat effect, in my opinion.
So here goes! How to get the following affect using GIMP 2.2!

Step One: Start with your base image. Here is a blend using two Anna Paquin pics from AnnaPaquinFan.org. If anyone wants a blend tutorial, let me know - I use them a lot.

Step Two: Apply text. With me so far? (Here I used New Romantics, size 38, line spacing of -18, and hinting, force auto-hinter and antialiasing all on, in white).

Step Three: Now that you have text, it's pretty obvious that you cannot see it very clearly. Thus the background. So duplicate the text layer, as we'll be working on the bottom of the two.
Step Four: For the layer we are working on, go layer -> layer to image size. This may not be all that important for larger text areas, but where there is a small layer, and a large selection, you end up with nasty straight edges instead of a fuzzy border.
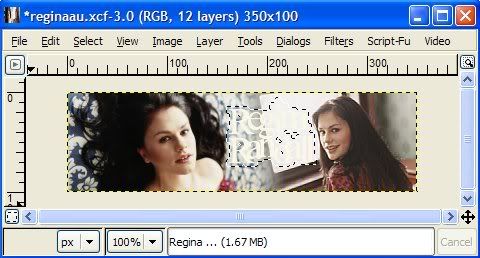
Step Five: Select by colour on the bottom text layer (the one we will be working on.
The next steps are pretty much trial and error, so make sure you have saved your work, and know that ctrl + z = undo.
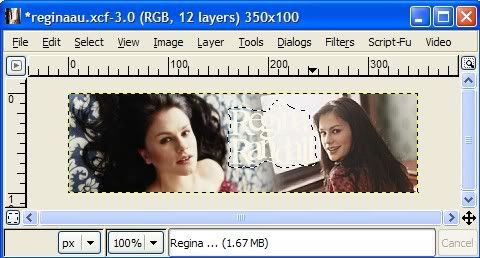
Step Six: Grow selection (Selection -> grow). Here I grew it by three.

Step Seven: Feather selection (selection -> feather). Here I feathered by ten. More you feather, the fuzzier it is.

Step Eight: Select a large brush (the larger the brush the less strokes you have to do), choose your colour, and just paint away. If you have a brush large enough, you should see pretty quickly how the whole thing looks. Here I used #3b4a63, which I extracted from the sheet behind her head on the left.

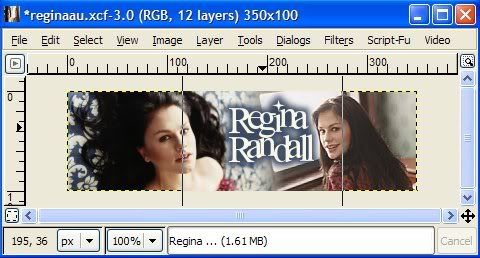
Step Nine: Merge layers and adjust position should you so desire. And it should look like this:

After that, you can add borders or whatever. For my sigtag, I just used a border of the same colour, #3b4a63, by filling a new layer with the colour -> select all -> shrink selection -> feather selection -> erase and adjusting the layer settings to what looked good (burn or whatever, opacity etc.)

And that should be that. Any comments, question etc are more than welcome!
I've also made some large brushes, just for filling in selections or large-scale erasing. Just squares of different sizes (80, 100, 125, 150, 200 and 300 pixels). Download brushes.
So here goes! How to get the following affect using GIMP 2.2!
Step One: Start with your base image. Here is a blend using two Anna Paquin pics from AnnaPaquinFan.org. If anyone wants a blend tutorial, let me know - I use them a lot.
Step Two: Apply text. With me so far? (Here I used New Romantics, size 38, line spacing of -18, and hinting, force auto-hinter and antialiasing all on, in white).
Step Three: Now that you have text, it's pretty obvious that you cannot see it very clearly. Thus the background. So duplicate the text layer, as we'll be working on the bottom of the two.
Step Four: For the layer we are working on, go layer -> layer to image size. This may not be all that important for larger text areas, but where there is a small layer, and a large selection, you end up with nasty straight edges instead of a fuzzy border.
Step Five: Select by colour on the bottom text layer (the one we will be working on.
The next steps are pretty much trial and error, so make sure you have saved your work, and know that ctrl + z = undo.
Step Six: Grow selection (Selection -> grow). Here I grew it by three.
Step Seven: Feather selection (selection -> feather). Here I feathered by ten. More you feather, the fuzzier it is.
Step Eight: Select a large brush (the larger the brush the less strokes you have to do), choose your colour, and just paint away. If you have a brush large enough, you should see pretty quickly how the whole thing looks. Here I used #3b4a63, which I extracted from the sheet behind her head on the left.
Step Nine: Merge layers and adjust position should you so desire. And it should look like this:
After that, you can add borders or whatever. For my sigtag, I just used a border of the same colour, #3b4a63, by filling a new layer with the colour -> select all -> shrink selection -> feather selection -> erase and adjusting the layer settings to what looked good (burn or whatever, opacity etc.)
And that should be that. Any comments, question etc are more than welcome!
I've also made some large brushes, just for filling in selections or large-scale erasing. Just squares of different sizes (80, 100, 125, 150, 200 and 300 pixels). Download brushes.