Tutorial #4: Veronica Mars
new tutorial!
how to go from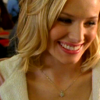
to
.
made in photoshop, non-translatable (sorry!).
requires some basic knowledge on selective coloring, curves, levels, etc.
get your image, in this case, a cap from veronica mars. crop, resize, etc.
add a curves adjustment layer:
RGB: 128/178
RED: 131/138
BLUE: 123/138
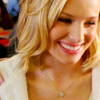
add a selective color layer:
REDS: -73, 0, +9, 0
YELLOWS: -62, 0, +100, 0
NEUTRALS: +35, 0, -29, 0
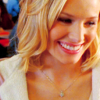
add another curves layer to make her look less radioactive and lighten up the image.
RGB: 116/141
RED: 138/116
BLUE: 123/139
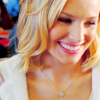
add a levels adjustment layer:
RGB: 0/1.11/255
RED: 0/1.11/255
set to 64% opacity.
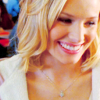
add another selective color layer:
RED: -30, 0, -3, 0
YELLOW: -23, 0, +40, 0
CYAN: +100, 0, -28, 0
NEUTRALS: +30, 0, -19, 0
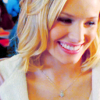
one more selective color. this is optional, but I like the icon with this step. these next few steps just adds some color to her hair.
RED: -69, 0, 0, 0
YELLOW: 0, 0, +100, 0
NEUTRALS: +25, 0, -14, 0
erase the parts that cover her face, but leave her eyes and lips.
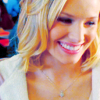
add a hue/saturation adjustment layer:
saturation: +13
like I said, this is optional, but it brightens her hair. erase the parts where it overlaps her face.
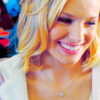
LAST STEP, PROMISE.
brightness/contrast layer to brighten up the image.
brightness: +5
contrast: -1

all done! sorry for the bazillion steps =S
if you'd like to download the .psd file, click here.
Like what you see? Join us @ icon_supernova
how to go from
to
.
made in photoshop, non-translatable (sorry!).
requires some basic knowledge on selective coloring, curves, levels, etc.
get your image, in this case, a cap from veronica mars. crop, resize, etc.
add a curves adjustment layer:
RGB: 128/178
RED: 131/138
BLUE: 123/138
add a selective color layer:
REDS: -73, 0, +9, 0
YELLOWS: -62, 0, +100, 0
NEUTRALS: +35, 0, -29, 0
add another curves layer to make her look less radioactive and lighten up the image.
RGB: 116/141
RED: 138/116
BLUE: 123/139
add a levels adjustment layer:
RGB: 0/1.11/255
RED: 0/1.11/255
set to 64% opacity.
add another selective color layer:
RED: -30, 0, -3, 0
YELLOW: -23, 0, +40, 0
CYAN: +100, 0, -28, 0
NEUTRALS: +30, 0, -19, 0
one more selective color. this is optional, but I like the icon with this step. these next few steps just adds some color to her hair.
RED: -69, 0, 0, 0
YELLOW: 0, 0, +100, 0
NEUTRALS: +25, 0, -14, 0
erase the parts that cover her face, but leave her eyes and lips.
add a hue/saturation adjustment layer:
saturation: +13
like I said, this is optional, but it brightens her hair. erase the parts where it overlaps her face.
LAST STEP, PROMISE.
brightness/contrast layer to brighten up the image.
brightness: +5
contrast: -1
all done! sorry for the bazillion steps =S
if you'd like to download the .psd file, click here.
Like what you see? Join us @ icon_supernova