002: Banner
Learn to make this:
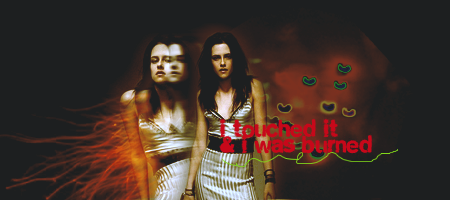
Program: PS 7
Difficulty: Hard. Oh so Hard.
Translatable? No, uses selective colouring.
You need to have at good grasp at Photoshop to make this, or it's just crazy and confusing!
Step 1; Firstly, your base has to be quite dark. A dark greyblue like #1C1924 works well.
So now, your pictures. You will need two.
You can have different people but if it's of the same person it looks much better.
Paste your pictures onto your back ground and erase the background with a soft edged eraser. Don't worry if it's not particularly neat; it doesn't matter greatly.
Step 2; Once you've got your pictures in place (make sure that they are quite close with one behind the other), we start the blurring.
Pay attention now, this is where it gets confusing!
Duplicate the image that is at the back. Then go Filter > Blur > Motion Blur. You want quite a large blur, around 17 works.
Step 3; Duplicate your back image again (the unblurred version) and again go Filter > Blur > Motion Blur. This time you want a reasonably small blur. I recomend 5. Set this image slightly to the left of your back image (still over the top of the previous image).
Step 4; Duplicate your back image once more and place it to the left of the previous image and set it to Screen at 100%.
Step 5; Now onto colouring. Make a new solid colour layer and fill it with #FFC1DD. Set it to Colour Burn.
Step 6; Make another solid colour layer and fill with #C1D1FF. Set to Multiply.
Step 7; One last solid colour layer. Fill this with #F5FFA3. Set to Colour Burn.
Step 8; Make a new Brightnes/Contrast layer.
Brightness: 42
Contrast: 16
Step 9; Make a Selective Colour layer.
RED: 15, -16, 25, 10
NEUTRALS: 8, 2, 1, -13
Step 10; Add this
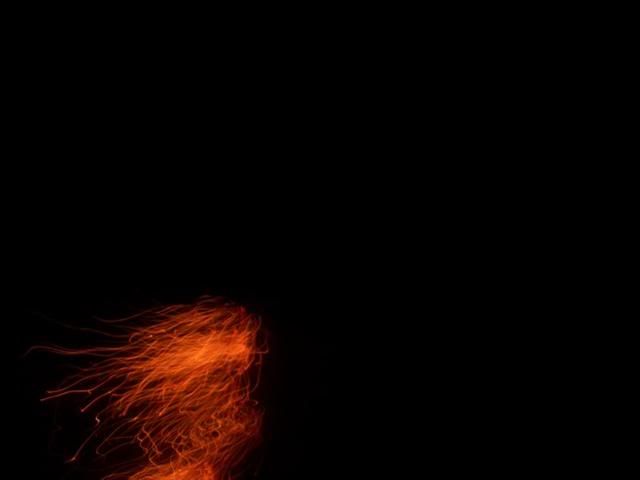
texture (I don't know who it's by) underneath everything, once up from your background. Play around with the size and position. Set it to Screen.
Step 11; Next, add this
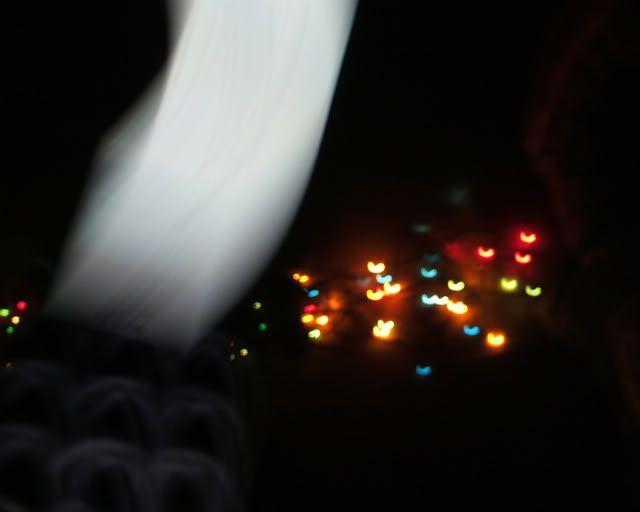
texture (Agin, I don't who made it). Cut out the little dots and paste them above the previous texture. Set to Screen.
Step 12; Duplicate the previous texture and set to Exclusion.
Step 13; Add some text and decoration if you want to and, WHAM! You're done!
I know it's long winded and quite confusing, but I'd love to see what you get!