Photoshop Icon Tutorial
Tutorial requested by
word_never_said
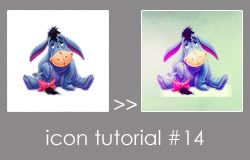
Includes Levels Adjustment Layers and Image Adjustments
I regret that I don't remember all the settings I used for this icon but I would encourage you to play around with your image to get the effect you want. Chances are my settings would not have been 100% suited to your image anyway. Where I do have the settings I have included them.
I started off with this texture:

It's actually one of my own that has been tweaked a bit, the original set is HERE. I'm afraid I can't remember for the life of me what changes I made but if you'd like to use it feel free to grab it!
Next I tweaked the colours a bit. Depending on what you think about the starting texture you may not want to do this bit, but I wanted a softer lighter look.
New layer fill colour FAE5E5:

>> soft light >>
New layer fill colour E5F7FA:

>> multiply >>
Next a new adjustment levels layer to make it a bit paler at these settings:
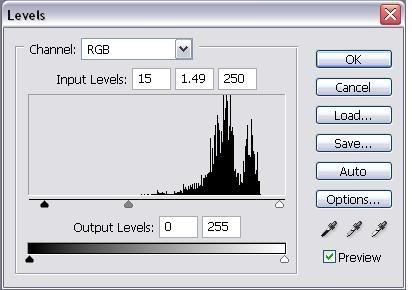
To give:

Perfect! Now to add Eeyore from this original pic.
I shrunk him down and cut round him using the eraser tool. I know lots of people use various tools which are quicker, but I find that using the eraser tool at different sizes does the trick. I always duplicate the layer before starting to erase in case something goes wrong. If you know how you can also use layer masks to do this step.

>> after erasing >>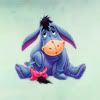
Hmmm, poor Eeyore is looking quite harsh against the soft background so I duplicated him and tweaked the duplicate using Image>Adjustment>Levels to make him look like this:

I then set this layer to soft light:

Awwwww, so cute! But I wanted to soften it up just a bit more, so I duplicated the original Eeyore and guassian blurred him slightly. I believe I also changed his levels to make him a little brighter:
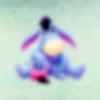
>> soft light >>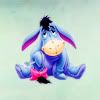
Now to make the icon come together I created a new fill layer colour 080120:

>> exclusion >>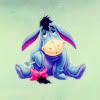
Next to add a little bit of subtle contrast I created a pink blob of doom:

>> screen >>
Finally, if you want, you can give Eeyore something to sit on using a brush or shape tool in white:

And finally here are all the layers:

word_never_said

Includes Levels Adjustment Layers and Image Adjustments
I regret that I don't remember all the settings I used for this icon but I would encourage you to play around with your image to get the effect you want. Chances are my settings would not have been 100% suited to your image anyway. Where I do have the settings I have included them.
I started off with this texture:

It's actually one of my own that has been tweaked a bit, the original set is HERE. I'm afraid I can't remember for the life of me what changes I made but if you'd like to use it feel free to grab it!
Next I tweaked the colours a bit. Depending on what you think about the starting texture you may not want to do this bit, but I wanted a softer lighter look.
New layer fill colour FAE5E5:

>> soft light >>

New layer fill colour E5F7FA:

>> multiply >>

Next a new adjustment levels layer to make it a bit paler at these settings:

To give:

Perfect! Now to add Eeyore from this original pic.
I shrunk him down and cut round him using the eraser tool. I know lots of people use various tools which are quicker, but I find that using the eraser tool at different sizes does the trick. I always duplicate the layer before starting to erase in case something goes wrong. If you know how you can also use layer masks to do this step.

>> after erasing >>

Hmmm, poor Eeyore is looking quite harsh against the soft background so I duplicated him and tweaked the duplicate using Image>Adjustment>Levels to make him look like this:

I then set this layer to soft light:

Awwwww, so cute! But I wanted to soften it up just a bit more, so I duplicated the original Eeyore and guassian blurred him slightly. I believe I also changed his levels to make him a little brighter:

>> soft light >>

Now to make the icon come together I created a new fill layer colour 080120:

>> exclusion >>

Next to add a little bit of subtle contrast I created a pink blob of doom:

>> screen >>

Finally, if you want, you can give Eeyore something to sit on using a brush or shape tool in white:

And finally here are all the layers:
