Photoshop CS Tutorial
Go from 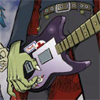
to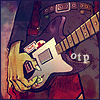
in just a few steps.
Start with this image and crop it to your liking.

Resize to 100x100.
I'm a little obsessive-compulsive, so I needed to remove 2D's hand from the left side. I just extracted some of the colors (using the dropper tool) and used round brushes to make it look like the cloud. That's just a personal thing, and it was really a matter of experimenting.
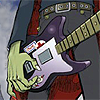
Having done that, I sharpened the base.
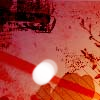
I used this image (ganked from a tutorial by minoticons, and set it at Overlay, 60% opacity, 100% fill.

I used this image (taken from aforementioned tutorial) at Multiply, 100% opacity, 100% fill.

I used this color, #000033, on a new layer at Exlcusion, 100% opacity, 100% fill.
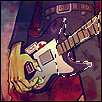
I use the magnetic lasso to select the area around a good chunk of Murdoc's bass, where I want to put the text. I right click and select "Make a Work Path," which will enable me to type along the curve of my selection.
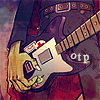
I select the text tool and put the cursor near where I would like to put the text. In my case, it's the curve of the body on the right. I used Times New Roman, 12pt at 200 kerning and auto-leading. I selected a light yellow from the image for the text color. The text is at 85% opacity, 100% fill with a drop shadow.

Since I think the icon feels unfinished without a border, I copy merged the image and put it into Paint (I'm cheap, I know) and select the darkest blue and put a 1px border around the thing. I paste it as a new image in Photoshop and voila!
As I understand it, with Photoshop you have to have CS to do the text on a path, but I'm pretty sure that feature is available in PSP, I'm just not sure exactly how it works, though.
I hope this tutorial was somewhat helpful and easy. :D
to
in just a few steps.
Start with this image and crop it to your liking.
Resize to 100x100.
I'm a little obsessive-compulsive, so I needed to remove 2D's hand from the left side. I just extracted some of the colors (using the dropper tool) and used round brushes to make it look like the cloud. That's just a personal thing, and it was really a matter of experimenting.
Having done that, I sharpened the base.
I used this image (ganked from a tutorial by minoticons, and set it at Overlay, 60% opacity, 100% fill.
I used this image (taken from aforementioned tutorial) at Multiply, 100% opacity, 100% fill.
I used this color, #000033, on a new layer at Exlcusion, 100% opacity, 100% fill.
I use the magnetic lasso to select the area around a good chunk of Murdoc's bass, where I want to put the text. I right click and select "Make a Work Path," which will enable me to type along the curve of my selection.
I select the text tool and put the cursor near where I would like to put the text. In my case, it's the curve of the body on the right. I used Times New Roman, 12pt at 200 kerning and auto-leading. I selected a light yellow from the image for the text color. The text is at 85% opacity, 100% fill with a drop shadow.
Since I think the icon feels unfinished without a border, I copy merged the image and put it into Paint (I'm cheap, I know) and select the darkest blue and put a 1px border around the thing. I paste it as a new image in Photoshop and voila!
As I understand it, with Photoshop you have to have CS to do the text on a path, but I'm pretty sure that feature is available in PSP, I'm just not sure exactly how it works, though.
I hope this tutorial was somewhat helpful and easy. :D