Icon Tutorial #1-Using PSP (8)
In this tutorial we'll be going from this 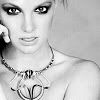
to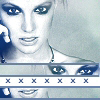
this. Please note that this is my first tutorial so go easy on me!
**Disclaimer:
There are a lot of pics that are going to show up so please be patient.
I saved all these steps under .jpg format and for some reason the colors get all funky and stuff. I usually save everything in .png so yeah. Don't worry I saved the most important stuff like the textures in .png so your icon will turn out snazy ;)
First we have our icon nicely cropped and sharpened once.
It looks dull to me so we’re going to make it a bit lighter.
Adjust >Brightness and Contrast >Levels.
Change your settings to match mine.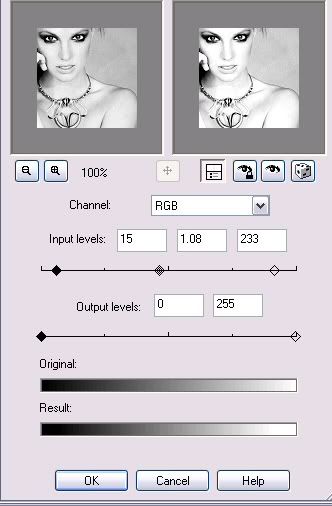
I think the image looks too bright so I’m going to make it look a little less bright.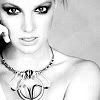
Add a new layer. Layers > New Raster Layer > Blend Mode --Soft Light > Opacity 100.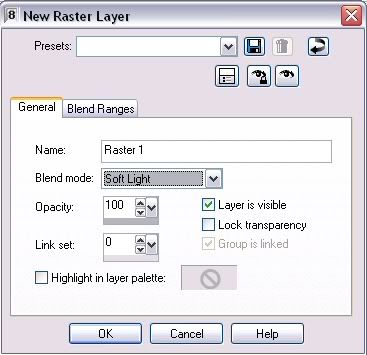
Fill the layer with this color using the flood bucket:

#000000 (its black)
Looks kinda ugly huh?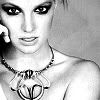
Don’t worry it’ll turn out fine.
So now we need to add some color to it!
Add a new layer. Layers > New Raster Layer > Blend Mode --Screen > Opacity 100.
Add this light texture
by colorfilter. (I set this texture into a pattern to make my icons a lot prettier. You can do this by right clicking, sending to your gradient folder then opening it in your program and it should show up in your pattern folders. If not let me know and I’ll try to figure out another way to make it work.) Using the flood bucket
.
Looks pretty doesn’t it?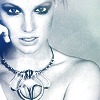
Well we’re not done quite yet.
Layers > Merge > Merge visible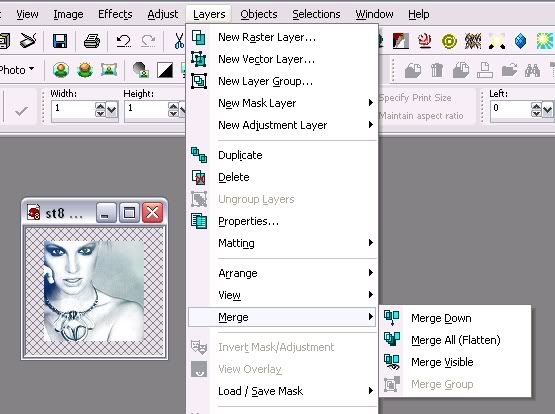
Now lets make a copy of it.
Edit> Copy [Ctrl+C] then Paste> Paste as new Image [Ctrl+V]
Crop
out her eyes make sure your crop is 100X10.
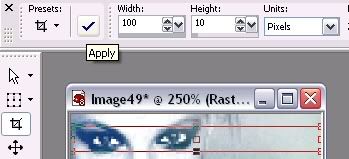
So you should have something like this
Add a border to this image. Image > Add border > (box should pop up say ok) > Click the color box and a box will pop up HTML >#6B82A5. FIX THE DEMENSIONS LIKE MINE.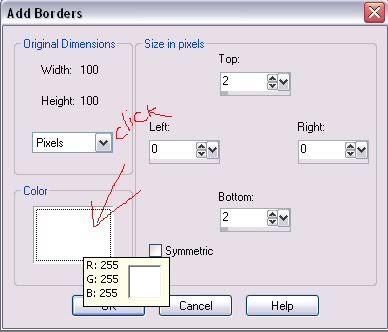
Click OK.
Now lets mirror the image. Image > Mirror You should now have this
Copy and go back to the original icon. Edit > Paste > Paste as new layer.
Click the move tool
Move to about here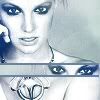
Now go back to the image you cropped for the eyes and hit undo
two or three times until all you can see is your cropping outline.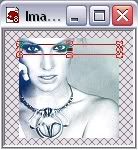
Move this box down to the lips.
Crop out her lips. You should have something like this
Add a border to this image. Image > Add border > (box should pop up say ok) > Click OK.
Click the move tool
Move to about here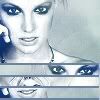
Now you see the spot in between the eyes and the lips? We’re going to cover that up! Click your brush button.
Click down on the button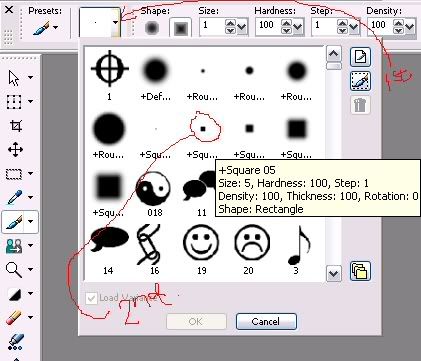
then choose the square size 5. Well that’s too small for the gap in between so lets edit it.
Click the area I show you
and type in a 9. That’s big enough.
Make sure your brush color is set in white.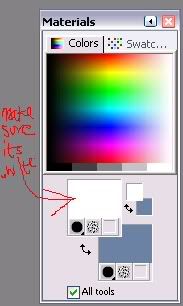
You can zoom into your icon by at least 200% and start filling in the gap.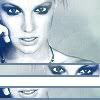
Now add your text/ brush. I used the color #1A356A.
Brush by either chouchoune or _coquettish
And tada!
You’re done. I hope you liked my tutorial! I enjoyed making it for you guys! Feel free to show me how your icon turns out =P

to

this. Please note that this is my first tutorial so go easy on me!
**Disclaimer:
There are a lot of pics that are going to show up so please be patient.
I saved all these steps under .jpg format and for some reason the colors get all funky and stuff. I usually save everything in .png so yeah. Don't worry I saved the most important stuff like the textures in .png so your icon will turn out snazy ;)
First we have our icon nicely cropped and sharpened once.

It looks dull to me so we’re going to make it a bit lighter.
Adjust >Brightness and Contrast >Levels.
Change your settings to match mine.

I think the image looks too bright so I’m going to make it look a little less bright.

Add a new layer. Layers > New Raster Layer > Blend Mode --Soft Light > Opacity 100.

Fill the layer with this color using the flood bucket:


#000000 (its black)
Looks kinda ugly huh?

Don’t worry it’ll turn out fine.
So now we need to add some color to it!
Add a new layer. Layers > New Raster Layer > Blend Mode --Screen > Opacity 100.
Add this light texture

by colorfilter. (I set this texture into a pattern to make my icons a lot prettier. You can do this by right clicking, sending to your gradient folder then opening it in your program and it should show up in your pattern folders. If not let me know and I’ll try to figure out another way to make it work.) Using the flood bucket

.
Looks pretty doesn’t it?

Well we’re not done quite yet.
Layers > Merge > Merge visible

Now lets make a copy of it.
Edit> Copy [Ctrl+C] then Paste> Paste as new Image [Ctrl+V]
Crop

out her eyes make sure your crop is 100X10.

So you should have something like this

Add a border to this image. Image > Add border > (box should pop up say ok) > Click the color box and a box will pop up HTML >#6B82A5. FIX THE DEMENSIONS LIKE MINE.

Click OK.
Now lets mirror the image. Image > Mirror You should now have this

Copy and go back to the original icon. Edit > Paste > Paste as new layer.
Click the move tool

Move to about here

Now go back to the image you cropped for the eyes and hit undo

two or three times until all you can see is your cropping outline.

Move this box down to the lips.
Crop out her lips. You should have something like this

Add a border to this image. Image > Add border > (box should pop up say ok) > Click OK.

Click the move tool

Move to about here

Now you see the spot in between the eyes and the lips? We’re going to cover that up! Click your brush button.

Click down on the button

then choose the square size 5. Well that’s too small for the gap in between so lets edit it.
Click the area I show you

and type in a 9. That’s big enough.
Make sure your brush color is set in white.

You can zoom into your icon by at least 200% and start filling in the gap.

Now add your text/ brush. I used the color #1A356A.
Brush by either chouchoune or _coquettish

And tada!

You’re done. I hope you liked my tutorial! I enjoyed making it for you guys! Feel free to show me how your icon turns out =P