(no subject)
A pretty straightforward tutorial on how to make:
this: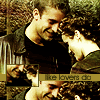
from this: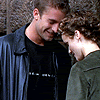
using PS7.
I started with this base:

(From screencap, Filter > Sharpen, Image > Adjustments > Auto Color & Auto Levels, Crop, Resize to 100x100, then Sharpen again.)
To get the modified base layer, I used the following:
(All layers at 100% opacity unless otherwise noted. Layers listed from top to bottom)

>> base image @ Soft Light

>> texture image from colorfilter @ Soft Light (Screen, Linear Dodge or even Normal combined with a layer mask also work)

>> base image @ Soft Light
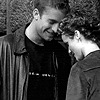
>> base image, desaturated (using Shift-Ctrl-D) @ Soft Light

>> darkest blue from the Color Swatches palette @ Exclusion

>> base image, desaturated @ Screen

>> same texture image @ Normal
Merge all layers (Layer > Merge Visible or Shift-Ctrl-E) to get:
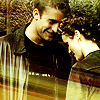
Next, with the selection tool on this layer, select a thin rectangle over Ben & Felicity's faces:
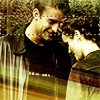
Copy (using Ctrl-C), and then Paste the selection (using Ctrl-V) on to a new (top) layer. Move it all the way down to the bottom:
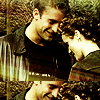
To get some colours to work with, I usually use the eyedropper tool to lift a light and dark colour from the icon. (For this one I took a yellow-y brown and a dark olive.) On a new (top) layer, select a thin rectangle again, and flood fill with the yellow colour:
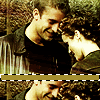
For the next little box I used the selection tool again, on the modified base layer:
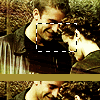
...then pasted it to the top again:
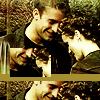
To make it more of an accent, use the Move tool on Transform (Ctrl-T) to shrink it, and then move to the side. Add a border using Edit > Stroke, on 1px:
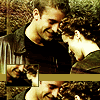
(Sometimes the accented box may need a Sharpen filter to up the clarity, but this one seemed okay)
And last, the text (Font = Decker @ 8pt) in the same dark colour as the border:

Done! :)
Other icons in similar styles:
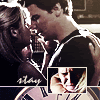
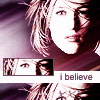
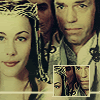
All icons are sharable with credit. :) Happy icon making!
this:

from this:

using PS7.
I started with this base:

(From screencap, Filter > Sharpen, Image > Adjustments > Auto Color & Auto Levels, Crop, Resize to 100x100, then Sharpen again.)
To get the modified base layer, I used the following:
(All layers at 100% opacity unless otherwise noted. Layers listed from top to bottom)

>> base image @ Soft Light

>> texture image from colorfilter @ Soft Light (Screen, Linear Dodge or even Normal combined with a layer mask also work)

>> base image @ Soft Light

>> base image, desaturated (using Shift-Ctrl-D) @ Soft Light

>> darkest blue from the Color Swatches palette @ Exclusion

>> base image, desaturated @ Screen

>> same texture image @ Normal
Merge all layers (Layer > Merge Visible or Shift-Ctrl-E) to get:

Next, with the selection tool on this layer, select a thin rectangle over Ben & Felicity's faces:

Copy (using Ctrl-C), and then Paste the selection (using Ctrl-V) on to a new (top) layer. Move it all the way down to the bottom:

To get some colours to work with, I usually use the eyedropper tool to lift a light and dark colour from the icon. (For this one I took a yellow-y brown and a dark olive.) On a new (top) layer, select a thin rectangle again, and flood fill with the yellow colour:

For the next little box I used the selection tool again, on the modified base layer:

...then pasted it to the top again:

To make it more of an accent, use the Move tool on Transform (Ctrl-T) to shrink it, and then move to the side. Add a border using Edit > Stroke, on 1px:

(Sometimes the accented box may need a Sharpen filter to up the clarity, but this one seemed okay)
And last, the text (Font = Decker @ 8pt) in the same dark colour as the border:

Done! :)
Other icons in similar styles:


All icons are sharable with credit. :) Happy icon making!