Full Tutorial: Textures, brushes, gradients for PS7
Just a quick tutorial I whipped up from a neat-looking icon I screwed around and made. Image intensive, so dial-up users have been warned.
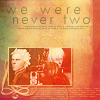

First off, we start with our 100 x 100 base and fill it with 718B99, with our paintbucket tool.
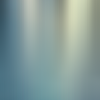
Then, take this blurred color texture, by me, and paste in a layer above the flat color layer. Set it to hard light.

Make a new layer above the texture and fill it with 0A0E30. Set this layer to exclusion.

Take this brush, also made by me, and stamp it on a new layer above the exclusion layer. I used 94AEA4. I also added a drop shadow with a distance of 1 and a size of 2, in 6A8F93 set at the default setting, which is multiply.
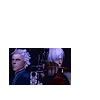
I took the image I wanted to use, in this case a shot from Mission 19's ending in Devil May Cry 3, and cropped it to fit my brush, which ended up being 62 x 37. I then set it to screen. I duplicated this layer, and set the new copy as overlay. Duplicated it once more, and set this third layer of the image at soft light.

Select the image (the tiny cropped one) and make a new layer. Fill it with 0A0E30 and set it to exclusion.

Then, make a new layer over the exclusion one (keep your marquee) and fill the marquee with 94AEA4 and set it to saturation.

Next, I selected my gradient tool, and chose one of my gradients, spanning from 0E132A to 9E0004, put in in a new layer above everything, and set this layer to screen.
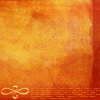
Next, I took one of my own bases and pasted it above the gradient layer, and set it to overlay.

I added text, using Futura at 14pt with a kerning of 200, sharp. The color was 94AEA4, and I set it to multiply. I also added some tiny text, Futura again, at 1pt, with a kerning of 400. And that's it, my icon was finished. :) Hope this helped somebody.