(no subject)
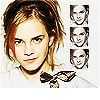
today we'll be going from

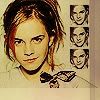
to
okay, to start off, a do apologize if some of the base images for the steps are slightly different. i originally made the icon, not thinking i would make a tutorial for it, and then had to go back and recrop the original picture. forgive me. *grovel*
01. start with your base. i used this pretty one of emma watson.

sharpen your base twice (or three times, or maybe even just once, depending on your picture), then duplicate the base twice. set the bottom layer to screen, and the top layer to linear burn at 71% opacity.

merge all your layers. cut a small section from the BOTTOM of the layer using the marquee tool. my picture doesn't really show this very well, because the background is white, but please bear with me.

the cut a small square section of her face, and resize it so that it's quite small. sharpen it once or twice (again, depending on your picture) and desaturate about halfway. duplicate this twice, and reposition the squares so that they lie in a straight vertical line.

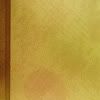
add this gradient on top of everything, set on linear burn 57%. flip it horizontally.

now you should have this:

use the marquee tool to cut out a section (overtop of the section you cut out from your base) from the gradient. flip it horizontally, so that the little dark brown part lies opposite from the top section of the gradient. whew. now add some text, a few brushes, and merge layers. duplicate the layer, and stroke it with a dark brown color. done!

if anything doesn't make sense, or i screwed something up, please tell me. i hope you liked it!

to

okay, to start off, a do apologize if some of the base images for the steps are slightly different. i originally made the icon, not thinking i would make a tutorial for it, and then had to go back and recrop the original picture. forgive me. *grovel*
01. start with your base. i used this pretty one of emma watson.

sharpen your base twice (or three times, or maybe even just once, depending on your picture), then duplicate the base twice. set the bottom layer to screen, and the top layer to linear burn at 71% opacity.

merge all your layers. cut a small section from the BOTTOM of the layer using the marquee tool. my picture doesn't really show this very well, because the background is white, but please bear with me.

the cut a small square section of her face, and resize it so that it's quite small. sharpen it once or twice (again, depending on your picture) and desaturate about halfway. duplicate this twice, and reposition the squares so that they lie in a straight vertical line.

add this gradient on top of everything, set on linear burn 57%. flip it horizontally.

now you should have this:

use the marquee tool to cut out a section (overtop of the section you cut out from your base) from the gradient. flip it horizontally, so that the little dark brown part lies opposite from the top section of the gradient. whew. now add some text, a few brushes, and merge layers. duplicate the layer, and stroke it with a dark brown color. done!

if anything doesn't make sense, or i screwed something up, please tell me. i hope you liked it!