FiRST TUTORiAL ;;
Here's my first tutorial. I'm usually not very creative, so can you imagine the look on my face when I thought of this one!? Anywho, on with the tutorial . . .
How to go from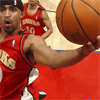
to
using Photoshop 7.0:
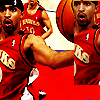
01. First, crop and resize your base so that it's 100x100. I used this picture of Salim Stoudamire of the Atlanta Hawks.

02. Next, duplicate your base. (Ctrl+J) Set the layer to Overlay. Sharpen the layer.
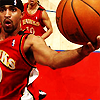
03. Duplicate your Overlay layer and lower the opacity to 75% (or whatever works with that particular picture). *OPTIONAL: Sharpen again.
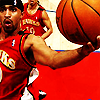
04. Duplicate your base picture, drag to the top, and set it to Soft Light.
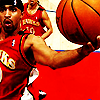
05. Now, using the Rectangular Marquee Tool, select part of your image, copy merged (Shift+Ctrl+C), paste and drag it to the right of the icon.
06. Use the following gradient and set to Hard Light. Go to Edit > Transform > Scale. Drag the sides until the gradient is JUST over the little picture on the right. Scale.


07. Duplicate the little picture, drag it above the gradient, and set to Soft Light.

08. Then, I used this brush by unmasked_icons, flipped it horizontally, and altered it a bit and I got this.


I put it right over the little picture in white and lowered the opacity to 80%.
09. Use the following gradient and go to Edit > Transform > Scale. Drag the sides until the gradient is JUST over the white brush and set to Soft Light. Use the Rectangular Marquee Tool or Eraser and remove any part of the gradient covering the little picture. In other words, make sure the gradient is just on the white brush part.


10. Finally, use this heart brush by ?? in #FD4313.

And there you have it! My first (and possibly last) tutorial.

Comments & credit would be nice :). I'd love to see what you guys came up with!
How to go from
to
using Photoshop 7.0:
01. First, crop and resize your base so that it's 100x100. I used this picture of Salim Stoudamire of the Atlanta Hawks.
02. Next, duplicate your base. (Ctrl+J) Set the layer to Overlay. Sharpen the layer.
03. Duplicate your Overlay layer and lower the opacity to 75% (or whatever works with that particular picture). *OPTIONAL: Sharpen again.
04. Duplicate your base picture, drag to the top, and set it to Soft Light.
05. Now, using the Rectangular Marquee Tool, select part of your image, copy merged (Shift+Ctrl+C), paste and drag it to the right of the icon.
06. Use the following gradient and set to Hard Light. Go to Edit > Transform > Scale. Drag the sides until the gradient is JUST over the little picture on the right. Scale.
07. Duplicate the little picture, drag it above the gradient, and set to Soft Light.
08. Then, I used this brush by unmasked_icons, flipped it horizontally, and altered it a bit and I got this.
I put it right over the little picture in white and lowered the opacity to 80%.
09. Use the following gradient and go to Edit > Transform > Scale. Drag the sides until the gradient is JUST over the white brush and set to Soft Light. Use the Rectangular Marquee Tool or Eraser and remove any part of the gradient covering the little picture. In other words, make sure the gradient is just on the white brush part.
10. Finally, use this heart brush by ?? in #FD4313.
And there you have it! My first (and possibly last) tutorial.
Comments & credit would be nice :). I'd love to see what you guys came up with!