Tutorial for screen mode> Death Note PS7
This tutorial gives you a step by step guide how to get from:
This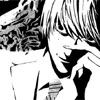
to this
1: We start off with the base

Personally I like to get the base a bit sharper and thus I do this by going to Filter>Sharpen > Unsharp Mask.. Play around with the levels and looks what it does to the pic.The ammounts differ per pic so just play around and find out what works for you.
And we get this:

2. Happy with the base?
Make a new layer and use a brush for it with the color black #000000 I used a blood brush from the set of _lighthouse
Sharpen this by going to Filter>Sharpen > Sharpen
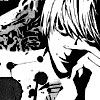
3. Again I make a new layer and on the left side I place this brush (color #000000) which I made some time ago
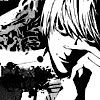
4. And yet again new layer where I use a grunge borderbrush By x_ohmyfluff
Filter>Sharpen > Sharpen
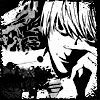
5. Than I start with the font.. I used the font Arial, bold in 8PT..
Also I used spacing here .. Go to Window > Character and than in that window set the spacing to 200 like indicated HERE
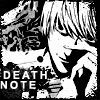
6. I used this gradient I made and put it on new layer at the top..
Than I simply put the layer to screen and that was it. You are done!

Comments and feedback are welcome..
I you used this tutorial I would love to see what you made out of it.
This

to this

1: We start off with the base

Personally I like to get the base a bit sharper and thus I do this by going to Filter>Sharpen > Unsharp Mask.. Play around with the levels and looks what it does to the pic.The ammounts differ per pic so just play around and find out what works for you.
And we get this:

2. Happy with the base?
Make a new layer and use a brush for it with the color black #000000 I used a blood brush from the set of _lighthouse
Sharpen this by going to Filter>Sharpen > Sharpen

3. Again I make a new layer and on the left side I place this brush (color #000000) which I made some time ago

4. And yet again new layer where I use a grunge borderbrush By x_ohmyfluff
Filter>Sharpen > Sharpen

5. Than I start with the font.. I used the font Arial, bold in 8PT..
Also I used spacing here .. Go to Window > Character and than in that window set the spacing to 200 like indicated HERE

6. I used this gradient I made and put it on new layer at the top..
Than I simply put the layer to screen and that was it. You are done!

Comments and feedback are welcome..
I you used this tutorial I would love to see what you made out of it.