MKA Tutorial
we are going from 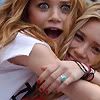
to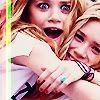
using PS CS
// image heavy
i got the original image from http://planet-olsen.net/gallery :

o1. i first crop the image and rotate it

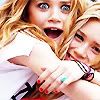
o2. i choose 'sharpen edge', then duplicate the base layer 3 times. with the middle 2 set to screen and the top 1 set to soft light, all in 100%. then i use the sharpen tool to re-sharpen the eyes and lips of MK on the base (original) layer.

>>
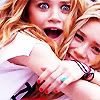
o3. new fill layer, #78117b, set to soft light, 50%

>>
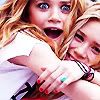
o4. second fill layer, #74DDFF, color burn, 25%

>>
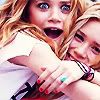
o5. third fill layer, #07155A, exclusion, 15%

>>
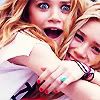
o6. last fill layer, #FACBA8, overlay, 10%

>>
o7. (new adjustment layer) gradient map, choose the one with Black to White, it should be a default gradient, but make it won't be too hard to make one yourself =) set to luminosity, 100%.

>>
o8. here come the last step. to decorate the icon, i created a new layer, used the Rectangular marquee tool and create a bar near the border. fill it with #FF0072, lighten, 100%
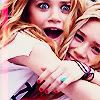
then i created another new layer, use the marquee tool again, this time i fill it with #00FF18, screen, 100%. note i overlap the 2 color a little bit.
here is the final product:

hope it's easy enough.
feel free to take the icon, simply credit me xx_js.
i'd love to see your comments and you own work =]
have fun!!!

to

using PS CS
// image heavy
i got the original image from http://planet-olsen.net/gallery :

o1. i first crop the image and rotate it

o2. i choose 'sharpen edge', then duplicate the base layer 3 times. with the middle 2 set to screen and the top 1 set to soft light, all in 100%. then i use the sharpen tool to re-sharpen the eyes and lips of MK on the base (original) layer.

>>

o3. new fill layer, #78117b, set to soft light, 50%

>>

o4. second fill layer, #74DDFF, color burn, 25%

>>

o5. third fill layer, #07155A, exclusion, 15%

>>

o6. last fill layer, #FACBA8, overlay, 10%

>>

o7. (new adjustment layer) gradient map, choose the one with Black to White, it should be a default gradient, but make it won't be too hard to make one yourself =) set to luminosity, 100%.

>>

o8. here come the last step. to decorate the icon, i created a new layer, used the Rectangular marquee tool and create a bar near the border. fill it with #FF0072, lighten, 100%

then i created another new layer, use the marquee tool again, this time i fill it with #00FF18, screen, 100%. note i overlap the 2 color a little bit.
here is the final product:

hope it's easy enough.
feel free to take the icon, simply credit me xx_js.
i'd love to see your comments and you own work =]
have fun!!!