(no subject)
MY FIRST TUTORIAL!
okay, so I made this icon and I was like WOAH I could make a tut out of this!
So here we go.
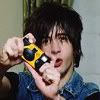
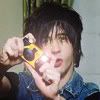
from THIS:
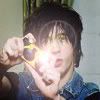
to THIS:
I'M USING PhotoShop 7 AND ImageReady7
Ok so open up photoshop, and open up this picture
So what I did was I jsut smoothed out Nick's skin a little bit, and used the dodge tool to make the white section on the flash (the bulb, i guess you could call it) a little bit whiter.
I saved that as "nickkk.psd"
Then i left it open, and went to FILTER> RENDER> LENS FLARE...
And clicked right in the middle of the white square, and set brightness to about 125-135%, or whicheve looks the best with your picture that you are using.
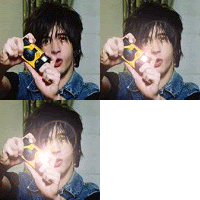
I saved it as "nickkk2.psd" and it look like this:
Once you've got that, keep it open. What I did next was just simple. go back to FILTER>RENDER>LENSE FLARE.. adn set the brightness to 150- 160%, or again, whatever looks best with your chosen photo.
Now I saved that as "nickk3.jpg" and it looks like so:
NOW here comes the IMAGE READY 7.0 part.
Exit Photoshop, and open up Image Ready.
Then go to wherever you saved your three pictures and open them up. Start with the first one, and then click the blue arrow, and then hit "copy frame"

Then click back to your first picture, and click the blue arrow again, this time clicking on "paste frame"

This window will pop up on you, but make sure the bottom button is selected and hit "ok".
Then click on the third picture, and repeat the "copy frame" step, then click back on the first picture, repeating the "paste frame" step, and you can keep going if you want with more frames, but I don't really see the need, because it just repeats itself, so now you have the finished result:

and I think it looks quite awesome, if I do say so myself.
If I didn't explain anything correctly or you have any questions, just ask and I will try and clear it up.
okay, so I made this icon and I was like WOAH I could make a tut out of this!
So here we go.
from THIS:

to THIS:

I'M USING PhotoShop 7 AND ImageReady7
Ok so open up photoshop, and open up this picture

So what I did was I jsut smoothed out Nick's skin a little bit, and used the dodge tool to make the white section on the flash (the bulb, i guess you could call it) a little bit whiter.
I saved that as "nickkk.psd"
Then i left it open, and went to FILTER> RENDER> LENS FLARE...
And clicked right in the middle of the white square, and set brightness to about 125-135%, or whicheve looks the best with your picture that you are using.
I saved it as "nickkk2.psd" and it look like this:

Once you've got that, keep it open. What I did next was just simple. go back to FILTER>RENDER>LENSE FLARE.. adn set the brightness to 150- 160%, or again, whatever looks best with your chosen photo.
Now I saved that as "nickk3.jpg" and it looks like so:

NOW here comes the IMAGE READY 7.0 part.
Exit Photoshop, and open up Image Ready.
Then go to wherever you saved your three pictures and open them up. Start with the first one, and then click the blue arrow, and then hit "copy frame"

Then click back to your first picture, and click the blue arrow again, this time clicking on "paste frame"

This window will pop up on you, but make sure the bottom button is selected and hit "ok".
Then click on the third picture, and repeat the "copy frame" step, then click back on the first picture, repeating the "paste frame" step, and you can keep going if you want with more frames, but I don't really see the need, because it just repeats itself, so now you have the finished result:

and I think it looks quite awesome, if I do say so myself.
If I didn't explain anything correctly or you have any questions, just ask and I will try and clear it up.