Icon Tutorial (03) - PSP 8
Learn how to make the icon below: (Do not use the image provided. It is someone else's personal photograph).
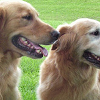
Before
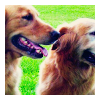
After
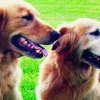
After (No Border)


*This tutorial was made for Paintshop Pro 8. I do not know how it will work in Photoshop, but you can easily translate it into past, or new versions of Paintshop Pro.
» Choose any picture (high quality) you'd like, resize and crop it. You can't use the image I already resized and cropped.
» Once it's cropped, go to Adjust > Sharpen > Sharpen.
» Now, go to Layers > Duplicate Layer.
» Layers > Properties - Change the blend mode to Screen, hit OK (Depending on the lightness of your graphic already, you might want to mess around with the opacity of that layer).
» Go to Layers > Merge > Merge Visible.
» Go to Layers > Duplicate Layer again.
» Layers > Properties - Change the blend mode to Multiply, hit OK (Depending on the lightness/darkness of your graphic already, you might want to mess around with the opacity of that layer).
» Go to Adjust > Blur > Gaussian Blur and change the number to 0.55.
» Go to Layers > Merge > Merge Visible.
» Go to Adjust > Brightness and Contrast > Automatic Contrast Enhancement.... Choose Light, Mild,&Bold.
» Go to Adjust > Hue and Saturation > Automatic Saturation Enhancement.... Choose Normal, & Strong.
» Go to Layers > New Adjustment Layer > Color Balance. Stay on the Adjustment tab, and change all the tone balances to -15, -11, and 14. That means Shadows, Midtones and Hilights should all be the same. Make sure Preserve Luminance is checked, and hit OK.
» Go to Layers > New Raster Layer. Fill it with #07132D and set the layer to Exclusion.
» Click on the merged layer in your Layer Palette, and duplicate it. Drag it up to the top and set it to Soft Light with a 70% opacity.
» Layers > Merge > Merge Visible.
» Do whatever you want, you're done. :)
Before
After
After (No Border)
*This tutorial was made for Paintshop Pro 8. I do not know how it will work in Photoshop, but you can easily translate it into past, or new versions of Paintshop Pro.
» Choose any picture (high quality) you'd like, resize and crop it. You can't use the image I already resized and cropped.
» Once it's cropped, go to Adjust > Sharpen > Sharpen.
» Now, go to Layers > Duplicate Layer.
» Layers > Properties - Change the blend mode to Screen, hit OK (Depending on the lightness of your graphic already, you might want to mess around with the opacity of that layer).
» Go to Layers > Merge > Merge Visible.
» Go to Layers > Duplicate Layer again.
» Layers > Properties - Change the blend mode to Multiply, hit OK (Depending on the lightness/darkness of your graphic already, you might want to mess around with the opacity of that layer).
» Go to Adjust > Blur > Gaussian Blur and change the number to 0.55.
» Go to Layers > Merge > Merge Visible.
» Go to Adjust > Brightness and Contrast > Automatic Contrast Enhancement.... Choose Light, Mild,&Bold.
» Go to Adjust > Hue and Saturation > Automatic Saturation Enhancement.... Choose Normal, & Strong.
» Go to Layers > New Adjustment Layer > Color Balance. Stay on the Adjustment tab, and change all the tone balances to -15, -11, and 14. That means Shadows, Midtones and Hilights should all be the same. Make sure Preserve Luminance is checked, and hit OK.
» Go to Layers > New Raster Layer. Fill it with #07132D and set the layer to Exclusion.
» Click on the merged layer in your Layer Palette, and duplicate it. Drag it up to the top and set it to Soft Light with a 70% opacity.
» Layers > Merge > Merge Visible.
» Do whatever you want, you're done. :)