(no subject)
Make-up Tutorial
Completed on Photoshop 6.
I'm sure it's somewhat translatable.
Please show me what you make,
and let me know if this was helpful.
First select your picture. I got mine from fashionesque.

I'm not sure who the model is, but she wasn't wearing much makeup, so I decided she would be perfect for this tutorial. I don't care if you practice on her, but please credit the appropriate people if you use her face for an icon.
Next adjust your picture a bit. Everyone has their own method of making pictures sharper, brighter, and colored better. I do this by going to Image > Adjustments > Levels.

This part is kind of tough, so I'll explain it the best I can. Holding down the alt key on your keyboard, drag the circled arrow to the right until you see little bits of black beginning to appear. Then click on your black eyedropper and select the darkest area of your picture which you just found.

Still holding down the alt key on your keyboard, drag the right circled arrow to the left until you see little bits of white beginning to appear. Then click on your white eyedropper and select the lightest area of your picture which you just found.

Then click on the center eyedropper and find an area of the picture which should be gray, with no color. This step is optional if you think the coloring of your picture is already ok.
Now you have:
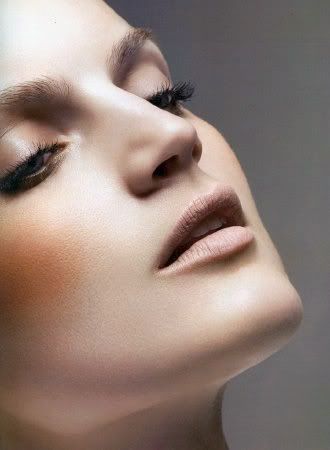
Onto the makeup. We are going to start with lipstick. Create a new layer called Lipstick1. Select a light mint-greenish color. I used #06FE84. Color over the entire lip area. Don't worry about being exact right now. You can always erase later. Set this layer to Color, Opacity: 20%. Using a layer mask or the eraser, erase the bits which cover skin or teeth until the color is only on the lips.
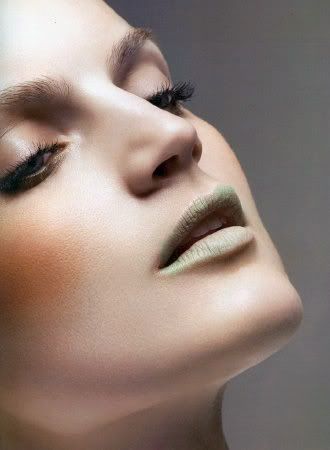
Duplicate this layer. Call it Lipstick2. Set it at Color, Opacity: 60%. Go to Image > Adjustments > Hue/Saturation. Drag the Hue bar up and down until you find a color which you like. My layer ended up being #FD022A.
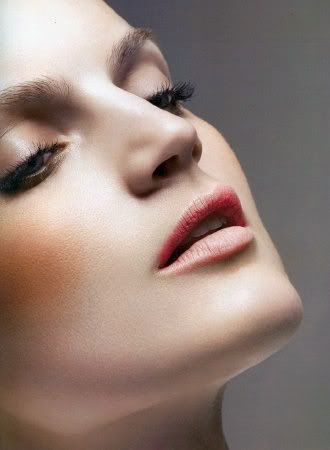
Now for eyeshadow. Create a new layer called Eyeshadow1. Set it at Color, Opacity: 40%. Using a small brush color with #FB4801 from the eyelash line to the crease of the eye.
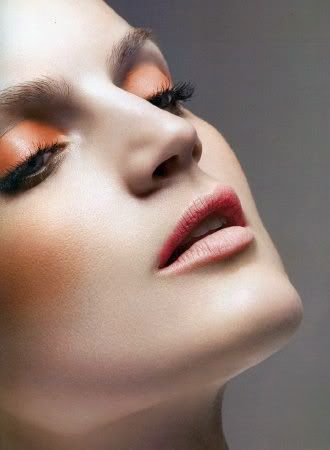
Duplicate this layer. Call it Eyeshadow2. Set it at Color, Opacity: 20%. Go to Image > Adjustments > Hue/Saturation. Drag the Hue bar up and down until you find a color which you like. My layer ended up being #01FBB1
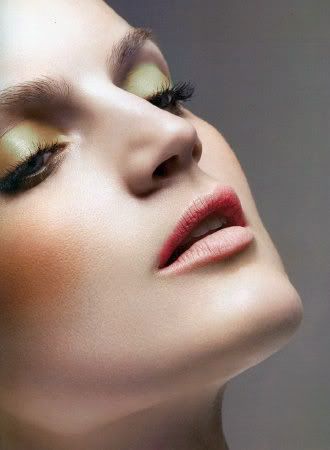
Now you have lipstick and eyeshadow, but what about some mascara? This model's eyelashes are already very well defined, but that doesn't mean she couldn't use more.
Duplicate you base layer. Place it above the base, but below all your makeup layers. Go to your burn tool. Set it at Shadows, Exposure: 17%. Color over the eyelashes once. Set this layer to Darken, Opacity: 100%.
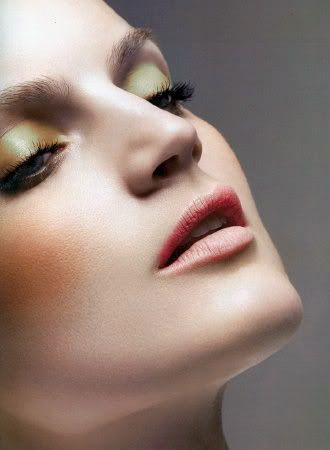
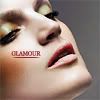
Now you are done, but I also made her into an icon. So let's continue there. Go to your Marquee tool and set the fixed aspect ratio: 1 to 1. Crop your image. Resize to 100px x 100px. Go to Filter > Sharpen > Unsharp mask. And use the settings: 100%, .4, 0. I flattened the image, duplicated the layer and set it to Soft Light at 40%. Then add text, brushes, etc. to add a little sparkle.
Completed on Photoshop 6.
I'm sure it's somewhat translatable.
Please show me what you make,
and let me know if this was helpful.
First select your picture. I got mine from fashionesque.

I'm not sure who the model is, but she wasn't wearing much makeup, so I decided she would be perfect for this tutorial. I don't care if you practice on her, but please credit the appropriate people if you use her face for an icon.
Next adjust your picture a bit. Everyone has their own method of making pictures sharper, brighter, and colored better. I do this by going to Image > Adjustments > Levels.

This part is kind of tough, so I'll explain it the best I can. Holding down the alt key on your keyboard, drag the circled arrow to the right until you see little bits of black beginning to appear. Then click on your black eyedropper and select the darkest area of your picture which you just found.

Still holding down the alt key on your keyboard, drag the right circled arrow to the left until you see little bits of white beginning to appear. Then click on your white eyedropper and select the lightest area of your picture which you just found.

Then click on the center eyedropper and find an area of the picture which should be gray, with no color. This step is optional if you think the coloring of your picture is already ok.
Now you have:

Onto the makeup. We are going to start with lipstick. Create a new layer called Lipstick1. Select a light mint-greenish color. I used #06FE84. Color over the entire lip area. Don't worry about being exact right now. You can always erase later. Set this layer to Color, Opacity: 20%. Using a layer mask or the eraser, erase the bits which cover skin or teeth until the color is only on the lips.

Duplicate this layer. Call it Lipstick2. Set it at Color, Opacity: 60%. Go to Image > Adjustments > Hue/Saturation. Drag the Hue bar up and down until you find a color which you like. My layer ended up being #FD022A.

Now for eyeshadow. Create a new layer called Eyeshadow1. Set it at Color, Opacity: 40%. Using a small brush color with #FB4801 from the eyelash line to the crease of the eye.

Duplicate this layer. Call it Eyeshadow2. Set it at Color, Opacity: 20%. Go to Image > Adjustments > Hue/Saturation. Drag the Hue bar up and down until you find a color which you like. My layer ended up being #01FBB1

Now you have lipstick and eyeshadow, but what about some mascara? This model's eyelashes are already very well defined, but that doesn't mean she couldn't use more.
Duplicate you base layer. Place it above the base, but below all your makeup layers. Go to your burn tool. Set it at Shadows, Exposure: 17%. Color over the eyelashes once. Set this layer to Darken, Opacity: 100%.

Now you are done, but I also made her into an icon. So let's continue there. Go to your Marquee tool and set the fixed aspect ratio: 1 to 1. Crop your image. Resize to 100px x 100px. Go to Filter > Sharpen > Unsharp mask. And use the settings: 100%, .4, 0. I flattened the image, duplicated the layer and set it to Soft Light at 40%. Then add text, brushes, etc. to add a little sparkle.
