Icon Guide 03: Terrible Lie
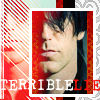
Hello! We're going to be making this Trent Reznor of Nine Inch Nails icon.

-->
-->
[x] Program: Photoshop CS [but, it can be transferred to any other program]
[x] Difficulty: slightly less than medium.
[x] Image heavy since I talk too much ;D
[x] Feedback is much appreciated
------------
Note: Please note that I branched off from this tutorial by 30yearwar. Check it out if you have the time!
Image used:
*flails at image* *ahem*
Image found at Maggie Bear
1.) Using the crop tool simply crop the image to the side. I do this because: a.) when you use images like this, it makes more sense to crop it slightly to the side b.) cropping at just the right angle can portray different types of messages and c.) it looks better. Once cropped, I go to Filter--> Sharpen --> Sharpen. Be careful when sharpening your image. If it looks slightly edgy/pixelized, then I suggest you quickly go to Edit---> Fade Sharpen to decrease the effect. Next, I resized the image to 100 by 100 by going to Image--> Image Size--> Width: 100, Height: 100, Resolution: 72. Note: Make sure Scale Styles, Constrain Proportions, and Resample Image: Bicubic is checked off; we don't want our image looking squished.
Result:
2.) Duplicate the background image and set to blend mode: screen to brighten it up. Opacity is left at 100%.
Result:
Again, depending on your image quality, you might want to change this step; play around with the opacity a bit.
3, 4, 5.) Insert these gradients. Gradient credit to 77words.
Gradient a.)
Blend mode: color burn; opacity: 42%
Gradient b.)
Blend mode: linear burn; opacity: 100%
Gradient c.)
Blend mode: screen; opacity: 100%
Result:
6, 7, 8, 9.) Insert the following colours:
Colour a: #101852; blend mode: exclusion; opacity: 80%
Colour b: #101852; blend mode: exclusion; opacity: 80%
Colour c: #8CDBEF; blend mode: hard light; opacity: 31%
Colour d: #EFE38C; blend mode: darken; opacity: 100%
Result:
10.) Duplicate your background image, drag it to the top, and set the blend mode to hard light; opacity: 100%
Result:
**Note that you can probably stop here if you want, but I decided to be different :D**
11.) Using the rectangular marquee tool, I selected and deleted all areas, but kept the white/grayish grungy strip.
--->
*Please note that the background is black so that you can see the actual strip; the image is just the strip and the remaining areas all clear.
Texture credit: gender
I moved it to the left side.
Result:
12.) Insert another texture by gender
Texture:
Blend mode: screen; opacity: 100%
Result:
13.) Insert pattern by Squid Fingers
Pattern:
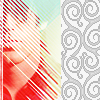
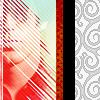
I first desaturated (changing image to black and white) it by going to Image--> Adjustments--> Desaturate, flipped it by going to Edit--Transform--> Rotate 90 degrees CCW, and finally duplicating the image by going to Layer--> Duplicate layer. I merged the two pattern layers by going to Layer--> Merge down. I moved the final pattern image to the right side.
Result:
--->
14.) Refer to step 11. Took a texture by gender, selected and deleted the areas I did not want and moved it towards the right side.
Result: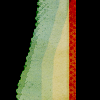
-->
-->
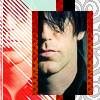
15.) Now I selected and copied a portion of Trent's face from step 10, took the red strip from the texture above, duplicated and placed them on either side of the face image.
Result: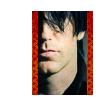
-->
16, 17, 18, 19.) I made white rectangular strips by using the rectangular tool. I duplicated this 3 more times to create a border around the small face image.
Result: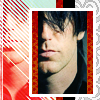
20.) Insert light texture by gender.
Light texture:
Blend mode: lighten; opacity: 100%
Result: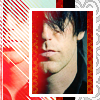
21, 22.) Final step is text.
Text: Terrible Lie
Colour: #BC0F0A and white
Font: Kingthings Trypewriter found at dafont.com
Result:
Here is my layer pallette as guide:
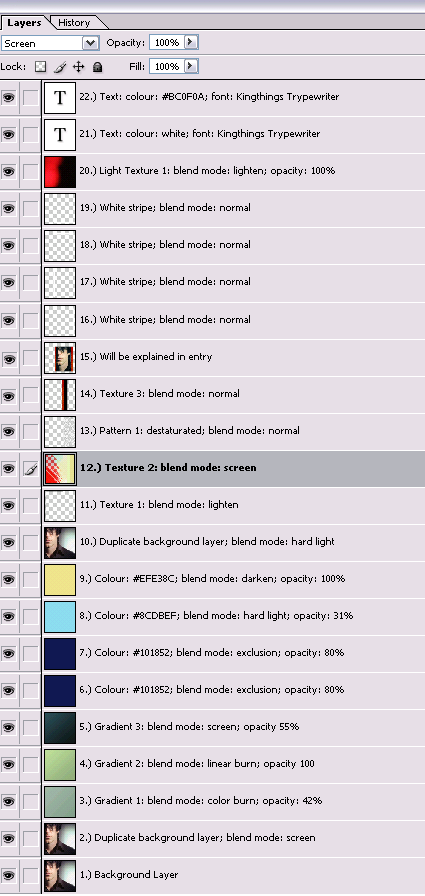
Icon is up for grab. Please do not hotlink. Feel free to ask questions for clarification purposes. Please do not copy the exact results, remix it at your own discretion. Thank you and enjoy.

-->

-->
[x] Program: Photoshop CS [but, it can be transferred to any other program]
[x] Difficulty: slightly less than medium.
[x] Image heavy since I talk too much ;D
[x] Feedback is much appreciated
------------
Note: Please note that I branched off from this tutorial by 30yearwar. Check it out if you have the time!
Image used:

*flails at image* *ahem*
Image found at Maggie Bear
1.) Using the crop tool simply crop the image to the side. I do this because: a.) when you use images like this, it makes more sense to crop it slightly to the side b.) cropping at just the right angle can portray different types of messages and c.) it looks better. Once cropped, I go to Filter--> Sharpen --> Sharpen. Be careful when sharpening your image. If it looks slightly edgy/pixelized, then I suggest you quickly go to Edit---> Fade Sharpen to decrease the effect. Next, I resized the image to 100 by 100 by going to Image--> Image Size--> Width: 100, Height: 100, Resolution: 72. Note: Make sure Scale Styles, Constrain Proportions, and Resample Image: Bicubic is checked off; we don't want our image looking squished.
Result:

2.) Duplicate the background image and set to blend mode: screen to brighten it up. Opacity is left at 100%.
Result:

Again, depending on your image quality, you might want to change this step; play around with the opacity a bit.
3, 4, 5.) Insert these gradients. Gradient credit to 77words.
Gradient a.)

Blend mode: color burn; opacity: 42%
Gradient b.)

Blend mode: linear burn; opacity: 100%
Gradient c.)

Blend mode: screen; opacity: 100%
Result:

6, 7, 8, 9.) Insert the following colours:
Colour a: #101852; blend mode: exclusion; opacity: 80%
Colour b: #101852; blend mode: exclusion; opacity: 80%
Colour c: #8CDBEF; blend mode: hard light; opacity: 31%
Colour d: #EFE38C; blend mode: darken; opacity: 100%
Result:

10.) Duplicate your background image, drag it to the top, and set the blend mode to hard light; opacity: 100%
Result:

**Note that you can probably stop here if you want, but I decided to be different :D**
11.) Using the rectangular marquee tool, I selected and deleted all areas, but kept the white/grayish grungy strip.

--->

*Please note that the background is black so that you can see the actual strip; the image is just the strip and the remaining areas all clear.
Texture credit: gender
I moved it to the left side.
Result:

12.) Insert another texture by gender
Texture:

Blend mode: screen; opacity: 100%
Result:

13.) Insert pattern by Squid Fingers
Pattern:

I first desaturated (changing image to black and white) it by going to Image--> Adjustments--> Desaturate, flipped it by going to Edit--Transform--> Rotate 90 degrees CCW, and finally duplicating the image by going to Layer--> Duplicate layer. I merged the two pattern layers by going to Layer--> Merge down. I moved the final pattern image to the right side.
Result:

--->

14.) Refer to step 11. Took a texture by gender, selected and deleted the areas I did not want and moved it towards the right side.
Result:

-->

-->

15.) Now I selected and copied a portion of Trent's face from step 10, took the red strip from the texture above, duplicated and placed them on either side of the face image.
Result:

-->

16, 17, 18, 19.) I made white rectangular strips by using the rectangular tool. I duplicated this 3 more times to create a border around the small face image.
Result:

20.) Insert light texture by gender.
Light texture:

Blend mode: lighten; opacity: 100%
Result:

21, 22.) Final step is text.
Text: Terrible Lie
Colour: #BC0F0A and white
Font: Kingthings Trypewriter found at dafont.com
Result:

Here is my layer pallette as guide:

Icon is up for grab. Please do not hotlink. Feel free to ask questions for clarification purposes. Please do not copy the exact results, remix it at your own discretion. Thank you and enjoy.