Coloring tutorial
My first tutorial.. Very simple :)
go from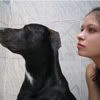
to
Made in PS 6.0
1. Duplicate your base and set it to screen. The opacity depends on how dark your base is, but you can come back to this layer later and fix it :) (I usually sharpen this layer once too).

2. New layer, fill it with #0E094F. Set it to Exclusion 78%

>>
2. New layer, fill it with #FFE2F0. Set it to Multiply 76%

>>
3. New layer, fill it with #D1D1D1. Set it to Color Burn 100%

>>
4. Go to go to Layer>>New Adjustment Layer>>Curves and use this curves.

5. You can copy this layer and use it on screen if you want to : )
6. Here you can go back to the second layer (base on screen) and adjust the opacity as you like..
7. If you want to do the same text effect I did, just create a new layer on top of the SECOND layer, the one on screen, go to Layer>>Layer Style>>Drop Shadow and use this settings:

8. Then you draw some lines using your brush tool (color: white) like this:


9. friends: Paulinho Pedra Azul, 8pt, black
4evr: Cataclysmic, 8pt, black
both with a distance of 200 between letters)

And that's it :)
I did the same effect in other pictures and it got like this:


go from

to

Made in PS 6.0
1. Duplicate your base and set it to screen. The opacity depends on how dark your base is, but you can come back to this layer later and fix it :) (I usually sharpen this layer once too).

2. New layer, fill it with #0E094F. Set it to Exclusion 78%

>>

2. New layer, fill it with #FFE2F0. Set it to Multiply 76%

>>

3. New layer, fill it with #D1D1D1. Set it to Color Burn 100%

>>

4. Go to go to Layer>>New Adjustment Layer>>Curves and use this curves.

5. You can copy this layer and use it on screen if you want to : )

6. Here you can go back to the second layer (base on screen) and adjust the opacity as you like..
7. If you want to do the same text effect I did, just create a new layer on top of the SECOND layer, the one on screen, go to Layer>>Layer Style>>Drop Shadow and use this settings:

8. Then you draw some lines using your brush tool (color: white) like this:


9. friends: Paulinho Pedra Azul, 8pt, black
4evr: Cataclysmic, 8pt, black
both with a distance of 200 between letters)

And that's it :)
I did the same effect in other pictures and it got like this:


