(no subject)
From 
TO
MADE IN PSCS2. I do not use psp. I can not help you with that program at all. I'm sorry.
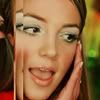
All icons are created different. Please do not copy this tutorial exactly as it's stated. Mess with thet layer opacity and what not to get the effect YOU like best. This is just a guide. :)
1. Crop your image til you get a base you like.
2. Duplicate your base twice. Set your middle layer to screen (opacity 35%) and your top layer to overlay. Sharpen once.
3. Create a new layer and fill it with #e1d7b7. Set this layer to multiply (opacity 100%).
4. Create a new layer and fill it with #b7edfd. Set this layer to color burn (opacity 100%.
5. Duplicate your base, drag it to the top and set to overlay (your might try softlight, it depends on what you like).
6. The overlay (or softlight) layer we made in step 5 we're going to desaturate it.
7. Now that it's desaturated we're going to adjust the hue/saturation. The settings I like are HUE: 0; SATURATION: +32; LIGHTNESS: +2. Sharpen once. And you're done. :)

Feel free to comment with what you created.

TO

MADE IN PSCS2. I do not use psp. I can not help you with that program at all. I'm sorry.
All icons are created different. Please do not copy this tutorial exactly as it's stated. Mess with thet layer opacity and what not to get the effect YOU like best. This is just a guide. :)
1. Crop your image til you get a base you like.
2. Duplicate your base twice. Set your middle layer to screen (opacity 35%) and your top layer to overlay. Sharpen once.

3. Create a new layer and fill it with #e1d7b7. Set this layer to multiply (opacity 100%).

4. Create a new layer and fill it with #b7edfd. Set this layer to color burn (opacity 100%.

5. Duplicate your base, drag it to the top and set to overlay (your might try softlight, it depends on what you like).

6. The overlay (or softlight) layer we made in step 5 we're going to desaturate it.

7. Now that it's desaturated we're going to adjust the hue/saturation. The settings I like are HUE: 0; SATURATION: +32; LIGHTNESS: +2. Sharpen once. And you're done. :)

Feel free to comment with what you created.