GIMP Tutorial
My first tutorial. I hope it helps someone.
I use The GIMP 2.2. Intermediate knowledge of the program should help. It's not the easiest tutorial, but not the hardest either.
We'll be going from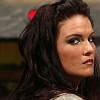
to this: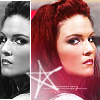
1. Crop and sharpen your base. I didn’t need to sharpen much since I had a good quality image. This leaves me this:

2. Go to Layer > Colors > Levels and hit the Auto button. This should leave you this:
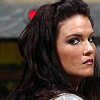
3. Duplicate your base three two times. Set the top layer to screen at 50, and the middle layer to Soft Light at 50. Duplicate the base again and set it to Multiply at 15. This should leave you this:

4. Flatten your image and blur out her skin a little bit. Duplicate the base again. Go to Layer > Colors > Brightness-Contrast. Set brightness to 20 and contrast to 30. This gives the image a crisper look, like so:

5. Bucket fill layer; fill with e899c7 and set to Soft Light at 35. That will give me this:

6. Lita’s hair is looking kinda browner than usual, and since we all like her pretty red hair, we’re gonna boost the red a bit. On a new layer, use b10800 using a middle-sized circle brush, go over only Lita’s hair. Set it to Color at 50. Erase any parts that you may have accidentally gone over that wasn’t her hair. That should leave you this:

7. Use this gradient:

And set it to Soft Light on 40. This helps brighten up Lita’s hair and skin a bit, and adds a nice color effect. It should look like this:

8. Next step gets kinda tricky. Use the Rectangular Selector and, from Layer 2, crop out a 30 x 100 part from her face. Copy it and go to Select > None. On a new layer, paste the crop and flip it horizontally. Drag it to the opposite side of the icon (opposite Lita’s face). Anchor the layer. Desaturate it. Now it should look like this:
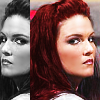
9. Set the color to white (or gray - whichever you prefer). Using the pixel brush, draw a border around the B & W crop. Like this:
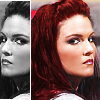
10. Next, take this light texture by
ewanism:

Slap that on there and set it to Screen. Erase all the parts of the texture from the B & W crop (and the colored part’s face too, if you want - I didn’t though). It should look like this:
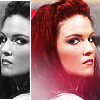
11. Take this brush by
teh_indy:

And set it to white. Slap it on right between the B & W image and the colored one. It should add a punk feel to the icon, like so:
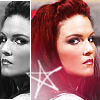
12. Add some very light pink tiny text right between the brush. Like this:

And voila! You’re done.
Don’t try to follow this tutorial exactly, though you may if you want - I’d love to see something original come out of this. Show me what you made, guys, I’d be very pleased to see! ^.^
I use The GIMP 2.2. Intermediate knowledge of the program should help. It's not the easiest tutorial, but not the hardest either.
We'll be going from

to this:

1. Crop and sharpen your base. I didn’t need to sharpen much since I had a good quality image. This leaves me this:

2. Go to Layer > Colors > Levels and hit the Auto button. This should leave you this:

3. Duplicate your base three two times. Set the top layer to screen at 50, and the middle layer to Soft Light at 50. Duplicate the base again and set it to Multiply at 15. This should leave you this:

4. Flatten your image and blur out her skin a little bit. Duplicate the base again. Go to Layer > Colors > Brightness-Contrast. Set brightness to 20 and contrast to 30. This gives the image a crisper look, like so:

5. Bucket fill layer; fill with e899c7 and set to Soft Light at 35. That will give me this:

6. Lita’s hair is looking kinda browner than usual, and since we all like her pretty red hair, we’re gonna boost the red a bit. On a new layer, use b10800 using a middle-sized circle brush, go over only Lita’s hair. Set it to Color at 50. Erase any parts that you may have accidentally gone over that wasn’t her hair. That should leave you this:

7. Use this gradient:

And set it to Soft Light on 40. This helps brighten up Lita’s hair and skin a bit, and adds a nice color effect. It should look like this:

8. Next step gets kinda tricky. Use the Rectangular Selector and, from Layer 2, crop out a 30 x 100 part from her face. Copy it and go to Select > None. On a new layer, paste the crop and flip it horizontally. Drag it to the opposite side of the icon (opposite Lita’s face). Anchor the layer. Desaturate it. Now it should look like this:

9. Set the color to white (or gray - whichever you prefer). Using the pixel brush, draw a border around the B & W crop. Like this:

10. Next, take this light texture by

ewanism:

Slap that on there and set it to Screen. Erase all the parts of the texture from the B & W crop (and the colored part’s face too, if you want - I didn’t though). It should look like this:

11. Take this brush by

teh_indy:

And set it to white. Slap it on right between the B & W image and the colored one. It should add a punk feel to the icon, like so:

12. Add some very light pink tiny text right between the brush. Like this:

And voila! You’re done.
Don’t try to follow this tutorial exactly, though you may if you want - I’d love to see something original come out of this. Show me what you made, guys, I’d be very pleased to see! ^.^