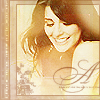
Golden Shiri Tutorial
My first tutorial here - hope I don't mess it up.
Going From this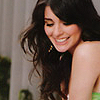
to this
Can be made with either PS7 or PSP8
I took my base above of the lovely Shiri Appleby and duplicated it twice, setting the first to Screen 100%, and the second to Soft Light 100%, Merge Flatten and Sharpen. Duplicate the new base and Desaturate it, then set to Multiply 45% and Flattened again.

Now adding a series of textures, etc. ** Disclaimer for images, textures, brushes, etc. - I’ve collected a lot of these over the past year or so, and have no idea what belongs to who, or is that whom? Anyway, if you see something that you created, or know who created it, let me know and I’ll give proper credit.
Add this image
set to Screen 100%
Add this image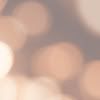
set to Hard Light 100%
Add this image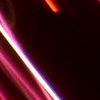
and set to Screen 100%, slide downward. Use a spongy style of eraser, set on a lower opacity (I used 40%) and erase part over her face.
Add this image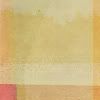
set to Multiply 60%
Add this image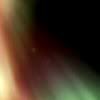
set to Screen 100%, erase part over her face.
Add this image
set to Soft Light 100%
Merge Flatten and Duplicate and set to Screen 50%,
Duplicate base again and move to the top setting at Soft Light 30%
Merge and Sharpen.

Now you can add brushes, text, etc. to your liking.
I can never get the brushes and text the way I like with PS7, so I save my icon and open it in PSP8. It’s just easier for me.
I added this brush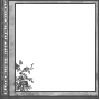
to a new layer, choosing a dark color from her hair, and set the layer to Normal, and lowered the opacity to 70%.
Then I added another layer and this brush
(reducing brush size to size that fits best), using the same color and opacity as the other brush.
And the finished product.
Going From this

to this

Can be made with either PS7 or PSP8
I took my base above of the lovely Shiri Appleby and duplicated it twice, setting the first to Screen 100%, and the second to Soft Light 100%, Merge Flatten and Sharpen. Duplicate the new base and Desaturate it, then set to Multiply 45% and Flattened again.

Now adding a series of textures, etc. ** Disclaimer for images, textures, brushes, etc. - I’ve collected a lot of these over the past year or so, and have no idea what belongs to who, or is that whom? Anyway, if you see something that you created, or know who created it, let me know and I’ll give proper credit.
Add this image

set to Screen 100%
Add this image

set to Hard Light 100%
Add this image

and set to Screen 100%, slide downward. Use a spongy style of eraser, set on a lower opacity (I used 40%) and erase part over her face.
Add this image

set to Multiply 60%
Add this image

set to Screen 100%, erase part over her face.
Add this image

set to Soft Light 100%
Merge Flatten and Duplicate and set to Screen 50%,
Duplicate base again and move to the top setting at Soft Light 30%
Merge and Sharpen.

Now you can add brushes, text, etc. to your liking.
I can never get the brushes and text the way I like with PS7, so I save my icon and open it in PSP8. It’s just easier for me.
I added this brush

to a new layer, choosing a dark color from her hair, and set the layer to Normal, and lowered the opacity to 70%.
Then I added another layer and this brush

(reducing brush size to size that fits best), using the same color and opacity as the other brush.
And the finished product.
