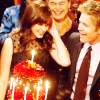
Bright Coloring!

Jul 18, 2006 21:13


to


Another very simple tutorial. The exact directions don't work well on all images, but if you play around with the settings, I'm sure it will look fine. ;)

  • Crop and resize image to get your base.


  • Layer >> New Adjustment Layer >> Brightness/Contrast

    BRIGHTNESS +22
    CONTRAST + 16

  • Create a new layer. Fill it with #FFE4ED on Color Burn, opacity at 50%.

  • Create a new layer. Fill it with #F6EDDE on Color Burn, opacity at 50%.

  • Duplicate your base and drag it to the top. Set it to Screen at 100%.

  • Go to Layer >> New Adjustment Layer >> Hue/Saturation. Increase the Saturation to +17 and leave everything else as is.

  • Create a new layer. Fill it with #EEEEEE on Color Burn, opacity 100%.

  • For an extra touch, copy and paste this texture and set this layer to Screen at 70%.


  • Flatten your image. TADA! You are done. :)


    Other icons made using this tutorial:
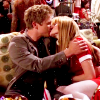


    Please credit to galassia or aardent if you use this tutorial. And I'd love to see your results, so do post them here! ;)
  • Previous post Next post
    Up