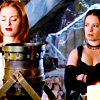
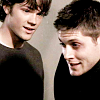
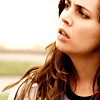
Brightening Screencaps.
My first tutorial. (please go easy)
From
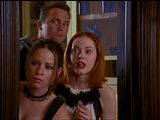
to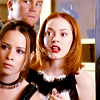
Made with PSP9
Should be fairly easy to translate.
Start off with a cap.
I'll be using THIS one.
It's easier to keep your cap at fullsize and then resize at the end.
1. Go to Adjust --> Brightness and Contrast --> Levels
Once in Levels change your settings to:
Input: 0,1.35,255
Output: 0,255
2. Go to Layers --> New Adjustment Layer --> Hue/Saturation/Lightness.
(You'll only be using the Saturation Box)
Master: 0
Reds: 10
Yellows: 40
Greens: 10
Cyans: 40
Blues: 40
Magentas: 40
(Be sure to play with these settings. Every cap is different. Your cap may not have Blues but may have Green. I usually don't mess with the Red's since it makes their face and body extremely red) Once you've done that, click ok.
3. Set the layer to Screen.
4. Merge Layers. Duplicate the now merged layer and set it to Softlight. Sometimes it helps/looks better if you desaturate it. (PSP - Shift + H, set saturation to
-100. I don't know about Photoshop) For this paticular image, I desaturated mine.
5. Merge layers together then Go to --> Adjust --> Brightness and Contrast --> Brightness/Contrast and play with the settings.
Mine are:
Brightness --> + 5
Contrast --> + 14
8. Crop and resize to 100x100 (or whatever size you want)
9. Go to Adjust --> Sharpeness --> Unsharp Mask.
Again you can play with this.
Mine are:
Radius - 1.00
Strength - 50
Clipping - 0
And that's it.
If you don't understand something, just comment.
I'd like to know if this has helped at all.
Other Icons made with this ...


From

to

Made with PSP9
Should be fairly easy to translate.
Start off with a cap.
I'll be using THIS one.
It's easier to keep your cap at fullsize and then resize at the end.
1. Go to Adjust --> Brightness and Contrast --> Levels
Once in Levels change your settings to:
Input: 0,1.35,255
Output: 0,255
2. Go to Layers --> New Adjustment Layer --> Hue/Saturation/Lightness.
(You'll only be using the Saturation Box)
Master: 0
Reds: 10
Yellows: 40
Greens: 10
Cyans: 40
Blues: 40
Magentas: 40
(Be sure to play with these settings. Every cap is different. Your cap may not have Blues but may have Green. I usually don't mess with the Red's since it makes their face and body extremely red) Once you've done that, click ok.
3. Set the layer to Screen.
4. Merge Layers. Duplicate the now merged layer and set it to Softlight. Sometimes it helps/looks better if you desaturate it. (PSP - Shift + H, set saturation to
-100. I don't know about Photoshop) For this paticular image, I desaturated mine.
5. Merge layers together then Go to --> Adjust --> Brightness and Contrast --> Brightness/Contrast and play with the settings.
Mine are:
Brightness --> + 5
Contrast --> + 14
8. Crop and resize to 100x100 (or whatever size you want)
9. Go to Adjust --> Sharpeness --> Unsharp Mask.
Again you can play with this.
Mine are:
Radius - 1.00
Strength - 50
Clipping - 0
And that's it.
If you don't understand something, just comment.
I'd like to know if this has helped at all.
Other Icons made with this ...


