Tutorial 004: Matt Treanor
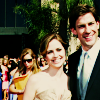
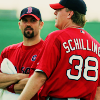
Go from 
to
Made on PSP 7, but is totally translatable since it uses only layers. :D
[1] Find your picture, cap, whatever, crop it, and sharpen if needed.

[2] Duplicate your base and set to Screen at somewhere between 40% - 50% (if you are using a darker picture or cap make two screen layers one set to 100% and the other at 40% - 50%).

[3] Duplicate your base again and bring to the top. Set this layer to Soft Light at 100%.

[4] Create a new raster layer and fill with a tan colour (I used #CCB48E). Set to Multiply at 50%.

[5] Create another raster layer and fill with a light teal colour (I used #9BD2D3). Set to Soft Light at 66%.

[6] Duplicate your base and bring it to the top. Desaturate the layer and set to Soft Light at 100%.

[7] Create a New Adjustment Layer and select the Hue/Saturation/Light option. Set the Saturation at something between 13 to 20 (for the icon I'm using I went with 14) and leave the rest at 0. Set the layer to Saturation at 100%.

Merge all the layer and there you have it! Just remember that all icons are different so you should play around with each layer's opacity until you find something that you like.
And now for other examples of icons made using this tutorial:


to

Made on PSP 7, but is totally translatable since it uses only layers. :D
[1] Find your picture, cap, whatever, crop it, and sharpen if needed.

[2] Duplicate your base and set to Screen at somewhere between 40% - 50% (if you are using a darker picture or cap make two screen layers one set to 100% and the other at 40% - 50%).

[3] Duplicate your base again and bring to the top. Set this layer to Soft Light at 100%.

[4] Create a new raster layer and fill with a tan colour (I used #CCB48E). Set to Multiply at 50%.

[5] Create another raster layer and fill with a light teal colour (I used #9BD2D3). Set to Soft Light at 66%.

[6] Duplicate your base and bring it to the top. Desaturate the layer and set to Soft Light at 100%.

[7] Create a New Adjustment Layer and select the Hue/Saturation/Light option. Set the Saturation at something between 13 to 20 (for the icon I'm using I went with 14) and leave the rest at 0. Set the layer to Saturation at 100%.

Merge all the layer and there you have it! Just remember that all icons are different so you should play around with each layer's opacity until you find something that you like.
And now for other examples of icons made using this tutorial:


